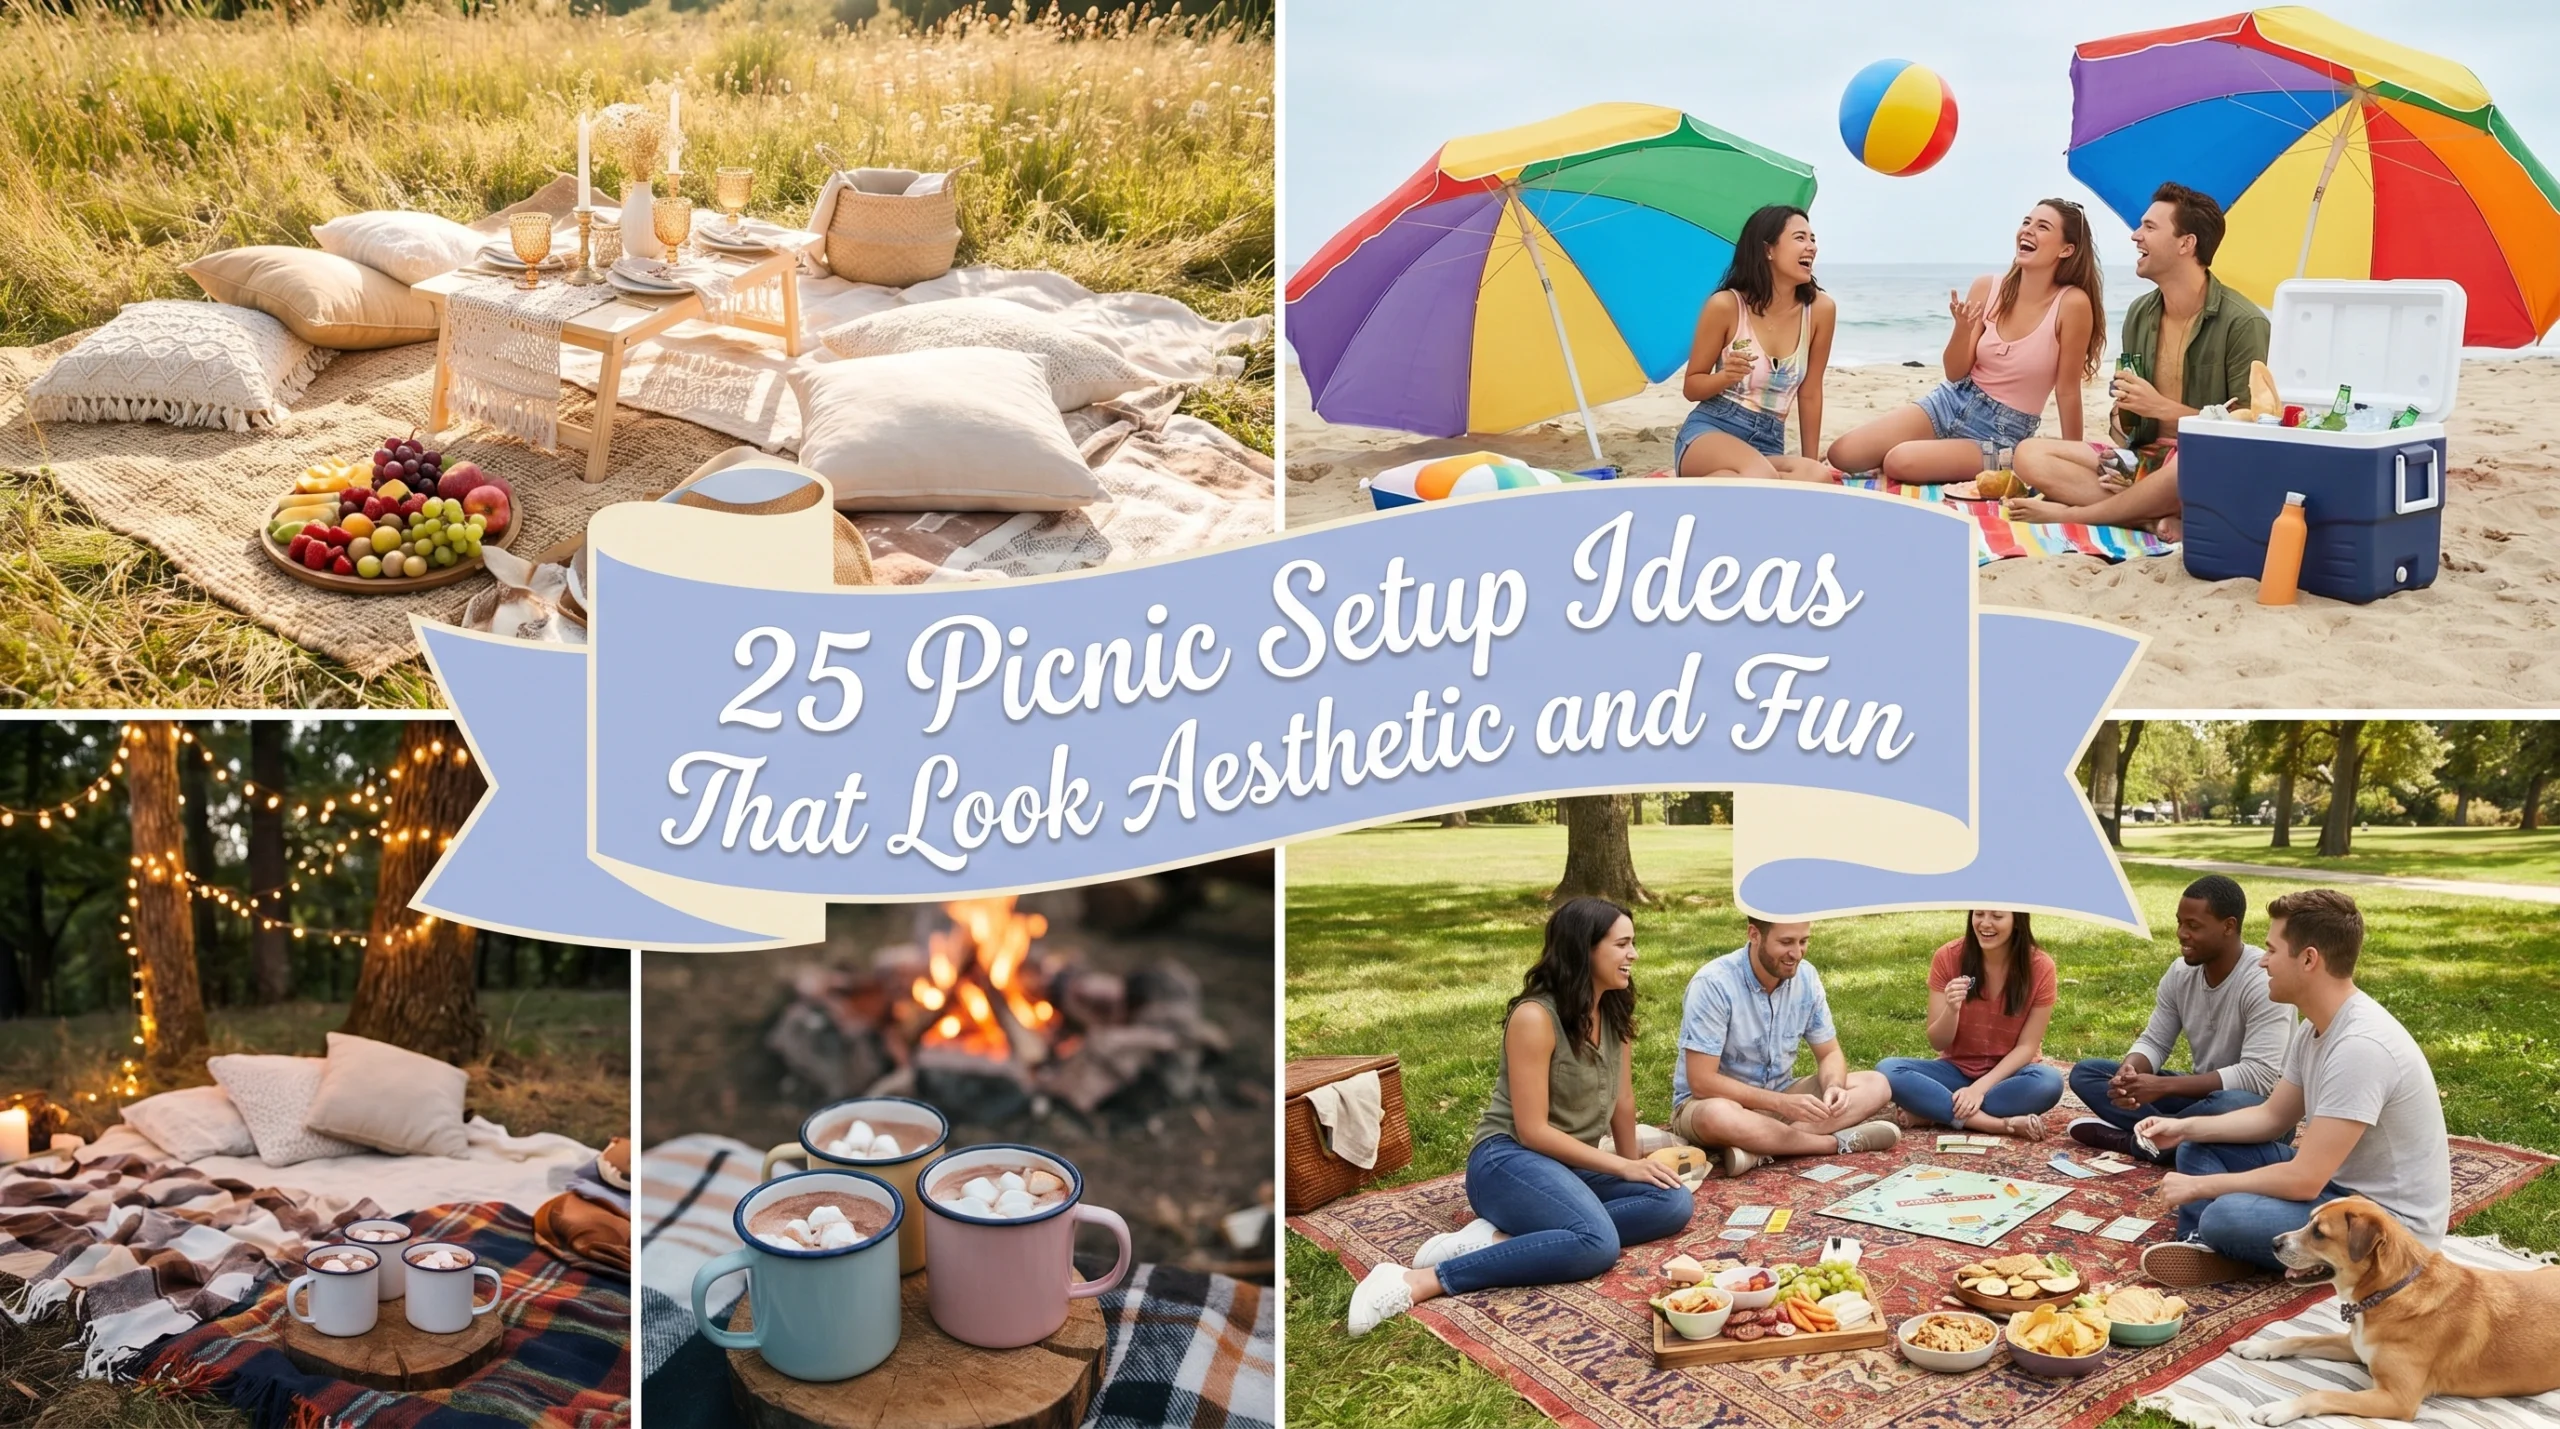
Have you ever scrolled through Pinterest, seen those stunning outdoor dining spreads, and then looked at your own folded-up plastic chairs and soggy sandwiches with a bit of a sigh? I’ve been there. For a long time, I thought a picnic was just about the food—until I realized that the “vibe” of the space is what actually makes the afternoon memorable. When your surroundings feel thoughtful, you linger longer, talk more, and truly relax.
You don’t need a massive budget or a professional event planner to pull off 25 picnic setup ideas that look aesthetic and fun. In fact, most of what makes a picnic “Instagrammable” is likely already sitting in your linen closet or kitchen cabinets. It’s about shifting the focus from “eating outside” to “creating a tiny outdoor room”. Whether you are planning a romantic date, a birthday bash, or just a Tuesday afternoon escape, these ideas prioritize warmth, comfort, and personality over cold perfection.
In this guide, I’m sharing my favorite ways to transform a patch of grass into a retreat. We’ll cover everything from layering textiles to lighting tricks that make the golden hour feel magical. By the end of this post, you’ll have 25 actionable, stylish ideas that prove you don’t need a showroom to have a Pinterest-worthy home styling experience outdoors.
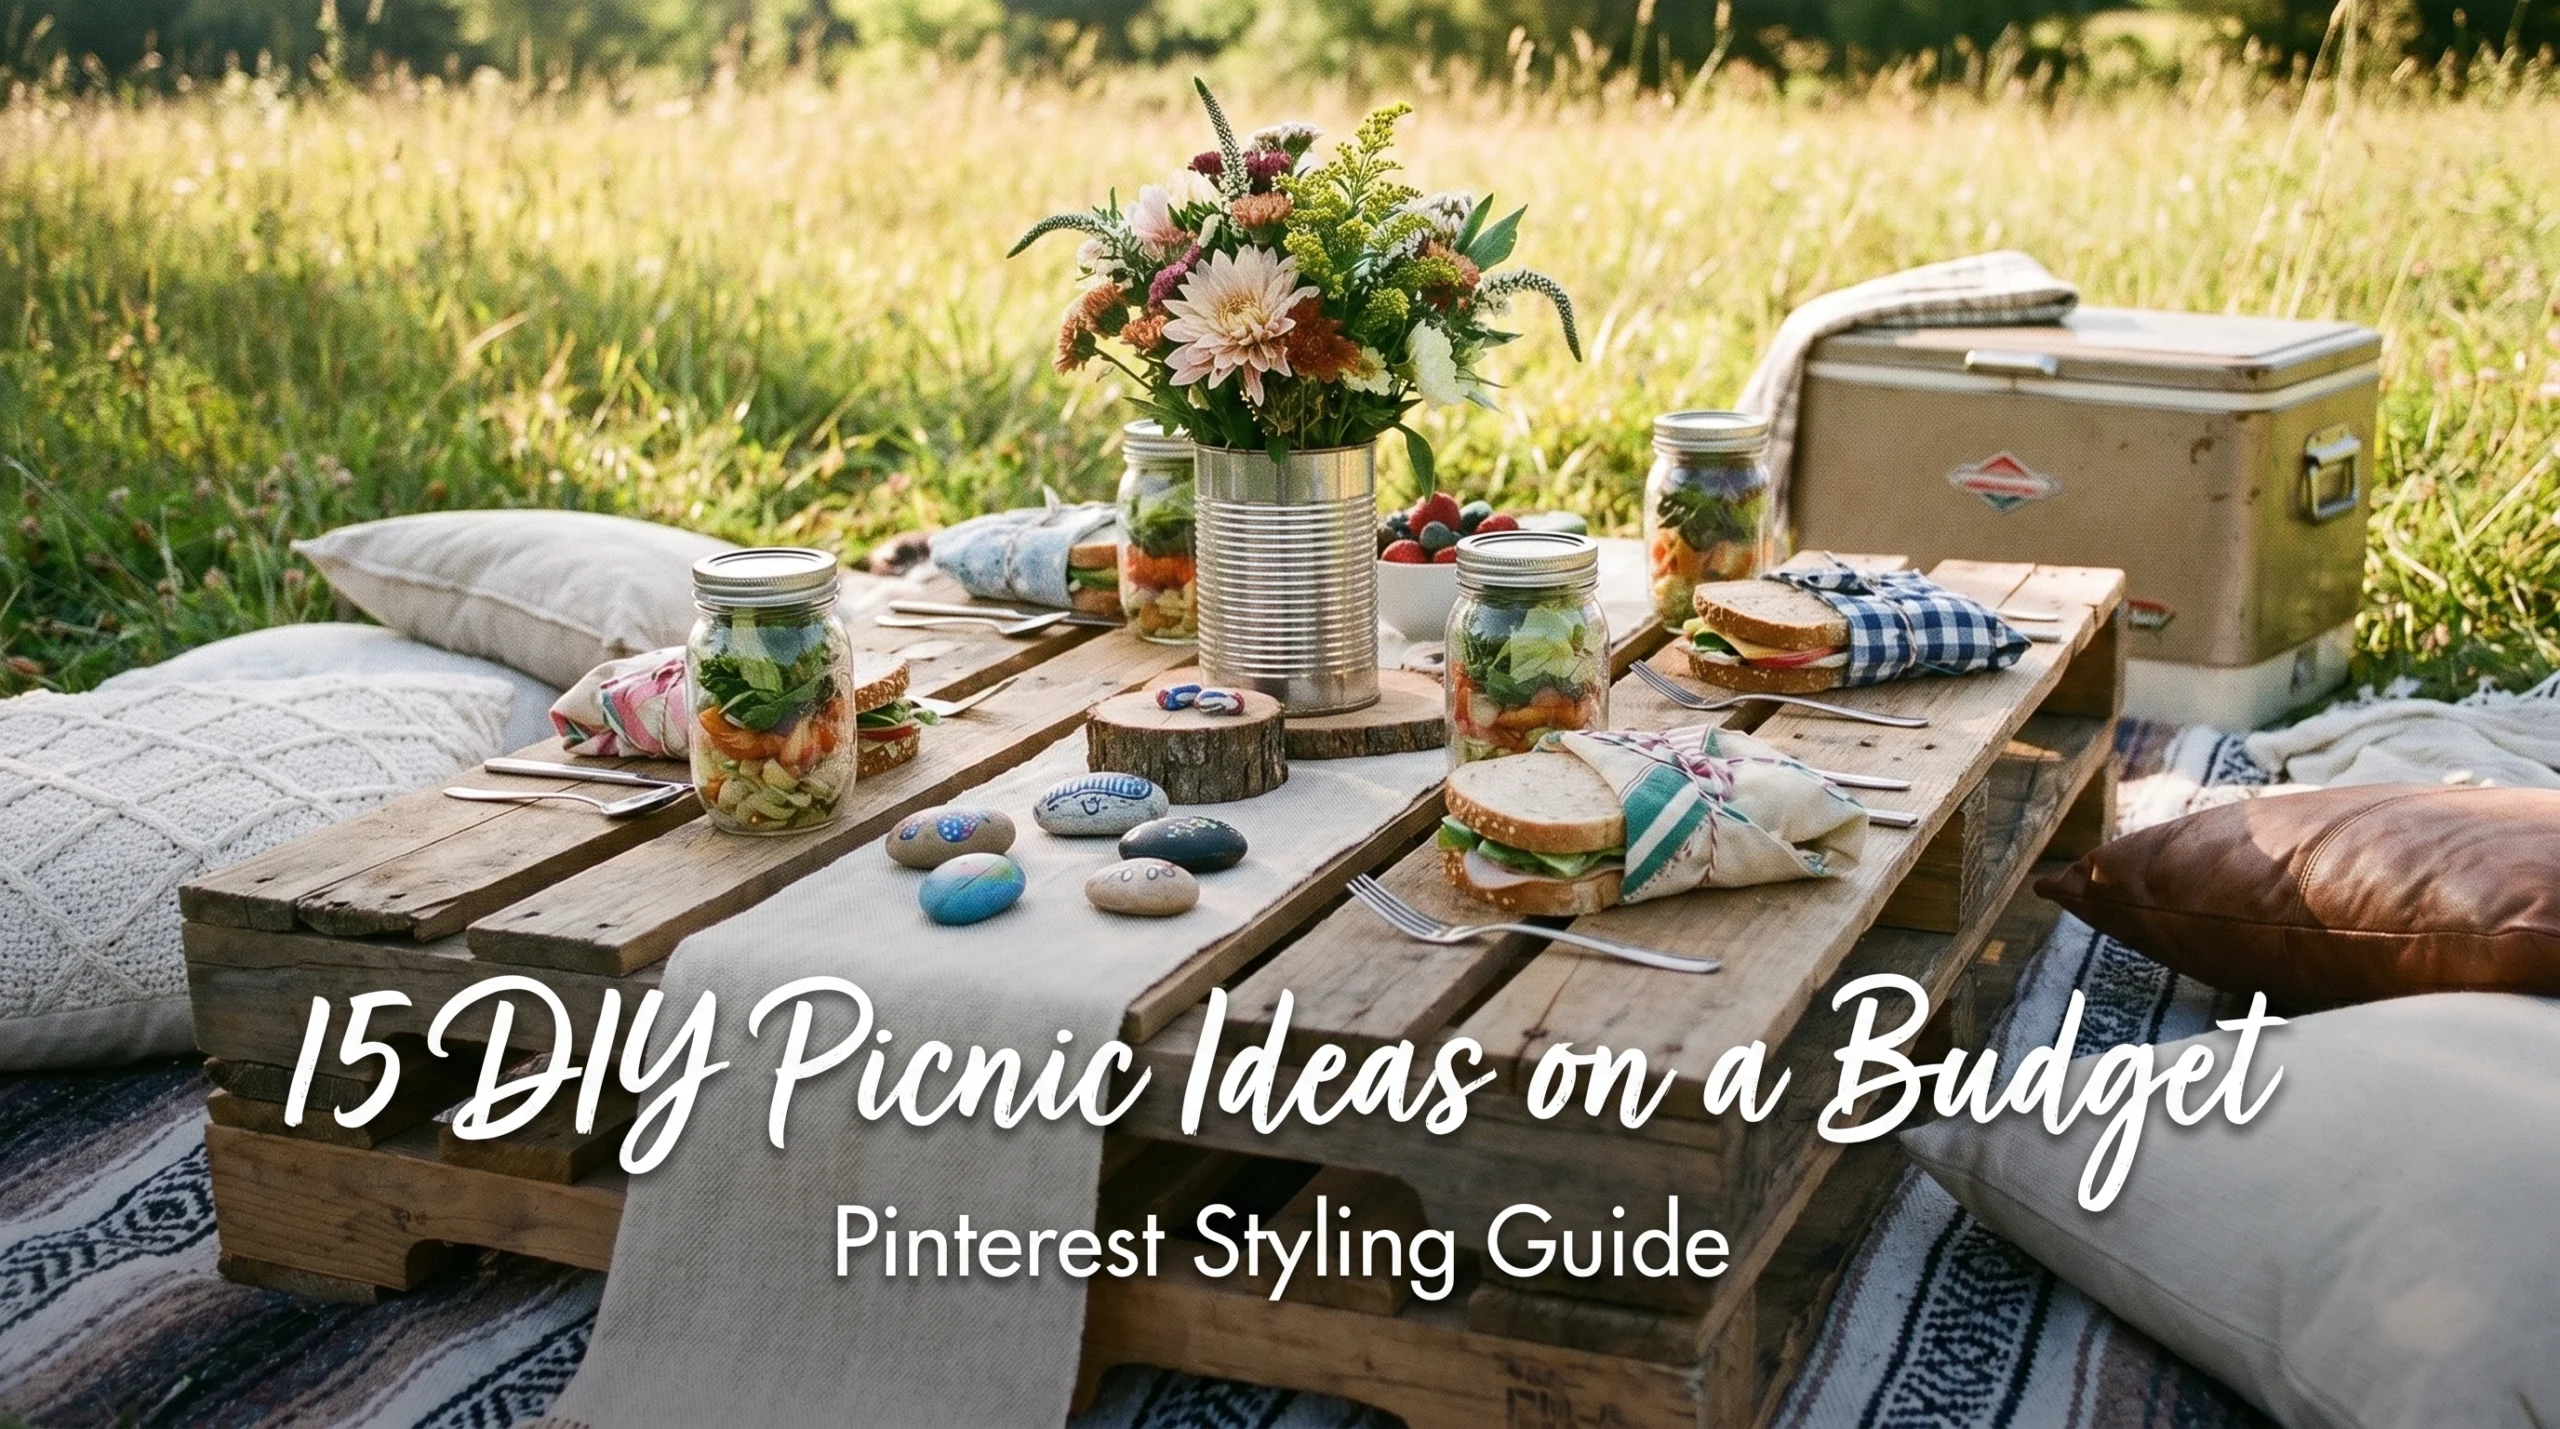
1. The Low-Profile Wooden Pallet Table
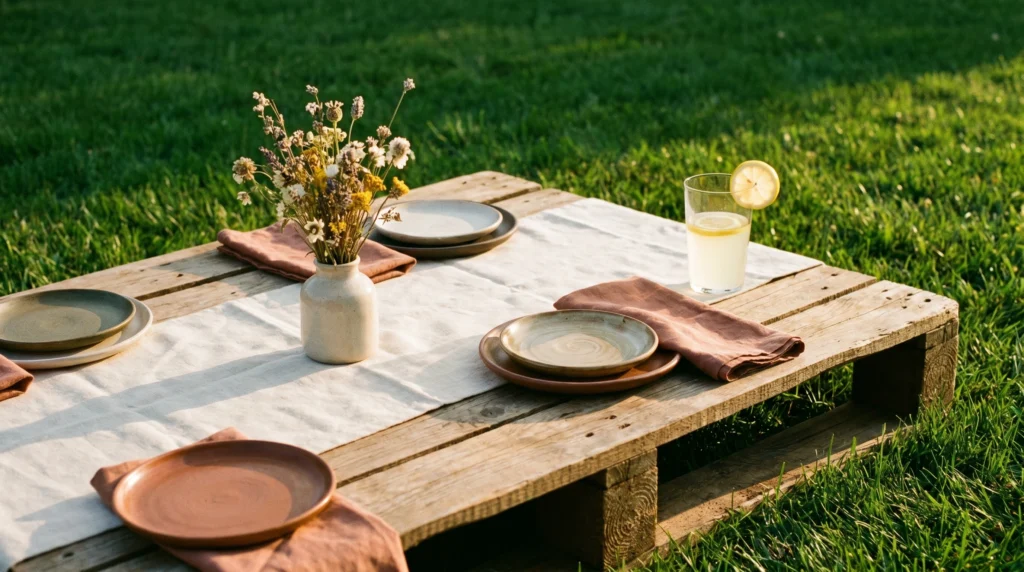
There is something about sitting on the ground that instantly makes a meal feel more casual and intimate. A low-profile table gives your picnic a “real furniture” feel while keeping that relaxed, bohemian energy. It provides a solid surface for wine glasses and heavy plates, which—let’s be honest—is the biggest struggle with blanket-only picnics.
You can often find wooden pallets for free behind local shops (just make sure they are heat-treated, marked with an “HT” stamp). Sand it down quickly to avoid splinters and throw a linen runner over the top. If you want a more polished look without the DIY, low folding bamboo tables are a great investment ($30–$60). In my experience, the biggest mistake here is forgetting a level surface; always test your table’s wobbliness before pouring the drinks!
2. Oversized Floor Cushions for True Comfort
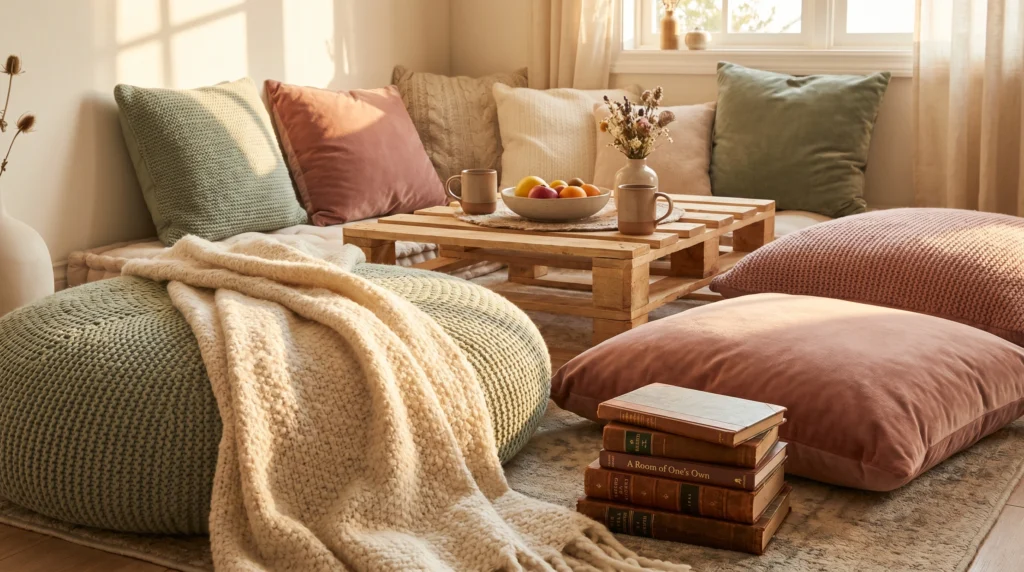
If you want your guests to stay for more than twenty minutes, you have to prioritize their backs and bottoms. Thin blankets just don’t cut it on uneven ground. Massive, plush floor cushions transform the grass into a cozy lounge area that feels like a living room transported outside.
Mix and match sizes and textures—think velvet, heavy cotton, or even outdoor-rated floor poufs. A lot of people skip this step, but it makes all the difference: place a moisture-proof tarp under your main blanket first to keep the cushions from getting damp. You can find decent floor pillows at discount home stores for $15–$25 each.
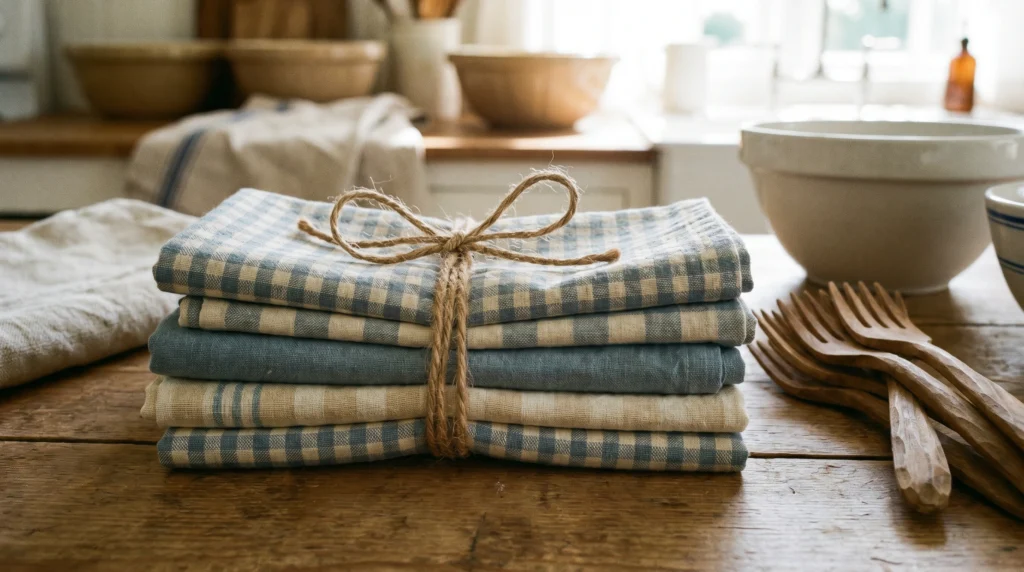
3. Layered Textiles for a Rugged-Chic Look
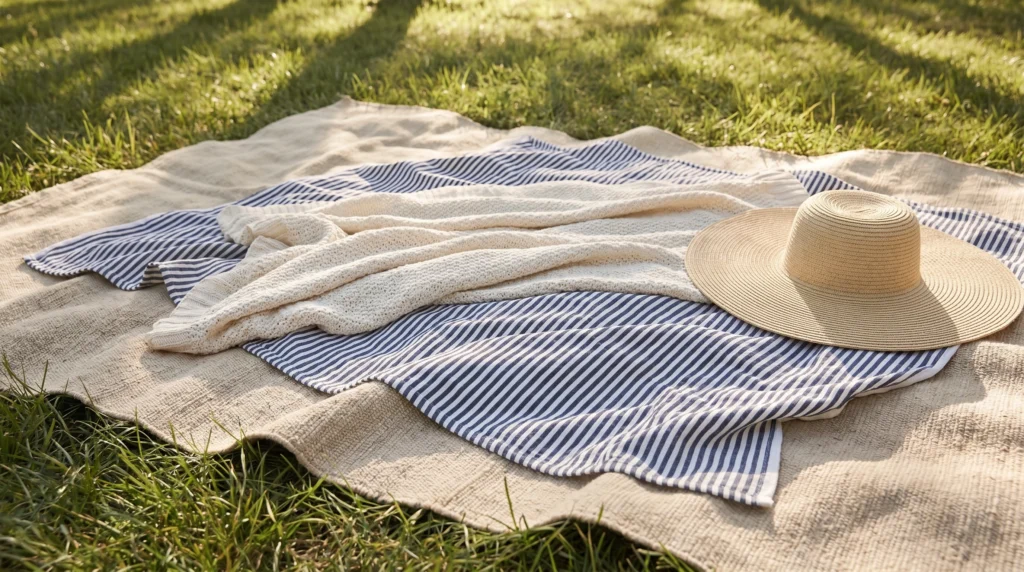
One blanket looks like a snack break; three blankets look like a destination. Layering different fabrics creates visual depth and masks any bumps in the grass. It’s a classic interior design trick that translates perfectly to the outdoors.
Start with a large, neutral canvas drop cloth or a heavy outdoor rug as your base. On top, layer a softer cotton throw and perhaps a vintage sheepskin or a patterned Turkish towel for accent. Stick to a cohesive color palette—like blues and creams—to keep it from looking messy. I always recommend this to anyone who asks me: go for varied weights of fabric to create that “rich” visual texture. Total cost can be $0 if you raid your linen closet!
4. The Vintage Picnic Basket Centerpiece
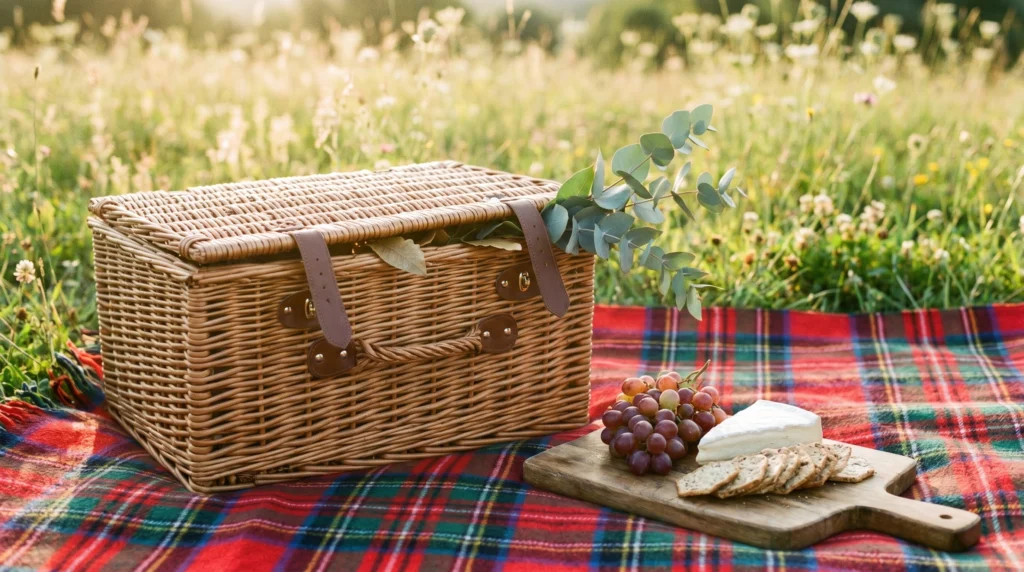
A picnic basket isn’t just a transport vessel; it’s the anchor of your aesthetic. A classic wicker or seagrass basket brings a sense of nostalgia and “preparedness” that modern cooler bags just can’t match.
Position the basket at one end of your setup to act as a vertical element. Keep the lid open to reveal a peek of a checkered cloth or some fresh baguette. If you don’t have a vintage one, a simple woven market bag or a crate works just as well. What I personally love about this is how it hides all the ugly plastic packaging from your groceries. Budget: $20–$50 at thrift stores or home goods aisles.
5. Mismatched Vintage Glassware
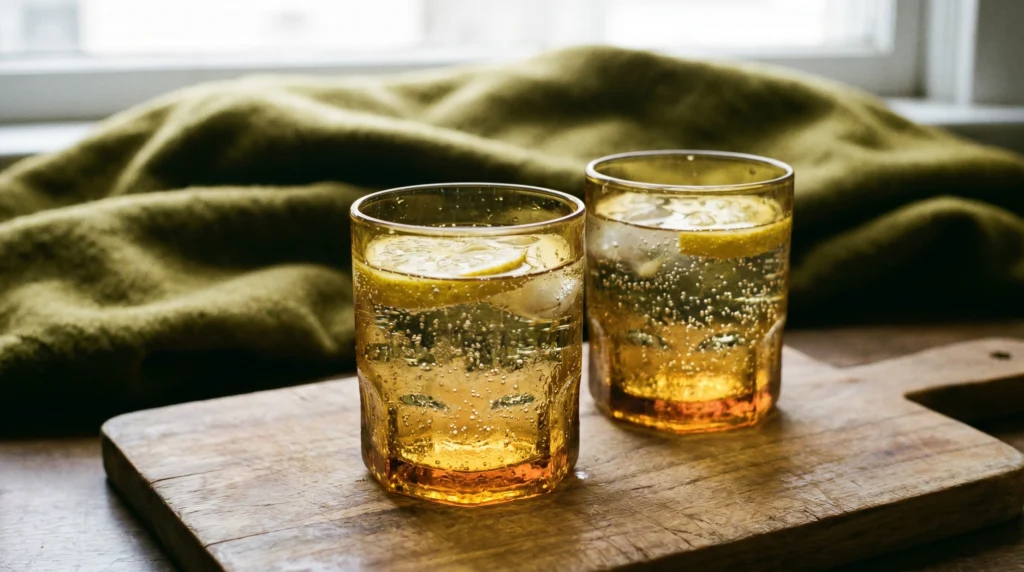
Disposable plastic cups are the fastest way to kill the “aesthetic” vibe. Swapping them for real glass—even if it’s just cheap thrift store finds—instantly makes the picnic feel like an event. The way sunlight hits glass is part of the magic.
Look for amber, smoke, or light green glassware to add a touch of color. Since you’re outdoors, thicker glass is better for stability and less likely to tip over in the wind. One real tip: wrap each glass in a cloth napkin for transport so they don’t clink and crack in your bag. You can usually find these for $1–$3 a piece at local charity shops.
6. Dried Flower Arrangements in Amber Jars
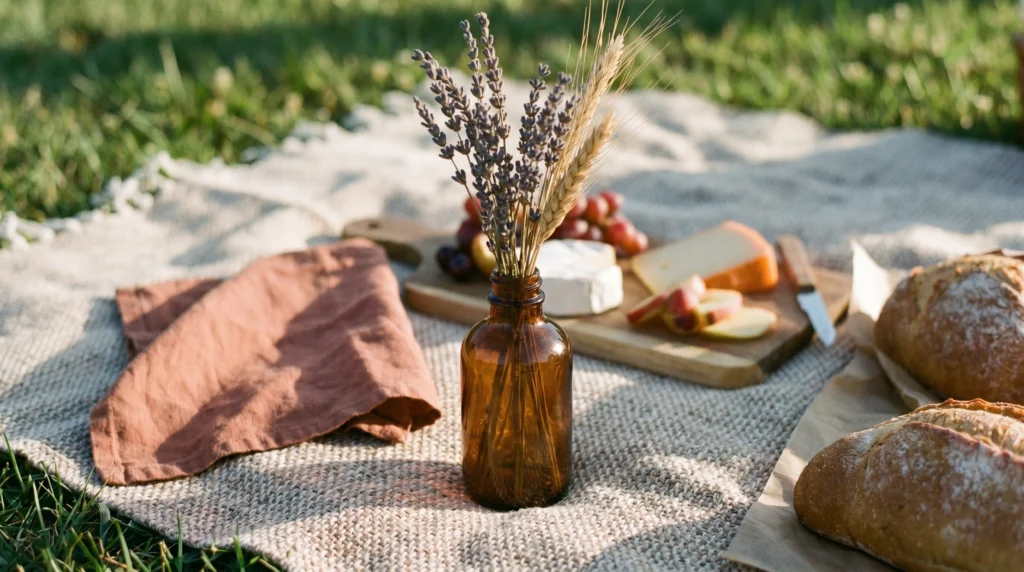
Fresh flowers are lovely, but they wilt quickly in the sun and require water-filled vases that can spill. Dried flowers, on the other hand, are durable, light, and perfectly suited for a “wild” outdoor setting.
Bunches of lavender, pampas grass, or dried bunny tails look incredible in small amber jars or bud vases. They add height to your flat setup without blocking the view of your picnic partner. A common mistake to avoid is using tall, top-heavy vases that will blow over at the first breeze; stick to short, squat containers. You can buy a bundle of dried florals for $10–$20 that will last for dozens of picnics.
7. Use Umbrellas or Parasols for Vertical Interest
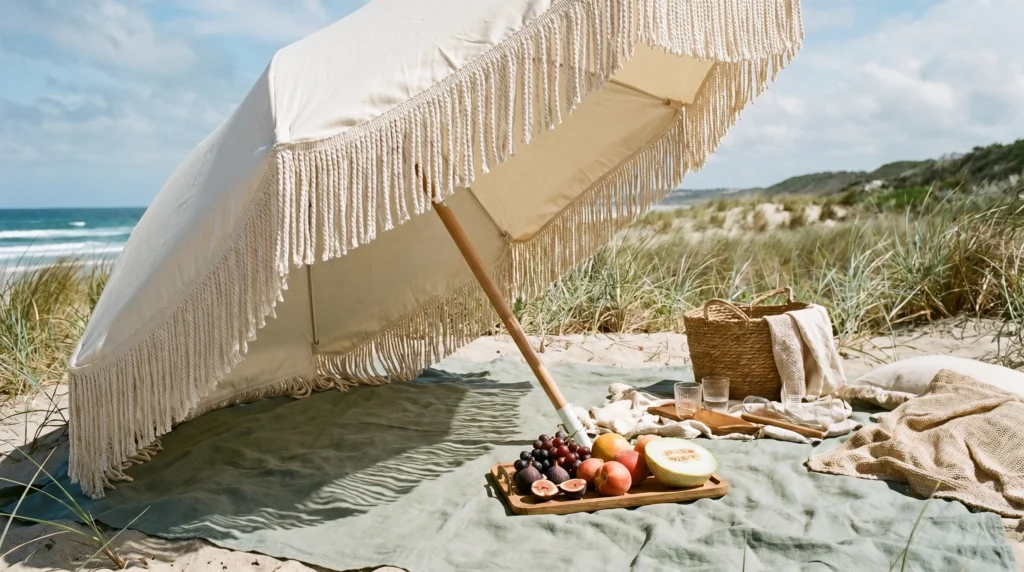
Most picnics are very “flat”. Adding an umbrella or a vintage-style parasol gives the space architectural interest and, more importantly, much-needed shade. It defines the “room” in an open park.
Look for something with fringe or a soft floral print. If you’re at the beach, a classic striped beach umbrella works wonders. I’ve found that even a small hand-held lace parasol can be propped up for a whimsical, Victorian feel. If buying new, these can range from $40–$100, but a standard patio umbrella you already own can often be transported to the park too.
8. Serving Boards instead of Individual Plates
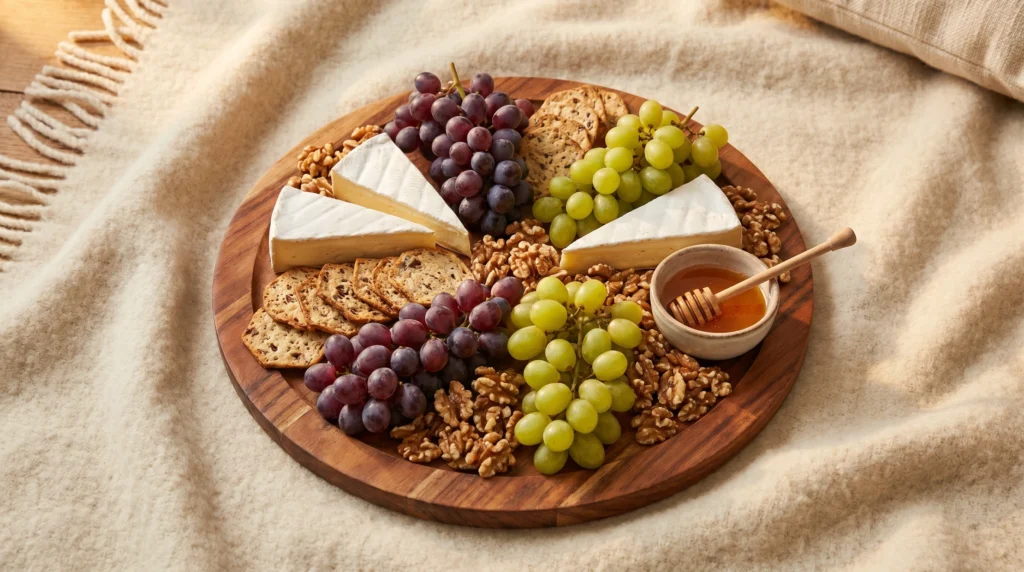
Instead of giving everyone a separate plate, serve everything on large wooden charcuterie boards. This encourages grazing and conversation, and it looks significantly more curated.
Incorporate a mix of textures—hard cheeses, soft grapes, crusty bread, and crunchy nuts. The secret here is to fill the board completely; gaps make it look unfinished, while a “crowded” board looks abundant and Pinterest-ready. You can use a simple wooden cutting board you already have in your kitchen.
9. Drape Fabric Over Nearby Tree Branches
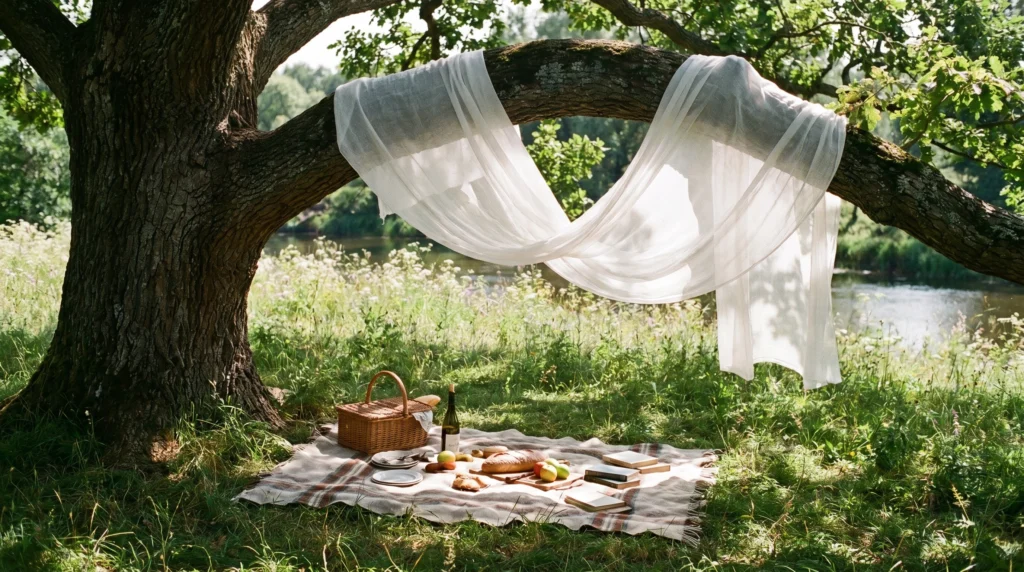
If you are lucky enough to be near a tree, use it! Draping a long piece of sheer fabric or a lightweight tablecloth over a low-hanging branch creates a “canopy” effect that feels like something out of a fairytale.
Use clothespegs or simple twine to secure the fabric so it doesn’t blow away. What I personally love about this is how it filters the sunlight, creating a soft, ethereal glow over your picnic. You can buy 3–4 yards of muslin or cheesecloth for under $15 at a craft store for this exact purpose.
10. Portable Record Player or Aesthetic Speaker
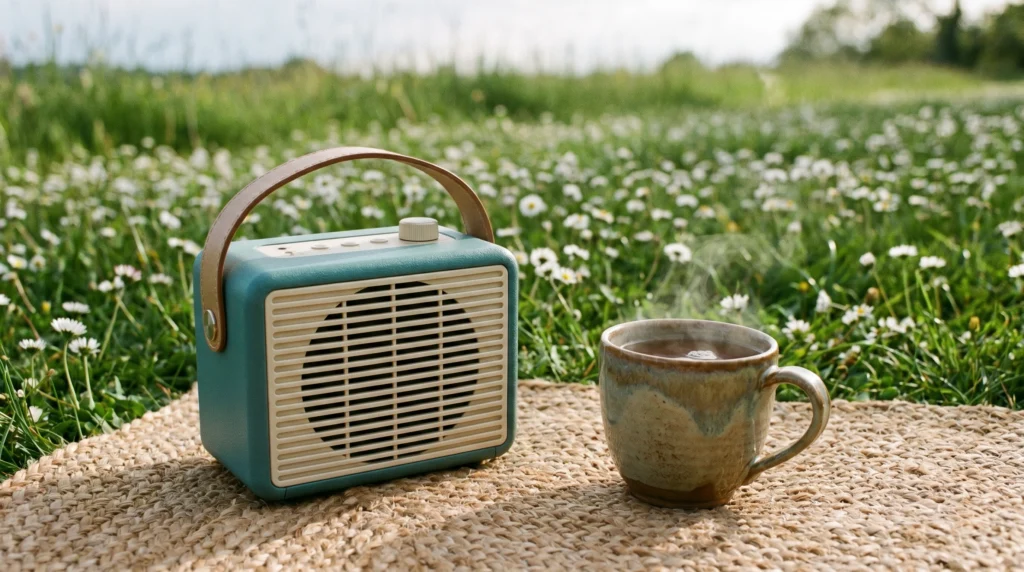
Atmosphere isn’t just about what you see; it’s about what you hear. A vintage-style portable record player or a retro-inspired Bluetooth speaker adds a layer of “cool” to the setup.
Choose music that fits the mood—jazz for a sophisticated afternoon, or soft indie for a relaxed vibe. A quick tip: be mindful of your neighbors in public parks! Keep the volume low enough that it’s just a “bubble” of sound for you and your friends. Budget: $30–$80 depending on the tech quality.
11. Use Taper Candles (Even if You Don’t Light Them)
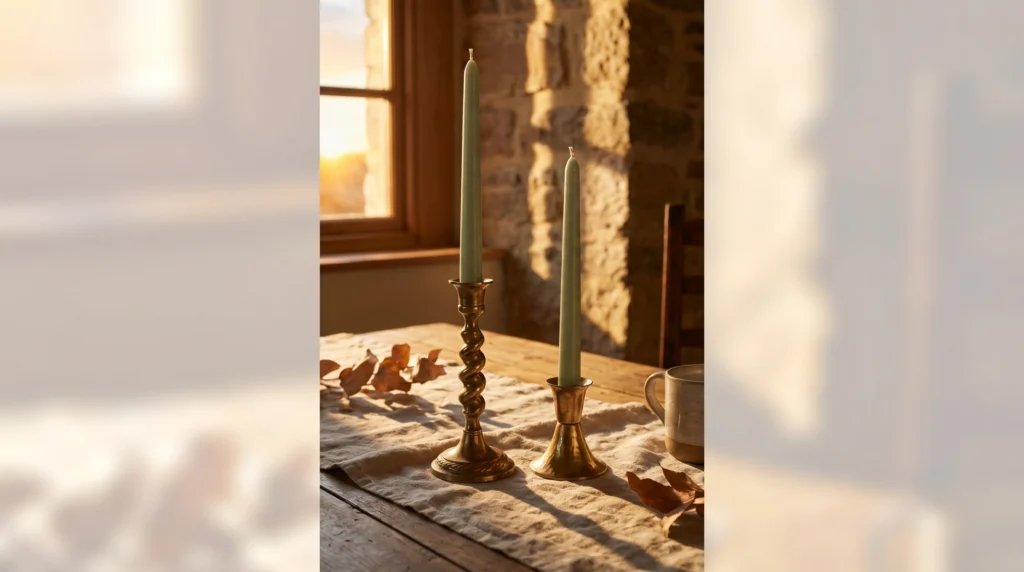
Taper candles in brass holders add an incredible amount of “height” and elegance to a table. Even if it’s too windy to light them, the visual of the tall, thin candles creates a high-end dining vibe.
Choose colors like beeswax yellow, sage, or muted blue to match your textiles. I always recommend this to anyone: use “museum putty” or a bit of melted wax at the bottom of the holder to keep them from tipping over on a bumpy pallet table. You can grab a pack of tapers for $5–$10 at most grocery stores.
12. Hand-Written Place Cards or Menus
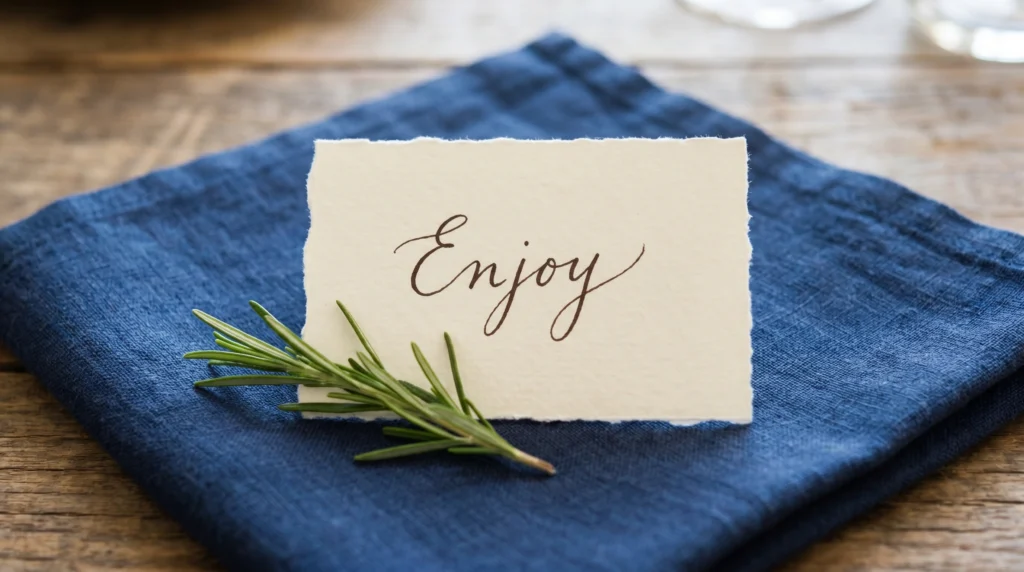
If you’re hosting a small group, hand-written details make guests feel incredibly special. It turns a casual hangout into a “hosted” experience.
Use torn-edge cardstock or even smooth river stones written on with a gold permanent marker. A common mistake to avoid is making it too formal; keep the handwriting loopy and casual to match the outdoor setting. Cost: basically pennies for some cardstock and a nice pen.
13. Incorporate Fresh Fruit as Decor
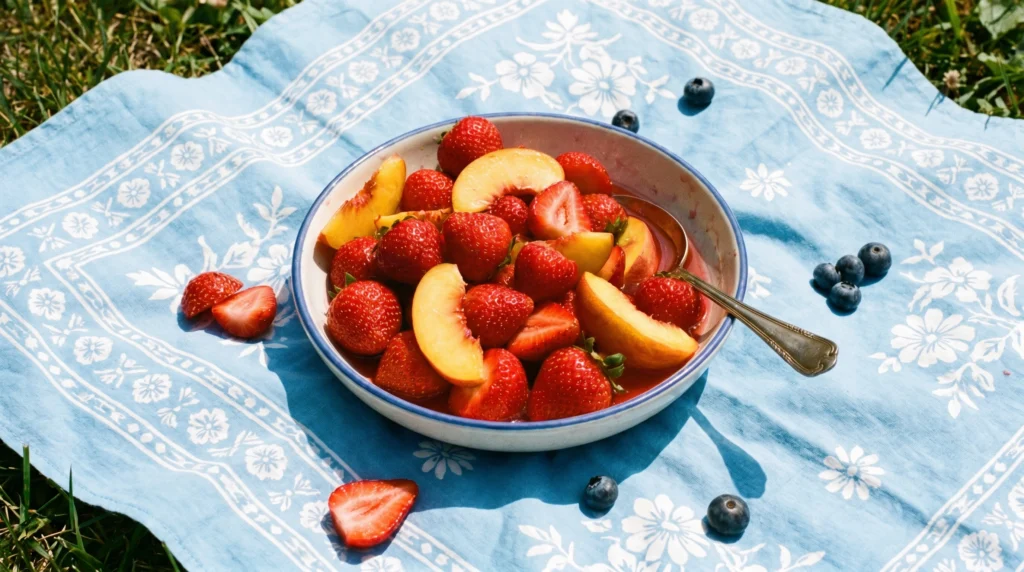
Fruit isn’t just for eating; it’s one of the most beautiful, natural decorations you can use. The vibrant colors of strawberries, halved peaches, or clusters of grapes add an organic feel to the spread.
Scatter them directly on the serving boards or keep them in small ceramic bowls. I’ve found that citrus fruits like lemons or oranges sliced in half add a wonderful scent to the air, too. Budget: $10 at the farmer’s market.
14. String Lights or Lanterns for Sundown
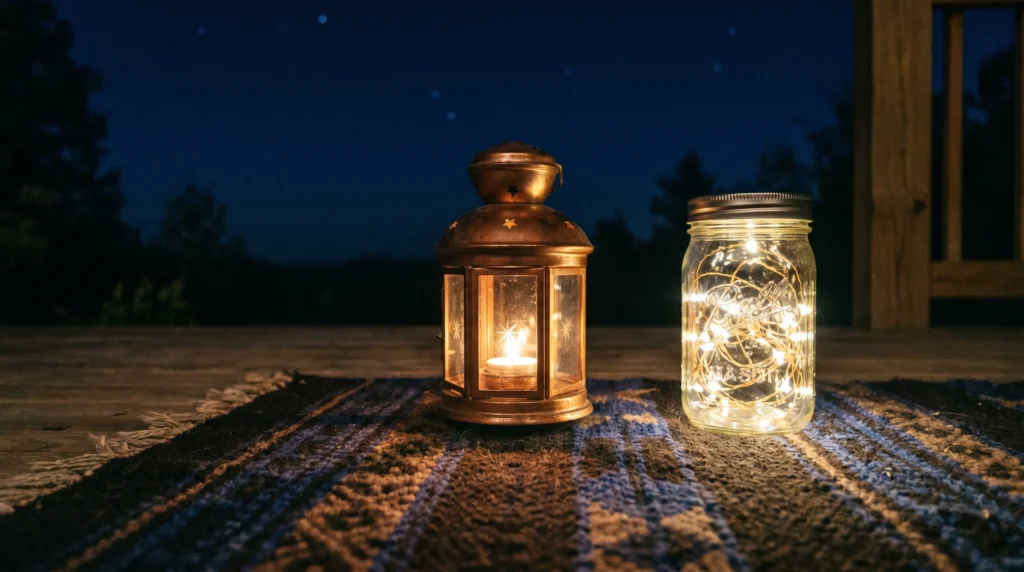
If your picnic is heading into the evening, lighting is non-negotiable. Battery-operated string lights or small LED lanterns can be draped over your basket or placed around the perimeter of the blanket.
Warm white light is a must—avoid the “cool white” or blue-toned LEDs, which can feel clinical. A lot of people skip this, but placing a few lanterns a few feet away from the blanket helps define the space and prevents people from tripping in the dark. Budget: $15–$30.
15. The “Comfort Kit” Basket

An aesthetic picnic is a comfortable one. A small basket filled with “comfort” items—sunscreen, bug spray (in an aesthetic bottle, maybe?), fans, or extra socks—shows you’ve thought of everything.
Keep the items organized in a small wicker bin so it looks like part of the decor. One real tip: decant your sunscreen and hand sanitizer into small amber pump bottles to keep the “plastic brand” clutter to a minimum.
16. A Low-Slung Hammock Nearby
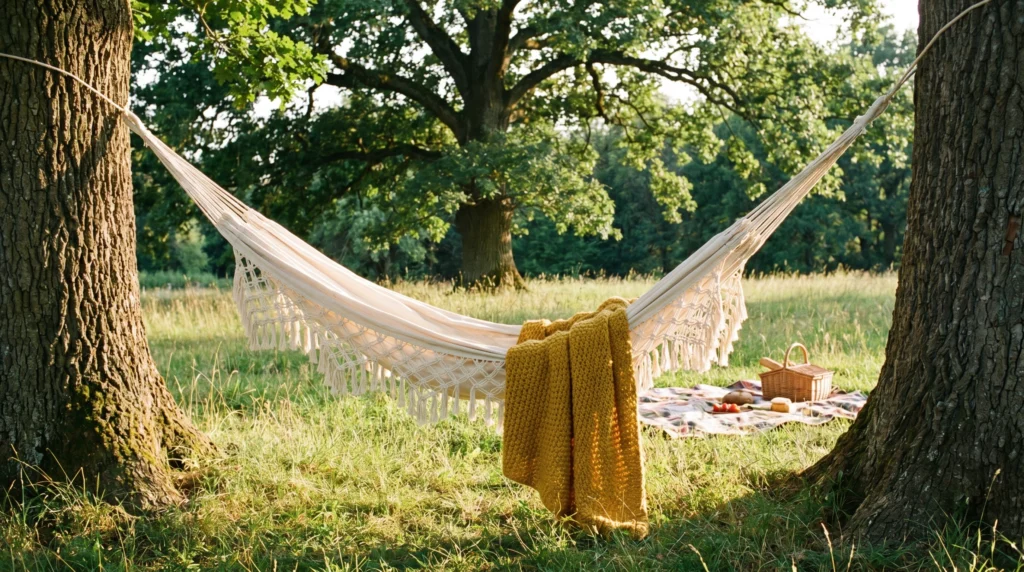
If your picnic is in a wooded area, a hammock provides a secondary “zone” for relaxing after the meal. It adds a vertical element to your photos and a lot of fun for guests.
Choose a woven macramé hammock for that ultimate boho aesthetic. In my experience, the key is to hang it low enough that it feels connected to the ground setup, rather than hovering way above it. Budget: $30–$60 for a portable nylon version, or $70+ for decorative cotton.
17. Ceramic or Enamel Mugs for Hot Drinks
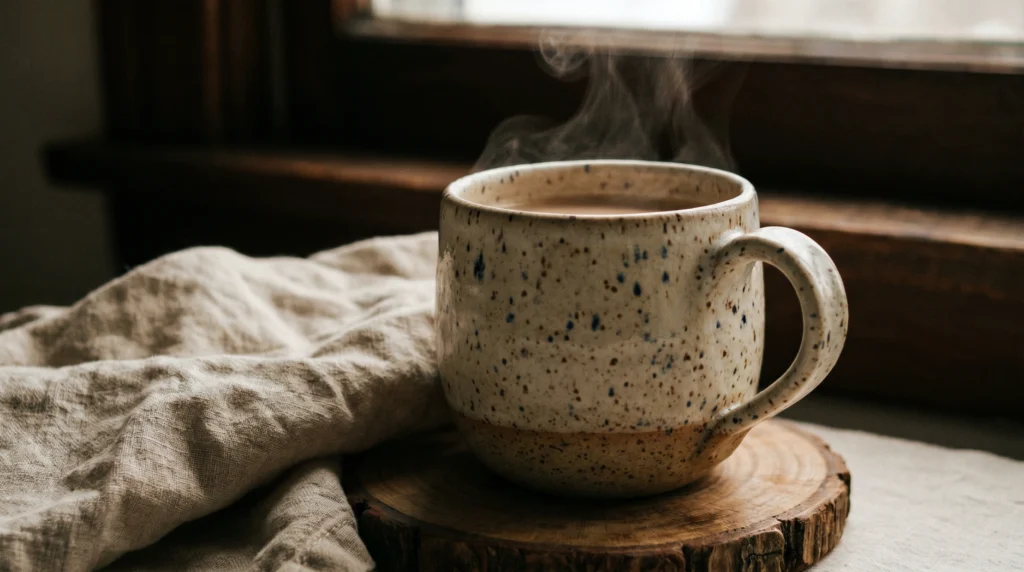
If you’re picnicking in the morning or late evening, hot coffee or tea is a must. Ditch the paper cups and bring your favorite ceramic mugs from home.
Mismatched handmade ceramics add so much character. A common mistake to avoid is using thin porcelain that breaks easily; look for sturdy stoneware or classic enamel camping mugs.
18. Use a Mirror to Reflect the Sky

This is a high-level Pinterest trick. Placing a small vintage mirror flat on the blanket or propped against a basket can reflect the clouds or the trees above, creating a surreal and beautiful visual.
It’s essentially “moving art” for your picnic. What I personally love about this is how it opens up the space, making a small blanket feel much larger. Just be careful with the angle so you don’t blind yourself with the sun! Budget: $5 at a thrift shop.
19. Woven Trays for Stability
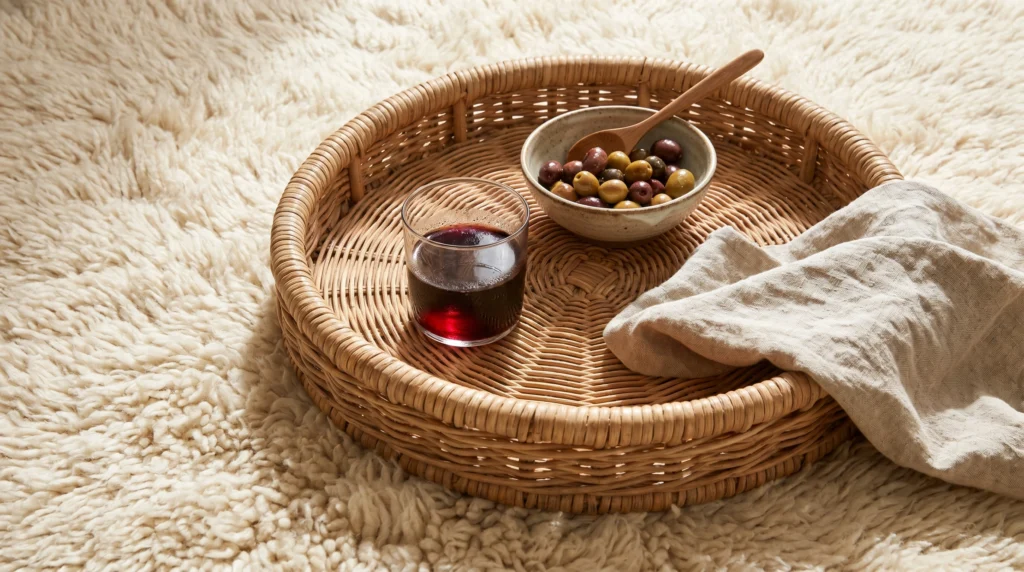
The grass is never perfectly flat. Woven seagrass or rattan trays provide a stable surface for drinks and small bowls on top of your soft blankets.
They also help group items together so the setup doesn’t look cluttered. I always recommend this: use trays of different heights to create visual interest. You can find these for $10–$20 at most home decor retailers.
20. A Pop of Pattern with Bandanas or Napkins
Small pops of pattern prevent a neutral setup from looking “flat”. Use cloth napkins or even vintage bandanas as placemats or to wrap cutlery.
Paisley, gingham, or floral prints in muted tones work best. One real tip: don’t match them perfectly! A mix of different patterns in the same color family looks much more “expertly styled”.
21. Use a Cooler as a Hidden Table
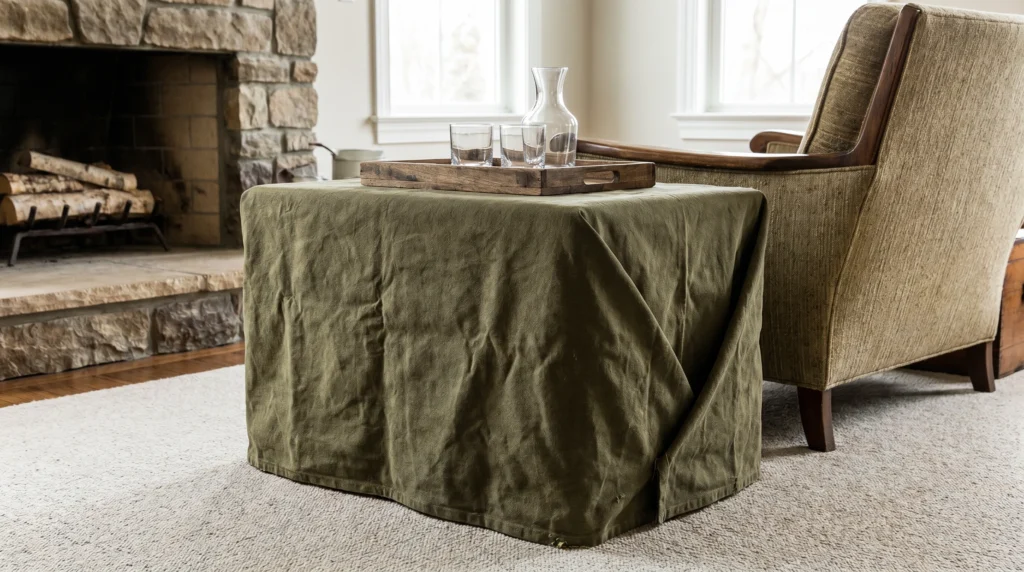
Coolers are usually ugly, but they are necessary. The trick is to hide them. Cover your hard-sided cooler with a large tablecloth or a spare blanket to turn it into an extra side table.
This keeps your drinks cold while providing a sturdy surface for a speaker or a basket. A lot of people skip this, and they end up with a giant blue plastic box ruining their photos.
22. Picnic “Scavenger Hunt” for Kids
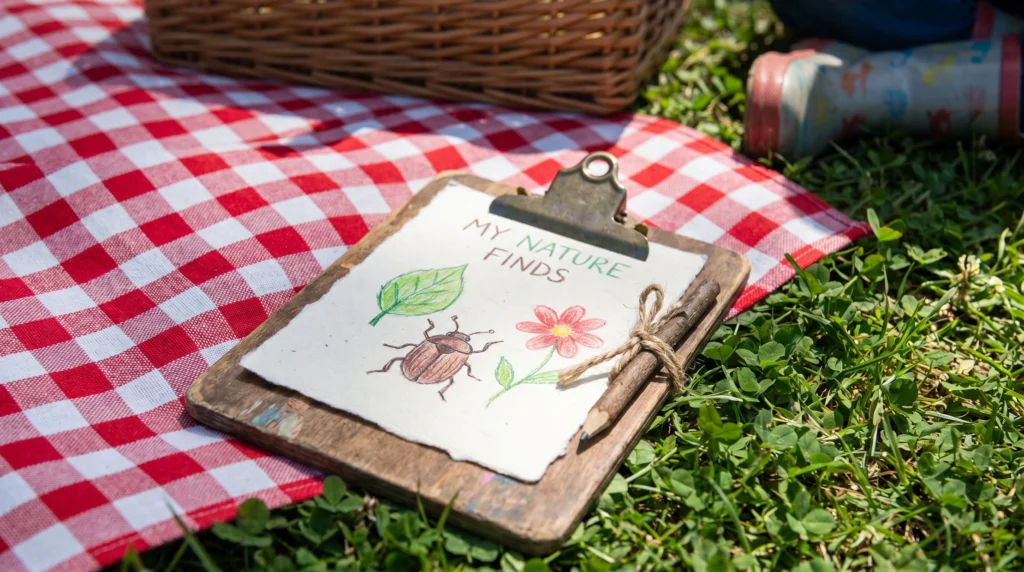
If you have children, the best way to keep the picnic “fun” is to give them an activity. A small, hand-drawn scavenger hunt card (find a yellow leaf, find a smooth stone) keeps them engaged.
You can clip the hunt card to a small wooden clipboard. What I’ve found is that when the kids are busy, the adults actually get to enjoy the “aesthetic” setup you worked so hard on!
23. A “Low” Flower Meadow

Instead of one big vase, use several tiny “bud” vases (or even empty spice jars) scattered around the edge of the blanket.
This makes it feel like you are sitting in the middle of a flower field. I always recommend picking wild-looking flowers like chamomile or baby’s breath for this. Budget: $5–$10.
24. The Bookshelf Aesthetic
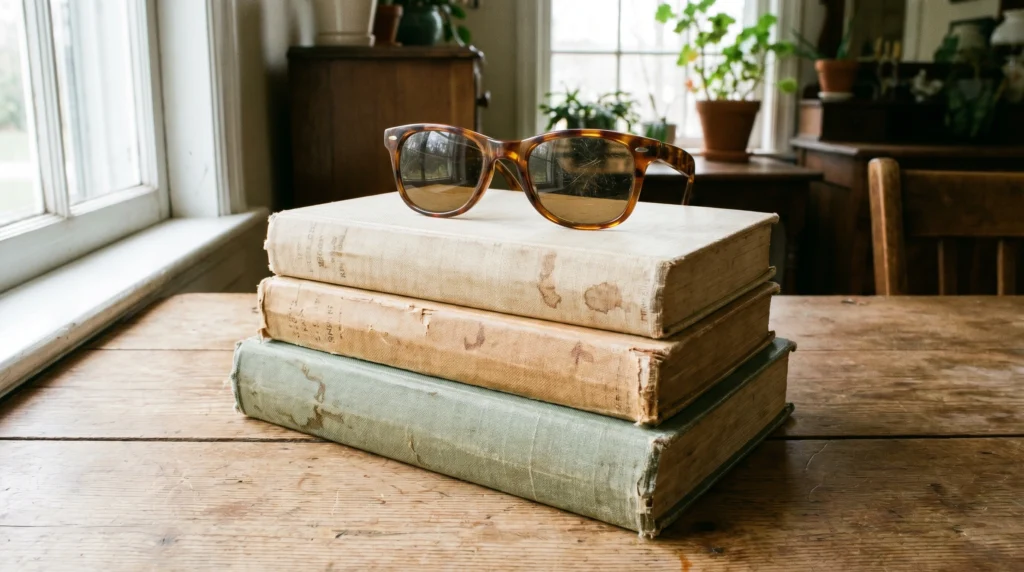
Bring a few of your favorite books along—not just to read, but for the vibe. Stacked books provide a great “stand” for a small candle or a glass.
Hardcovers with the dust jackets removed often have beautiful linen textures underneath that look great in a picnic setting. A common mistake is bringing books you’re afraid to get a little grass on; stick to older copies or “coffee table” style books.
25. Use a Parasol as a Prop
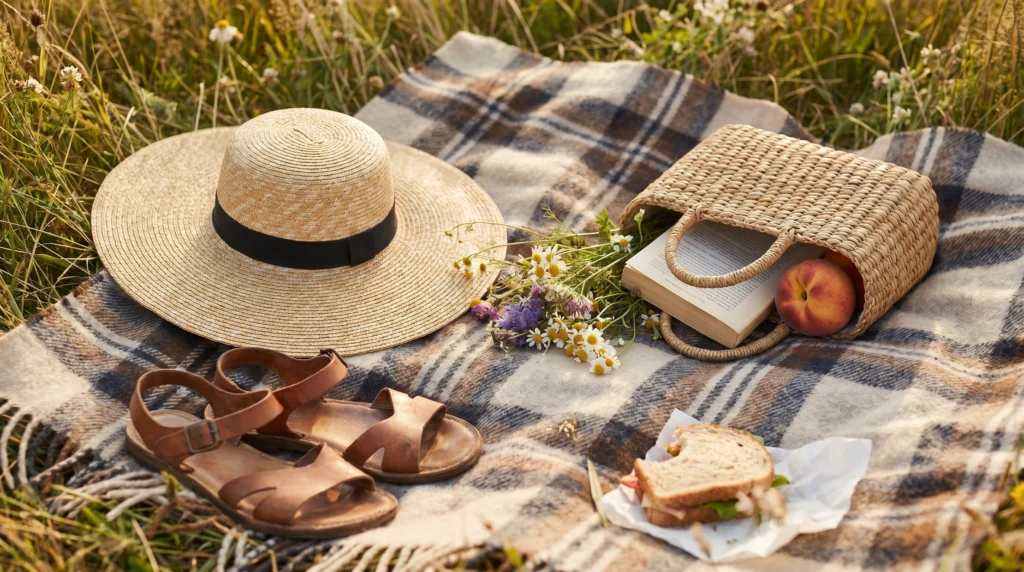
Finally, don’t forget yourself! An aesthetic picnic often includes a few people. Using a paper parasol or a wide-brimmed straw hat as a “prop” on the blanket when you aren’t using it adds a final touch of personality.
It tells a story of a day spent in the sun. In my experience, these little “human” touches are what make a Pinterest photo feel real and relatable.
Conclusion
At the end of the day, a beautiful picnic isn’t about how much money you spent or having the “perfect” grass. It’s about creating a space where you and your favorite people can slow down and enjoy a meal together. I hope these 25 picnic setup ideas that look aesthetic and fun have inspired you to look at your outdoor spaces—and your indoor linens—in a whole new way.
You don’t have to do all 25 at once! Start by layering two blankets you already own and bringing out a real glass instead of plastic. You’ll be surprised at how much that one small change shifts the mood. Remember, the best picnics are the ones where you feel relaxed enough to stay until the sun goes down.
Which of these ideas are you trying first for your next outdoor hang? Drop it in the comments—I’d love to know!
Frequently Asked Questions
How do I keep my aesthetic picnic setup from getting dirty?
The best trick is to use a “barrier layer”. Always place a waterproof tarp or a cheap plastic shower curtain liner under your pretty blankets. This prevents ground moisture and dirt from seeping through. Additionally, bring a small brush to sweep off grass before you pack up, and keep your serving boards elevated on a pallet or tray to keep food away from the “foot traffic” areas.
What is the best time of day for a Pinterest-worthy picnic?
“Golden Hour”—the hour before sunset—is the undisputed champion of picnic lighting. The light is soft, warm, and creates those beautiful long shadows you see in professional photos. If you prefer mornings, aim for “Blue Hour” just after sunrise, or at least before 10 AM while the light is still directional and not directly overhead, which can cause harsh, unflattering shadows.
How can I make a picnic aesthetic on a very low budget?
Focus on what you already have. Use your indoor throw pillows, blankets, and even kitchen cutting boards. Thrift stores are gold mines for vintage glassware, wicker baskets, and linen tablecloths for just a few dollars. Nature itself provides free decor: wildflowers, interesting stones, and beautiful branches can all be used to style your setup without spending a dime.
What food looks best for an aesthetic picnic photo?
Think about colors and textures. A charcuterie board with various cheeses, bright red berries, and green grapes is a classic. Bread like baguettes or croissants adds a rustic feel. Avoid foods that “weep” or get soggy quickly, like heavily dressed salads. Instead, opt for colorful “dry” foods like tarts, quiches, or sandwiches wrapped in parchment paper tied with twine for that extra styled touch.