We have all been there: you are in the middle of cooking dinner, the stove is hot, and you are frantically digging through a dark cabinet trying to find that one can of tomato paste. You pull out three expired boxes of pasta, a sticky jar of honey, and some half-empty chip bags, only to realize you bought a duplicate of what you already had. It is frustrating, exhausting, and completely breaks your momentum. In my experience, the biggest mistake people make is treating their pantry like a storage closet rather than an active workspace.
When you organize your kitchen, the goal should not just be making things look pretty for a photo. True kitchen peace comes from how easily you can grab what you need when you are busy. By planning your space around your daily habits, you can create a system that works with you instead of against you. In this guide, we are looking at 16 pantry layout ideas that improve daily kitchen flow, focusing on practical, realistic setups that keep your ingredients visible, reachable, and perfectly organized without requiring a massive budget.
1. The Multi-Zone Walk-In Pantry
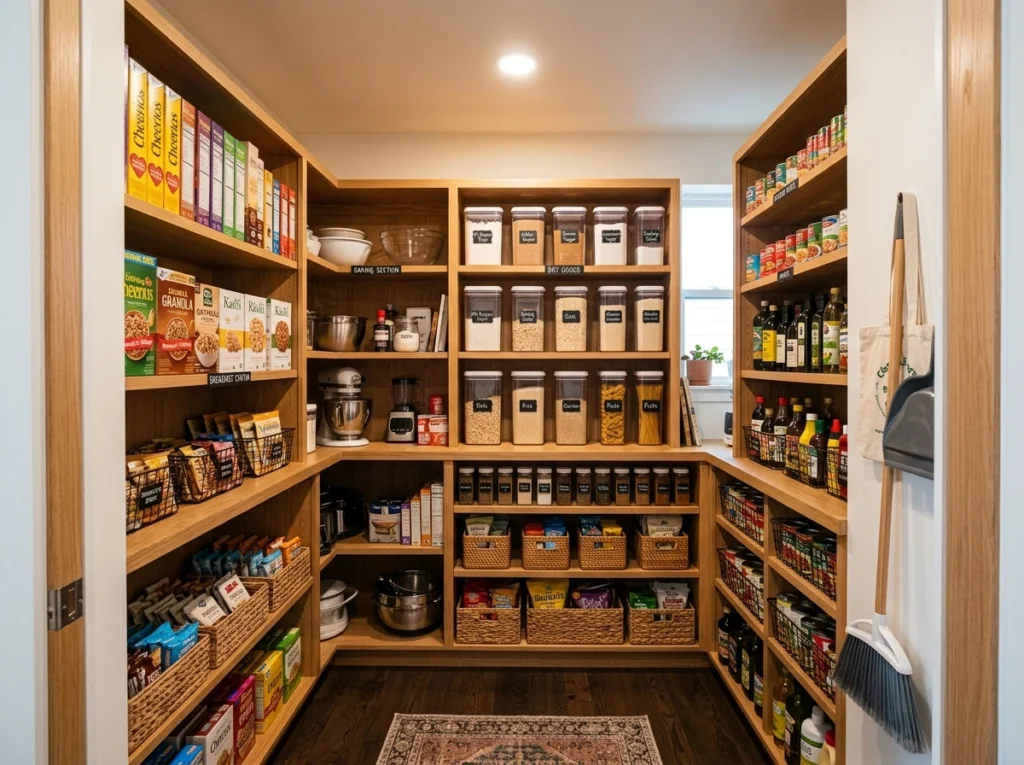
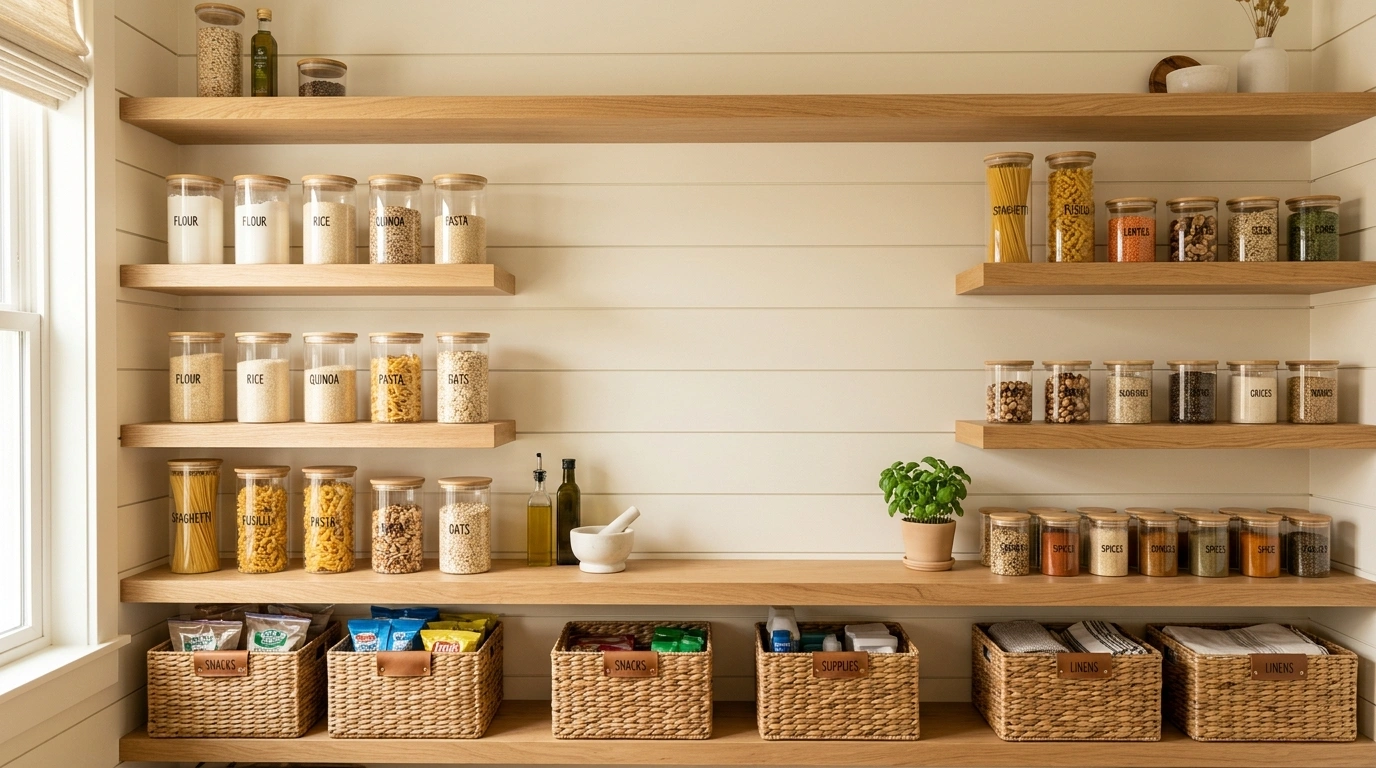
What I personally love about this setup is how it treats your pantry like a mini-grocery store, grouping items by exactly how you live and cook. Imagine stepping into a bright, airy space where the baking supplies are clustered together on one side, breakfast essentials sit ready on another, and dinner ingredients are right at eye level. This layout uses warm wood shelves against soft white walls to create a calm, inviting mood that instantly lowers your stress levels when you are planning meals.
To recreate this layout, I always recommend starting with a clear inventory of what you actually eat. Group your items into three main zones: high-use daily items, baking/cooking ingredients, and bulk backstock. Place your daily essentials at chest-to-eye height, heavy backstock items on the very bottom shelves, and light, occasionally used items like holiday cookie cutters on top. If you are on a budget, you do not need custom shelving; simple sturdy floating shelves from a local hardware store work beautifully.
- Estimated Effort/Cost: Moderate to High | $150 – $500 (depending on shelving choices)
2. The Double-Deep Pull-Out Drawer Layout
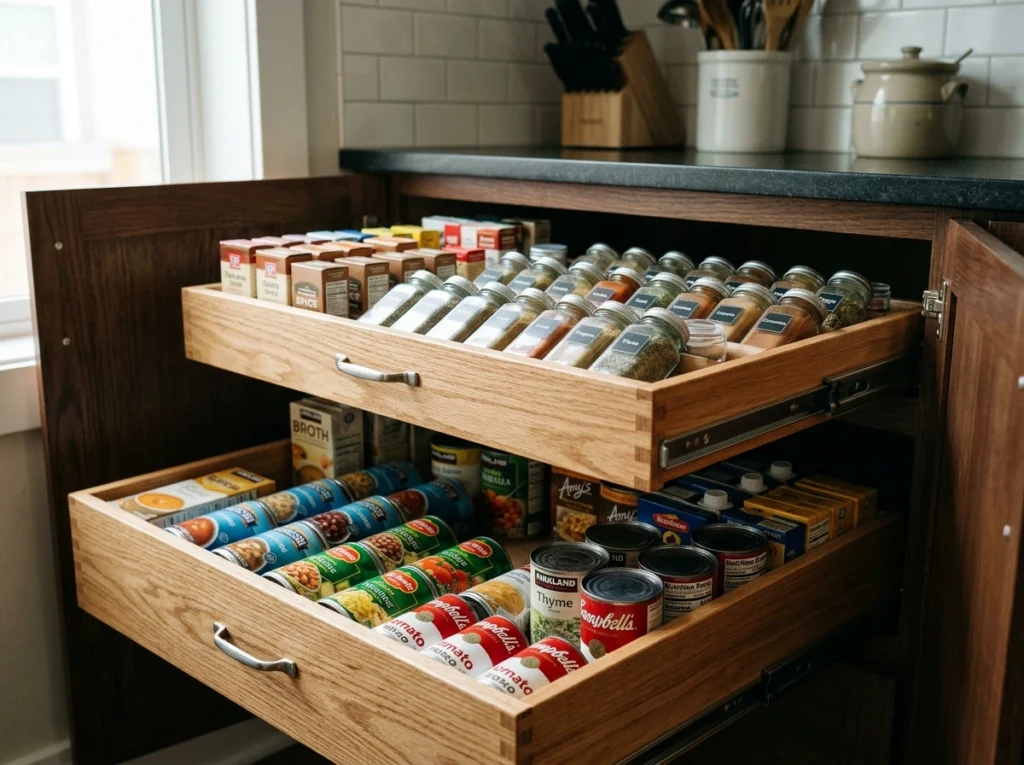
A lot of people overlook this detail, but deep, dark cabinets are where pantry items go to die. This clever layout replaces static, deep lower shelves with heavy-duty pull-out wooden drawers that bring everything directly into the light. When you pull the drawer out, you get a full top-down view of all your jars, cans, and snack boxes, meaning nothing ever gets lost in the dark back corners again. It feels incredibly satisfying and keeps the kitchen looking tidy because everything is tucked away behind closed doors.
To make this work in your existing cabinets, look for aftermarket slide-out wire or wood baskets that can be screwed directly into your existing shelf bases. Make sure to measure your cabinet openings carefully, including the clearance around the hinges, before purchasing. I highly recommend using sturdy wooden or heavy metal slides that can handle the weight of heavy cans and jars. If you want to save money, focus on upgrading just the bottom two shelves where visibility is lowest.
- Estimated Effort/Cost: Moderate | $80 – $200 per drawer slide-up kit
3. The U-Shaped Corner Shelving System
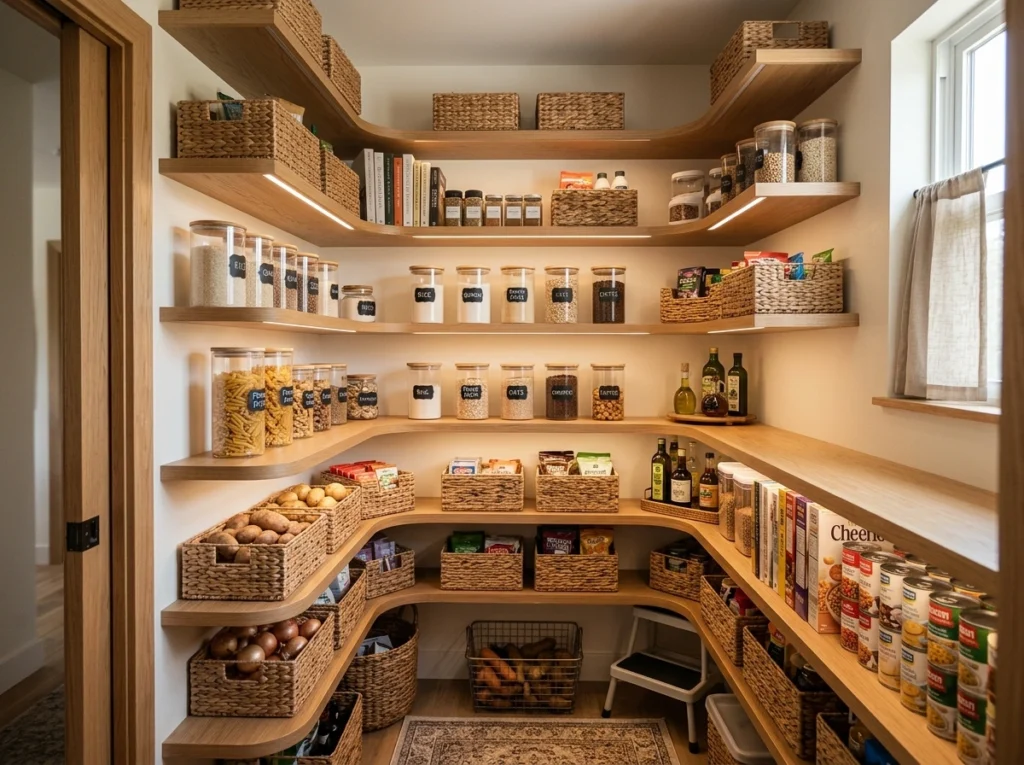
This layout is a lifesaver for small walk-in pantries or deep closets because it wraps around the walls to maximize every single inch of corner space. Instead of letting those awkward 90-degree corners become dead zones, the shelves sweep continuously around the room, creating a seamless, cozy feel. It makes the entire space look unified and gives you a panoramic view of your entire food supply the second you step inside.
When setting up a U-shaped layout, the trick is to use curved corner shelves or lazy Susans right in the bend so you do not have to awkward stretch to grab things. Use this corner area to store bulky, lightweight items like paper towels, large mixing bowls, or chip baskets. Avoid storing small spice jars directly in the sharp corners, as they will inevitably get knocked over and lost. You can easily build these shelves yourself using pre-cut plywood and simple metal brackets.
- Estimated Effort/Cost: Moderate to High | $120 – $350
4. The Butler’s Pantry with Integrated Coffee Station
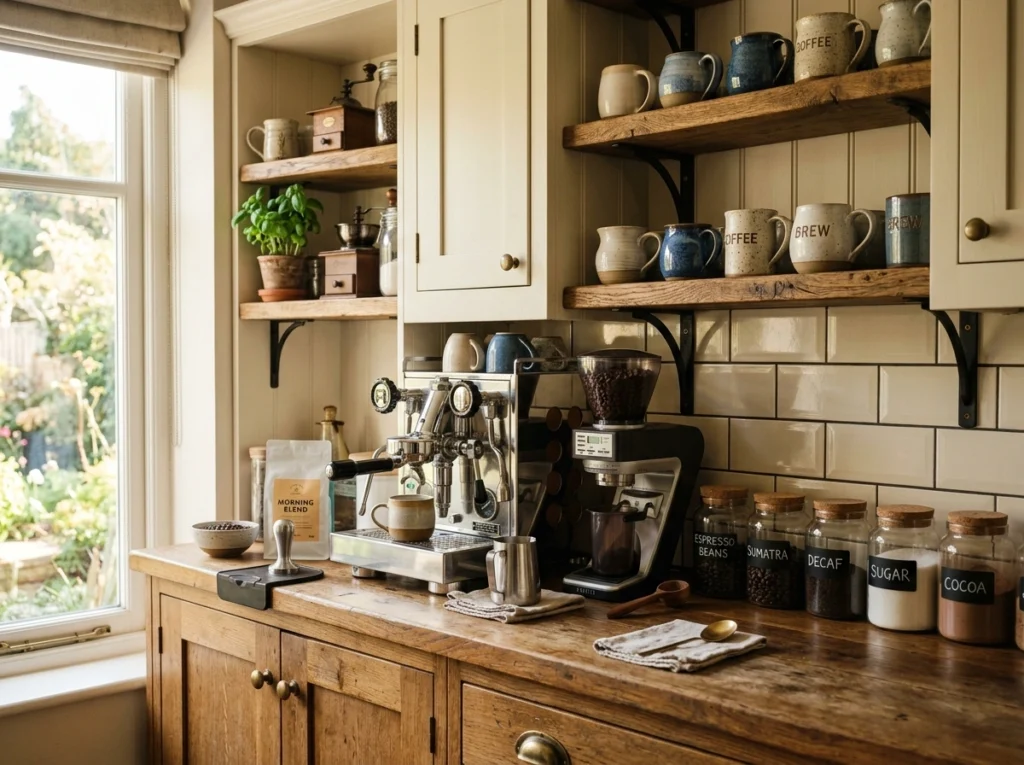
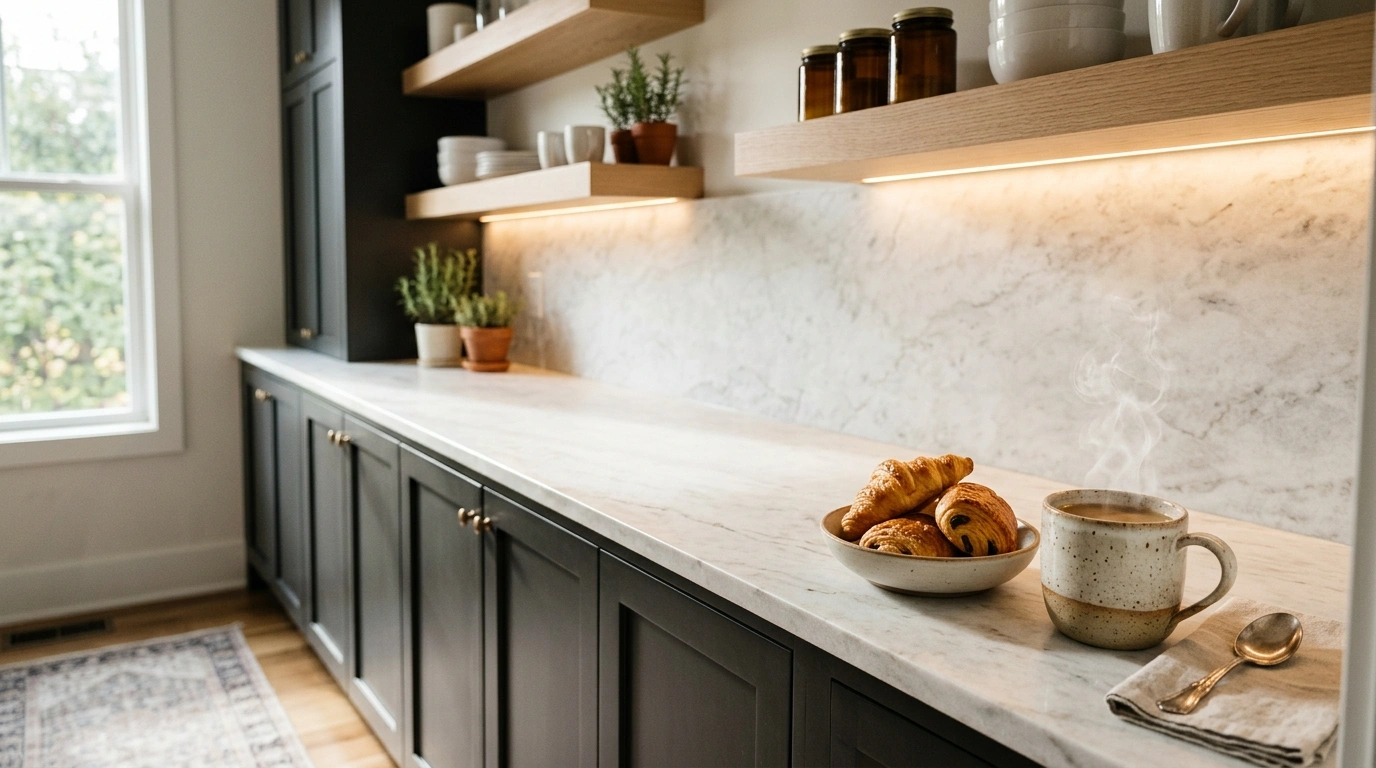
This setup is the ultimate luxury for improving morning flow, blending traditional dry food storage with a functional countertop workspace. The layout features open shelving on top for beautiful jars of coffee beans and mugs, while the lower section holds a sturdy countertop with your espresso machine or blender. It feels like your favorite local coffee shop, keeping the morning rush out of the main cooking zone so family members can make breakfast without stepping on each other’s toes.
To recreate this without a massive remodel, you can repurpose an old dresser or a sturdy sideboard inside a larger pantry closet or at the edge of your kitchen. Install a few floating shelves directly above the countertop to hold your coffee pods, syrups, and mugs in neat baskets. A common mistake is forgetting about power sources, so make sure your setup is close to an outlet or have a professional install one safely. Use durable, easy-to-wipe contact paper on the countertop to protect it from accidental coffee spills.
- Estimated Effort/Cost: High | $300 – $800 (including furniture and shelving)
5. The Over-the-Door Organizer Layout
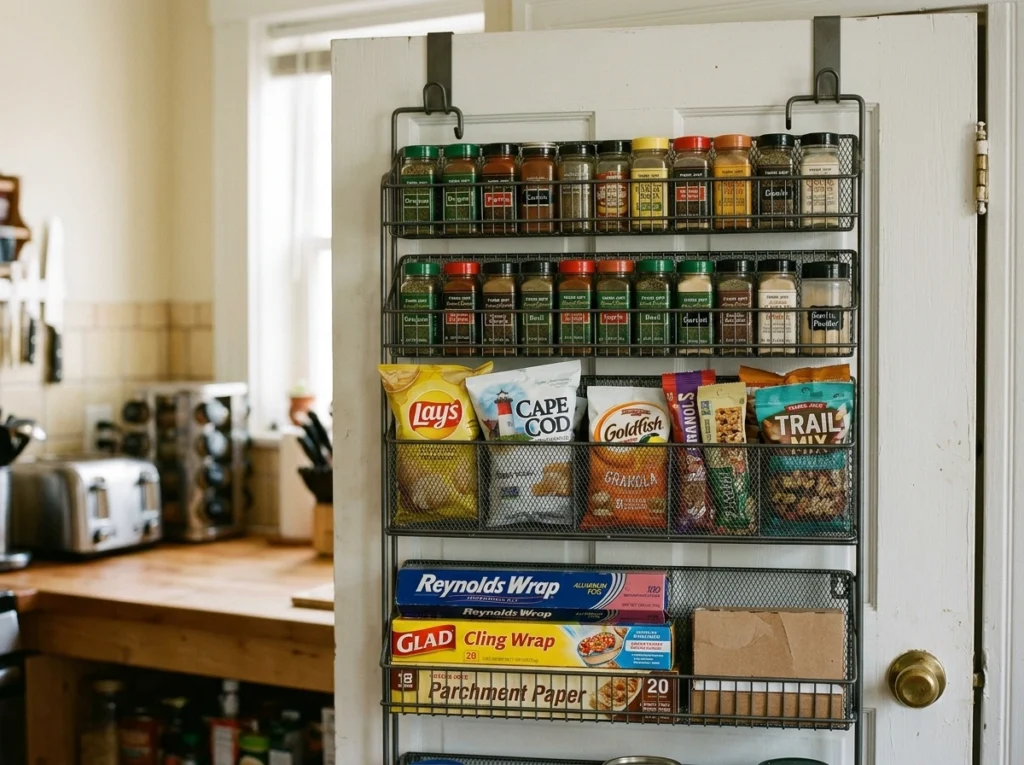
This works especially well if you want to look more put together without trying too hard or spending a lot of money. By utilizing the back of your pantry door, you instantly unlock several square feet of highly visible storage space that is perfect for small, everyday items. This layout uses slim, clear plastic pockets or shallow metal wire baskets suspended from the top of the door, keeping frequently grabbed items like spices, snacks, and foil boxes right at your fingertips.
When choosing a door organizer, I always recommend looking for a tension-mounted model that clips tightly to the door rather than just hanging loose. This stops the organizer from banging loudly every single time you open or close the pantry. Use this space for light, grab-and-go items rather than heavy glass jars, which can strain the door hinges over time. It is an incredibly affordable way to clear off your main shelves and make room for bigger bulk items.
- Estimated Effort/Cost: Easy | $20 – $50
6. The Visual Decanting Zone with Clear Jars
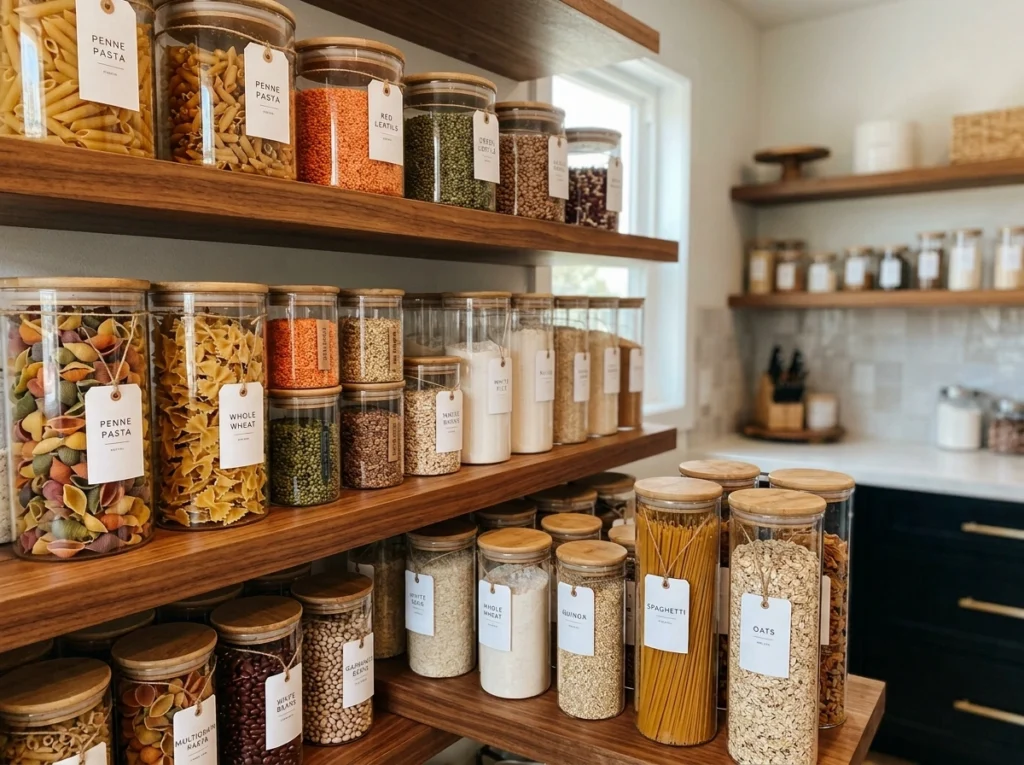
There is something deeply relaxing about opening your pantry and seeing neat rows of matching glass jars filled with colorful grains, pastas, and flours. This layout focuses on eye-level shelves dedicated entirely to clear, airtight containers, giving you an instant visual update on when you are running low on staples. It removes the visual clutter of mismatched cardboard boxes and plastic bags, creating a clean, modern look that feels both practical and satisfying.
You do not need to spend a fortune on high-end container sets to achieve this look. I always recommend saving and washing large glass sauce jars, or buying classic, inexpensive mason jars in bulk. Use simple, water-resistant paper labels or a chalk marker to write the names of the contents and the expiration dates on the back of the jars. Make sure to keep a few scoops inside your flour and sugar jars to make baking prep as smooth as possible.
- Estimated Effort/Cost: Easy | $30 – $100
7. The Kids’ Low-Level Self-Serve Drawer
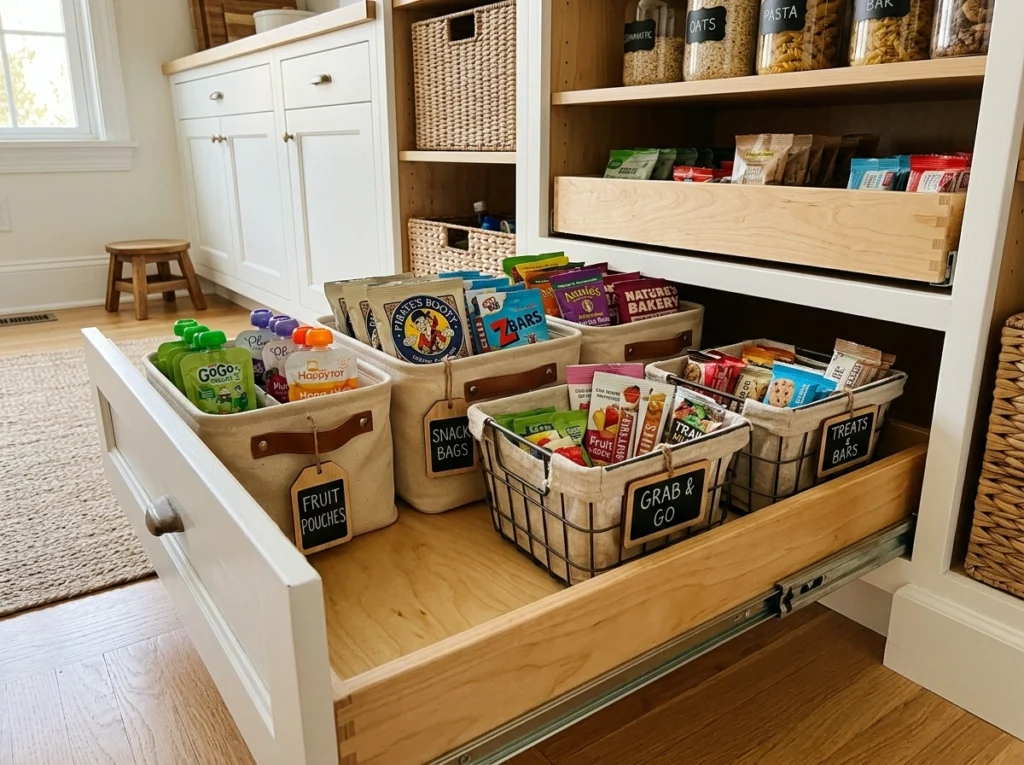
If you have children, this layout will completely change your afternoon routine and save you from constant requests for snacks. By placing healthy, pre-approved snacks in low, easy-to-reach wire baskets or deep drawers, you give your kids independence while keeping them out of your main cooking supplies. It uses sturdy, kid-friendly canvas bins or plastic baskets that can handle being pulled out and dropped without breaking.
Place this kid-friendly zone on the very lowest shelves of your pantry or cabinet, using bright, clear labels with pictures if your children are still learning to read. Fill the baskets with portioned snacks like applesauce pouches, pretzels, and dried fruit. A lot of people overlook this, but keeping a small trash can or recycling bin right next to this zone helps teach kids to clean up after themselves immediately.
- Estimated Effort/Cost: Easy | $15 – $40
8. The Under-Shelf Sliding Basket Layout
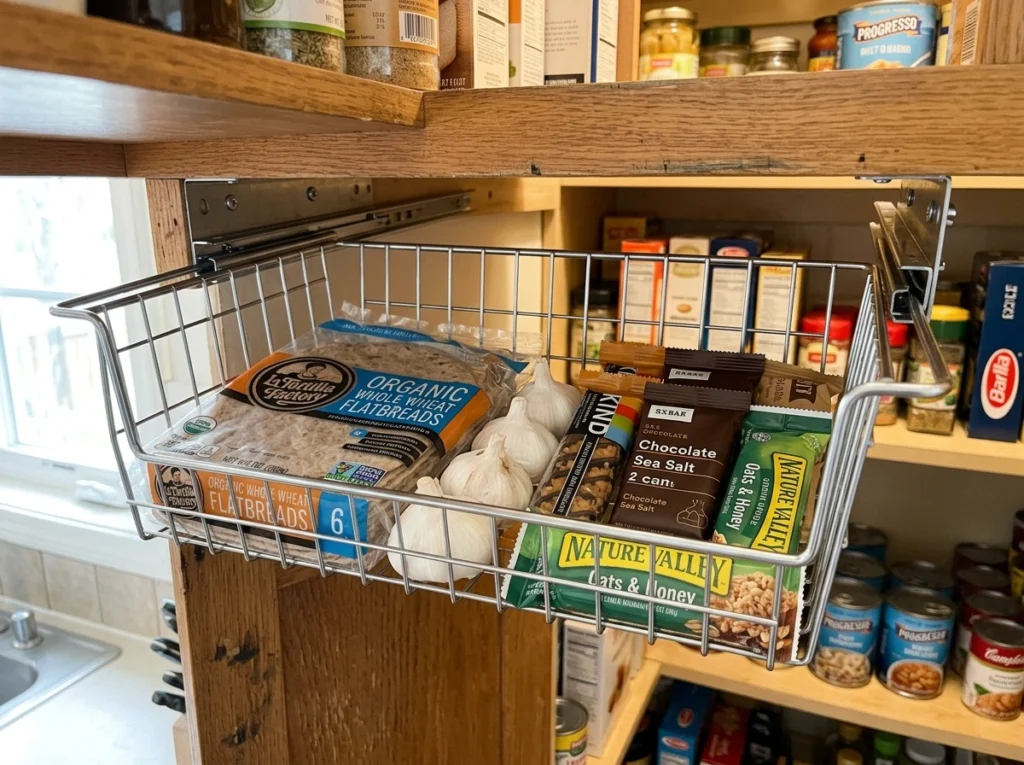
This layout is a brilliant hack for rental kitchens or any space where you cannot easily install new shelves. It utilizes the “dead space” that naturally sits between the top of your food boxes and the shelf above it. By sliding wire baskets directly onto your existing shelves, you create a whole new level of storage that is perfect for flat, awkward items like bread, tortillas, garlic bulbs, or loose snack bars.
The beauty of these slip-on wire baskets is that they require absolutely zero tools or drilling to install. Simply slide the arms over your existing shelf, and you instantly double your usable surface area. I recommend using them for lightweight items only, as putting heavy cans in them can cause cheaper wood or wire shelves to bow in the middle over time. It is a simple, highly effective way to make a small cabinet feel twice as big.
- Estimated Effort/Cost: Easy | $10 – $30
9. The Slide-Out Appliance Garage Layout
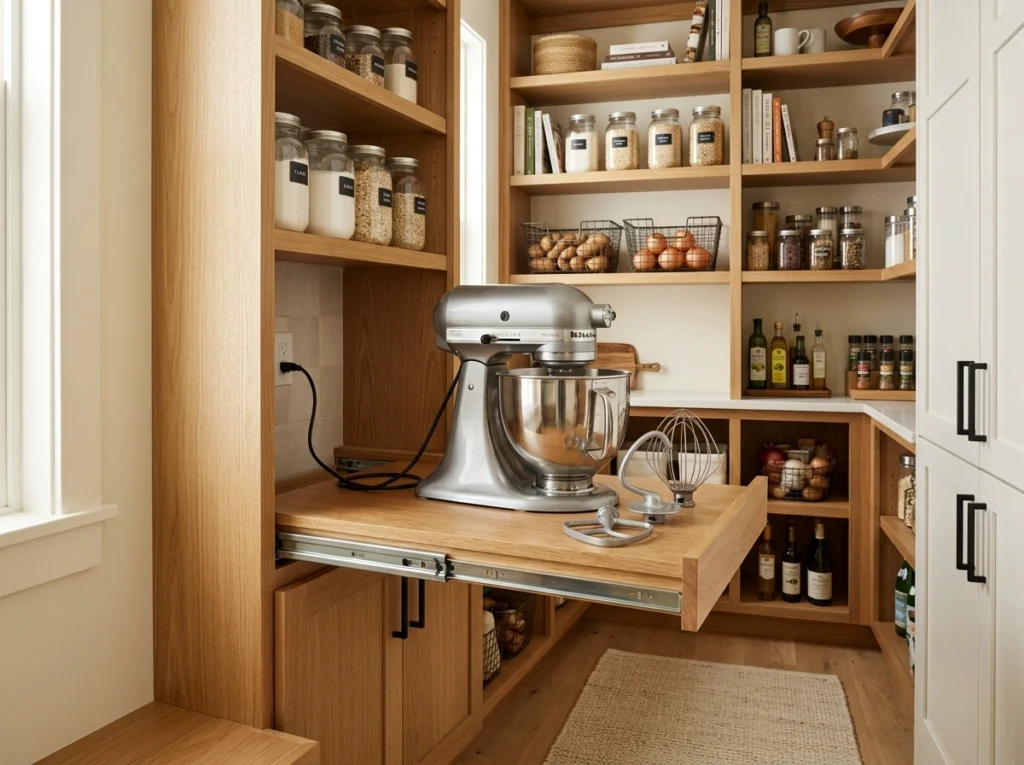
Keeping heavy appliances like stand mixers, blenders, and food processors on your kitchen counters can make the whole room feel cluttered and chaotic. This layout dedicates a wide, sturdy shelf at waist height in your pantry to these appliances, complete with a slide-out tray so you can pull them forward easily. It keeps your main countertops clean and open for meal prep, while still making sure your heavy kitchen tools are accessible without straining your back.
To make this practical, ensure the shelf is built from thick, reinforced wood and fitted with heavy-duty drawer slides that can support the weight of heavy machinery. If possible, plug the appliances into an outlet inside the pantry so you can use them right on their slide-out trays. If you do not have an outlet, just make sure the path from the pantry to your kitchen island is clear of obstacles.
- Estimated Effort/Cost: High | $150 – $400
10. The Lazy Susan Corner Turntable Setup
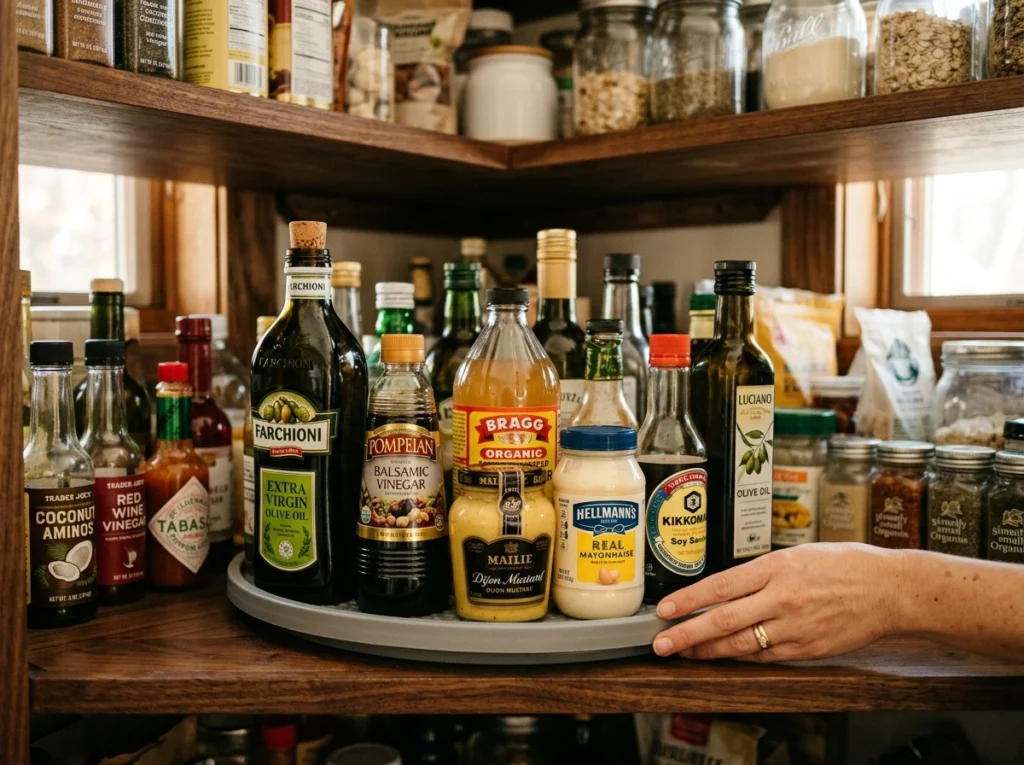
We have all had those moments where we buy a jar of mustard only to realize we already had three hidden at the very back of a deep corner shelf. This layout solves that exact problem by placing large, rotating turntables in every deep corner of your pantry shelves. With a quick spin, everything at the back of the shelf is brought directly to the front, making it incredibly easy to see and grab your oils, vinegars, and condiments.
When shopping for turntables, look for models with a non-slip silicone lining and a small raised edge to keep jars from flying off when you spin them. I always recommend grouping similar items together on each turntable—for example, keep all your hot sauces and condiments on one, and your cooking oils and vinegars on another. It keeps your corners highly functional and saves you from knocked-over bottles.
- Estimated Effort/Cost: Easy | $15 – $40 per turntable
11. The Modular Pegboard Back-Wall Customizer
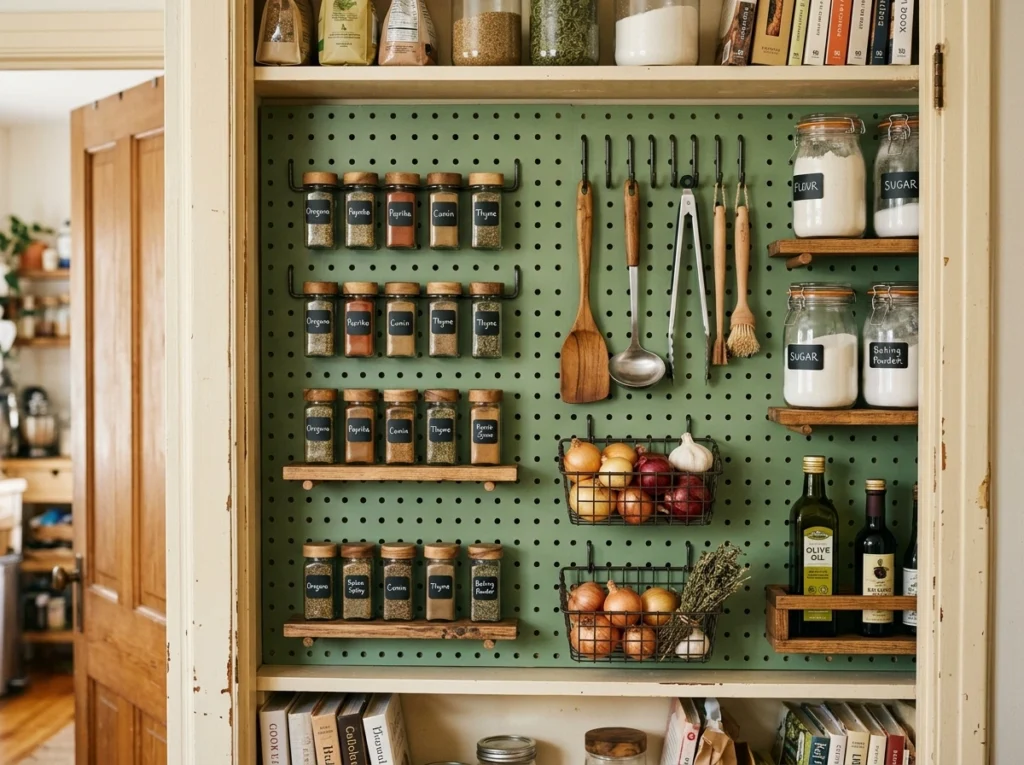
If you love flexibility and want a pantry that can grow and change with your cooking habits, a pegboard wall is the ultimate solution. This layout covers the back wall of a shallow pantry closet with a sturdy, painted wooden or metal pegboard. You can easily move hooks, small shelves, and hanging baskets around whenever you want, making it incredibly easy to store everything from frying pans to mesh bags of onions.
You can purchase basic pegboard panels at any local home improvement store and have them cut to fit your wall space. Paint the pegboard a soft, warm color like muted sage or warm beige to make it feel like a intentional design choice rather than a workshop tool. Use sturdy metal hooks for hanging lightweight pots, colanders, or aprons, and shallow pegboard shelves to hold your spice jars and tea tins.
- Estimated Effort/Cost: Moderate | $50 – $120
12. The Tiered Step-Shelf Spice and Can Organizer
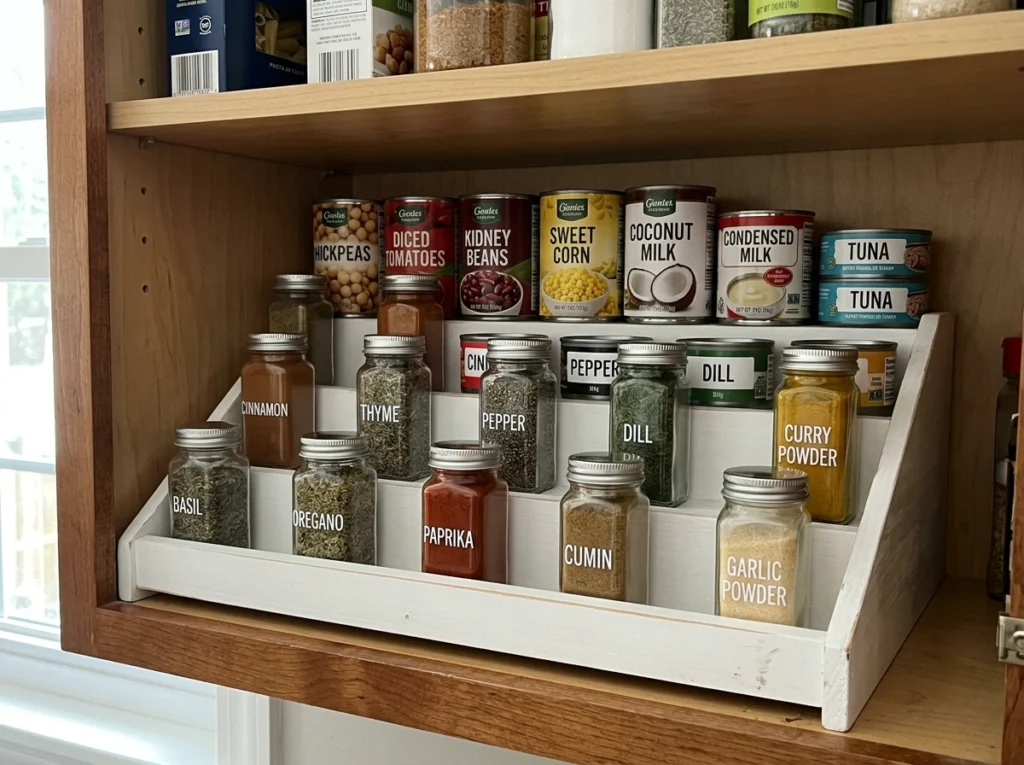
Storing spices and small cans flat on a standard shelf is a recipe for clutter, as the taller items in the front will always block your view of the smaller items in the back. This layout uses tiered, stadium-style step shelves to lift up the back rows, making every single label clearly visible at a single glance. It makes cooking feel incredibly smooth because you never have to pick up five different spice jars to find the cumin.
For the best results, look for expandable step organizers that can stretch to fit the exact width of your cabinet or shelf. I recommend reserving this setup for high-use items like canned tomatoes, beans, and your everyday spices. If you want a cheaper alternative, you can easily build your own simple steps out of scrap wood and paint them to match your shelves.
- Estimated Effort/Cost: Easy | $15 – $35
13. The Vertical Slot Divider for Sheet Pans and Cutting Boards
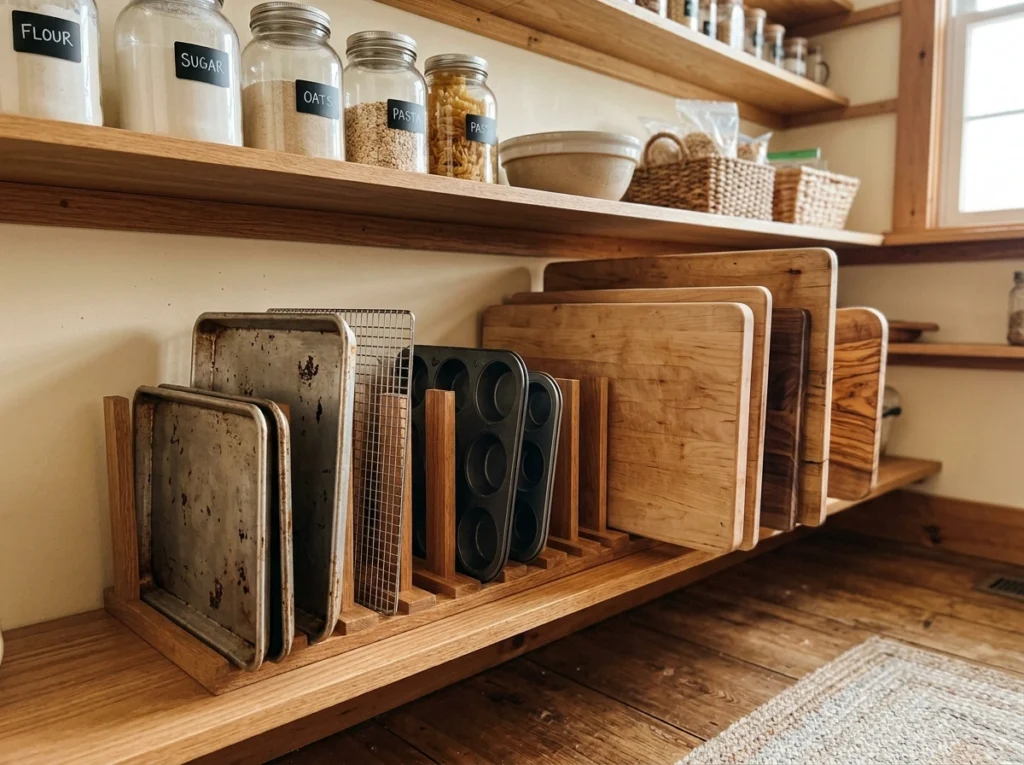
Stacking baking sheets, muffin tins, and heavy wooden cutting boards horizontally is one of the loudest, most annoying storage mistakes you can make in a kitchen. This layout uses vertical wood or metal dividers to store these flat items upright, like books on a library shelf. It allows you to slide out a single cookie sheet quietly and easily without having to lift a heavy, clattering stack of metal pans.
You can easily recreate this by purchasing simple wire plate racks or wooden tension dividers and placing them on a lower pantry shelf. Keep your heaviest cutting boards on the outer edges for stability, and slide your lightweight baking sheets and cooling racks into the middle slots. This single change will make your kitchen feel instantly calmer and more professional.
- Estimated Effort/Cost: Easy | $15 – $35
14. The Breathable Wire Basket Drawers for Produce
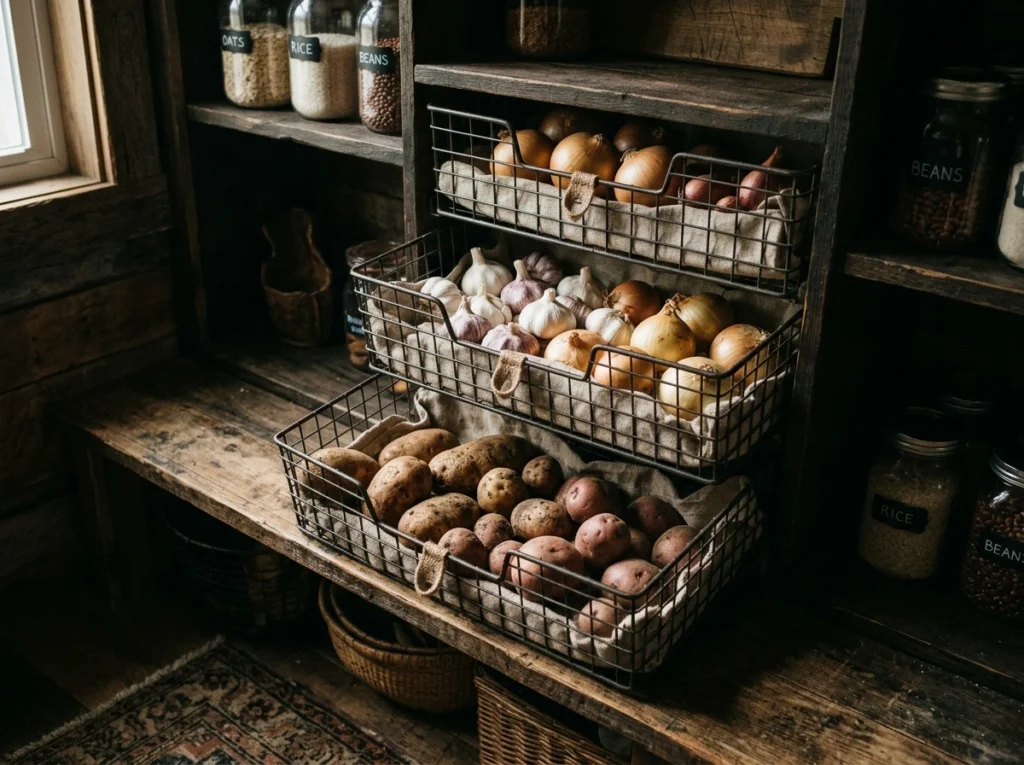
Not all pantry items belong in airtight glass jars or dark cabinets; fresh produce like potatoes, onions, garlic, and squash need cool, dark, well-ventilated spaces to stay fresh. This layout features open, pull-out wire or wicker baskets that allow fresh air to circulate freely around your root vegetables. It looks wonderfully rustic and farmhouse-inspired while keeping your produce from rotting or sprouting prematurely.
When setting up this zone, always place your produce baskets on the absolute lowest, coolest shelves of your pantry, away from direct sunlight. It is highly important to keep your onions and potatoes in separate baskets, as onions release gasses that cause potatoes to spoil much faster. Line the bottom of the wire baskets with simple, washable linen liners to catch any loose onion skins or dirt.
- Estimated Effort/Cost: Easy to Moderate | $30 – $80
15. The Mobile Utility Cart Extension
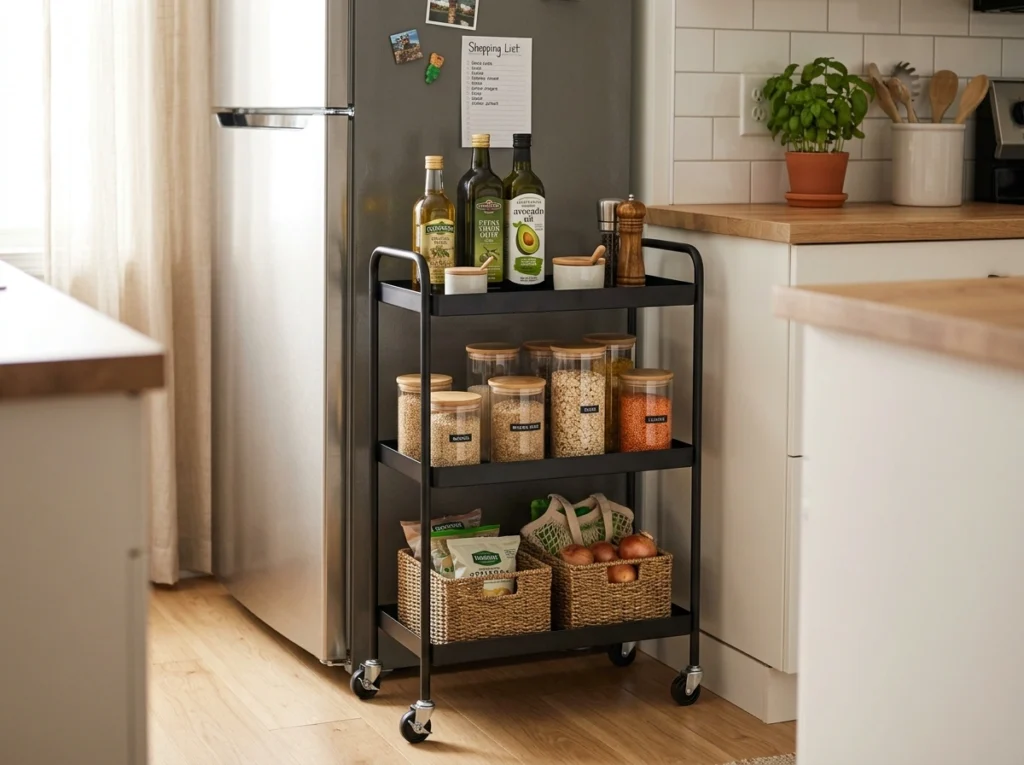
If you have a tiny kitchen with no built-in pantry space at all, a slim, rolling metal cart is your absolute best friend. This layout uses a three-tiered rolling cart to act as a mobile pantry that can be tucked into an unused corner or right next to your fridge, then rolled directly to your stove when you are preparing meals. It feels highly efficient and keeps your active cooking supplies close by without taking up valuable counter space.
Look for a sturdy steel cart with smooth-rolling wheels and shelves deep enough to keep tall bottles from tipping over. Use the top shelf for your everyday cooking oils, salt, and pepper; the middle shelf for frequently used grains and pastas; and the bottom shelf for heavier items like cans. It is an incredibly flexible, budget-friendly solution that works perfectly for apartments or rental homes.
- Estimated Effort/Cost: Easy | $25 – $60
16. The Minimalist Shallow Shelf Cabinet
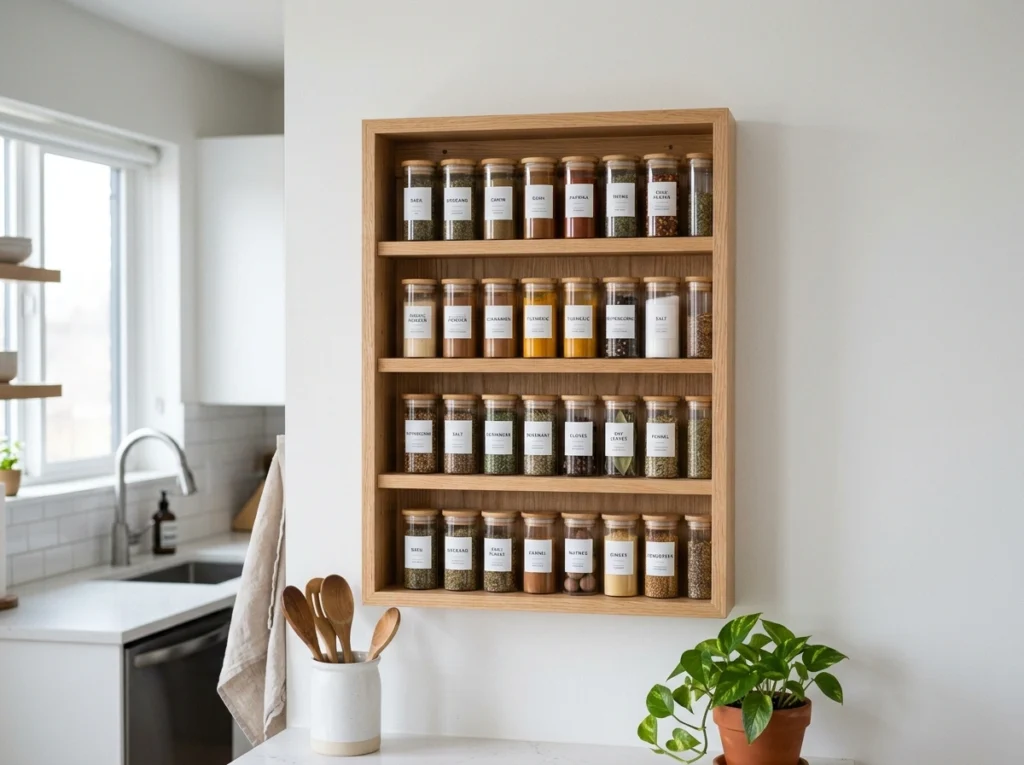
Many people assume that deeper shelves are always better, but super deep shelves actually encourage clutter and make things hard to find. This layout uses very shallow shelves—only about 6 inches deep—inside a shallow cabinet or pantry closet. Because the shelves are so narrow, you can only store items one row deep, meaning every single jar, box, and can is completely visible and accessible with zero digging.
This is an incredibly smart option for narrow hallways, the space behind a kitchen door, or any small blank wall. You can build a simple shallow cabinet using basic pine boards and attach it directly to the wall studs for safety. It keeps your kitchen flow incredibly clean because you can instantly spot what you need, grab it, and put it back in under two seconds.
- Estimated Effort/Cost: Moderate | $60 – $150
Finding Your Perfect Kitchen Flow
At the end of the day, a truly great pantry layout is not about having a picture-perfect space filled with expensive, matching containers. It is about creating a functional, supportive system that makes your daily life easier, reduces cooking stress, and helps you enjoy your time in the kitchen. Your home should work for you, not the other way around.
If you are feeling overwhelmed by all of these ideas, I always recommend starting with just one small area. Try upgrading a single corner shelf with a lazy Susan, or setting up a simple snack basket for your kids on a lower shelf. You will be amazed at how much a small change can improve your daily kitchen flow and bring a sense of calm to your cooking routine.
Which of these pantry layout ideas are you going to try out in your own kitchen first? I would genuinely love to know!
Frequently Asked Questions
How do I choose the best pantry layout for a small kitchen?
For small kitchens, focus on maximizing your vertical space and utilizing dead areas. I highly recommend using an over-the-door organizer for small items and adding under-shelf wire baskets to double your shelf capacity without drilling.
What is the most functional way to organize pantry shelves?
The most functional method is organizing by zone and height. Keep daily essentials at eye level, heavy bulk items and root vegetables on the bottom shelves, and rarely used cooking tools or holiday items on the very top shelves.
How can I design a highly functional pantry on a tight budget?
You do not need custom shelving to stay organized. Save glass jars from pasta sauces to use as clear storage containers, buy simple plastic baskets from a dollar store, and use cheap lazy Susans to keep your deep corners accessible.
How deep should pantry shelves actually be to prevent clutter?
Ideally, pantry shelves should be between 12 to 16 inches deep. Anything deeper makes it too easy for cans and jars to get pushed to the back and forgotten, which quickly leads to clutter and expired food.
How do I keep my pantry organized when my family keeps messing it up?
The secret is making the system incredibly easy to follow. Use clear, simple labels on your baskets so everyone knows exactly where things go, and create a designated, low-level snack zone specifically for kids to grab their own food.