If you have ever tried to prep a full meal while balancing a cutting board over a half-open drawer, you already know the struggle of a tiny rental kitchen. It is incredibly frustrating to feel like you are constantly fighting your space just to make a simple dinner. We often look at those massive, sweeping island kitchens on social media and feel like our small spaces are just something we have to endure until we move. But in my experience, the biggest mistake people make is thinking they need a massive remodel to make their kitchen functional.
With the right apartment kitchen ideas, you can easily turn even the most cramped, single-wall kitchen into a warm, highly functional space that actually feels good to cook in. You do not need thousands of dollars or a landlord who allows major renovations. By focusing on small, smart layout changes, styling tricks, and clever vertical storage, you can gain serious counter space and make your kitchen feel incredibly cozy and organized. Let’s dive into fifteen practical, real-world ways to reclaim every square inch of your apartment kitchen.
1. Magnetic Knife Strips to Free Up Counter Space
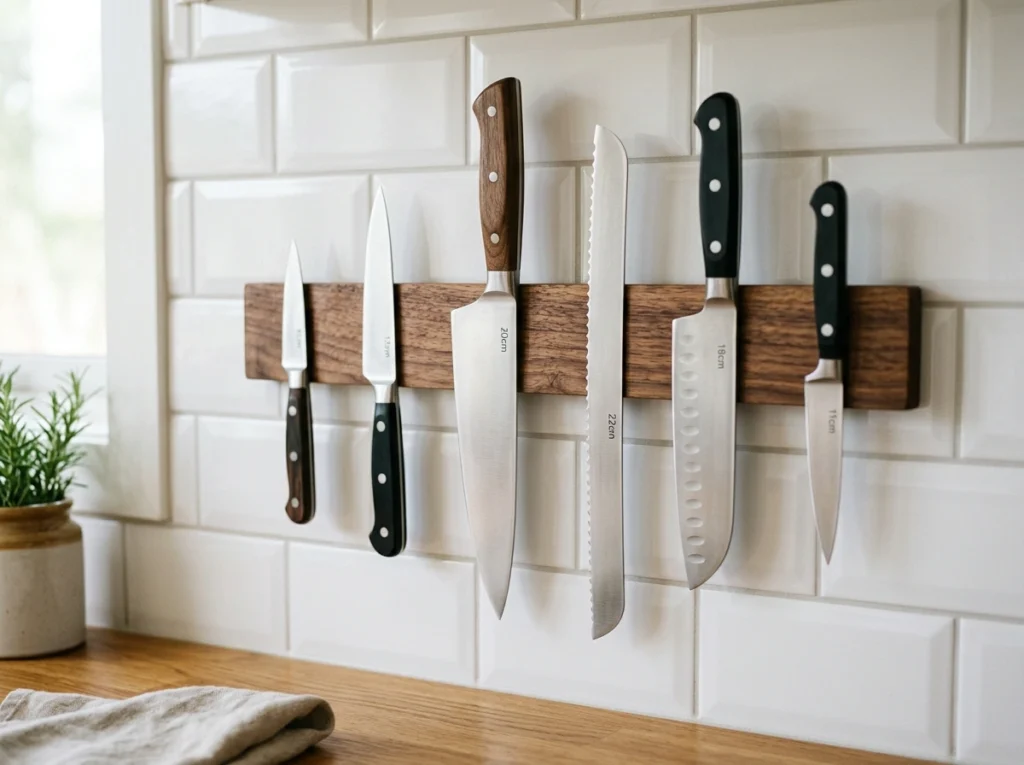
What I personally love about this look is how clean and open it makes your prep area feel. Instead of a bulky wooden knife block gathering dust on your only usable counter, your knives sit securely on the wall, showing off their clean steel shapes against the kitchen tile. It brings a warm, utilitarian kitchen vibe that feels both practical and intentional, making the whole cooking process feel smoother and more relaxed.
To recreate this, look for a heavy-duty magnetic strip that matches your hardware, like walnut wood or matte black steel. If you are renting and cannot drill into the wall, a lot of people overlook the power of heavy-duty mounting tape, which holds these strips perfectly on tile surfaces. Just make sure to mount it near your main prep area but away from high-traffic zones where you might bump it. A good quality magnetic strip usually runs between $15 and $30 and instantly gives you back a crucial foot of counter space.
2. Over-the-Sink Cutting Boards for Extra Prep Area
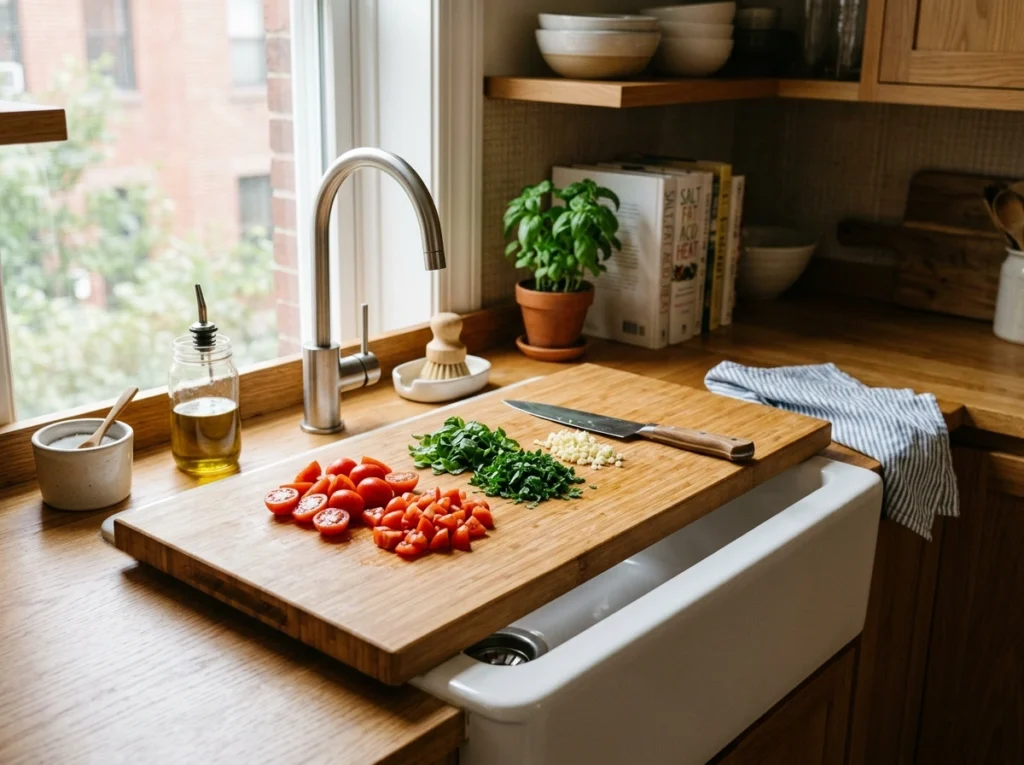
This setup is a total lifesaver when you literally have zero counter space next to your stove. Imagine a beautiful, thick wooden board resting securely over your sink basin, instantly giving you a solid, spacious spot to chop vegetables or set down hot pans. It feels cozy and smart, transforming an otherwise useless empty void into the main workspace of your kitchen while keeping scraps easy to sweep away.
I always recommend starting with a sturdy bamboo or maple board that is slightly wider than your sink opening. Look for boards with built-in grooves to catch juices, or even models that come with collapsible strainers built right into the wood. The common mistake here is buying a board that is too thin, which can slide around and feel unsafe while chopping. A thick, high-quality over-the-sink board costs around $25 to $45 and makes your kitchen prep feel infinitely more organized.
3. Rolling Utility Carts as Flexible Work Stations

There is something so comforting and practical about a sturdy rolling cart tucked neatly into a kitchen corner. It holds your heavy stand mixer, your jars of flour, and maybe a few fresh dish towels, looking like a little pantry on wheels. When you are ready to cook, you simply wheel it right next to your stove to use as an extra helper, then slide it back out of the way when you are done.
When choosing a cart, opt for one with a solid wood or stainless steel top so you can use it as a secondary cutting or serving station. Metal utility carts with three tiers are highly affordable—often under $35—and fit perfectly into narrow gaps between your fridge and the wall. Make sure to get one with locking wheels so it doesn’t roll away while you are trying to mix ingredients, which is a mistake that ruins the utility of the cart.
4. Hanging Pot Racks to Clear Out Deep Cabinets

We have all experienced the loud, metal-on-metal clattering of trying to pull a skillet out from the bottom of a dark cabinet stack. Hanging your pots and pans on the wall or from a low ceiling rack completely changes the feel of your kitchen, giving it a cozy, rustic restaurant look. The warm copper, brass, or seasoned cast iron textures add a beautiful, lived-in character to the room while making cooking feel completely effortless.
If you are allowed to drill, a wall-mounted pot rail with S-hooks is incredibly sturdy and lets you display your cookware like art. For renters, you can hang a heavy-duty tension rod inside a deep window frame or use a sturdy pegboard mounted with heavy-duty adhesive hooks. Avoid hanging heavy cast iron on weak drywall; always locate a wall stud or stick to lighter aluminum pans for safety. A basic metal rail and hook system will set you back about $20 to $40.
5. Lazy Susans for Tricky Corner Cabinets

A lot of people overlook the deep, dark corners of their corner cabinets, turning them into a graveyard for half-used spices and expired cans. Placing a simple wooden or clear plastic turntable on those shelves brings everything right to your fingertips with a quick, satisfying spin. It makes opening your cabinets feel orderly and calm, rather than chaotic and stressful.
I recommend buying double-tiered turntables to maximize the vertical space inside taller shelves. Use them for your oils, vinegars, and spices near the stove, or for cleaning supplies under the sink. Make sure to measure your cabinet depth before purchasing to ensure the circle can spin freely without hitting the door. A simple plastic or bamboo lazy Susan costs around $12 to $25 and saves you from ever having to dig around in the dark again.
6. Under-Shelf Stemware and Mug Hooks
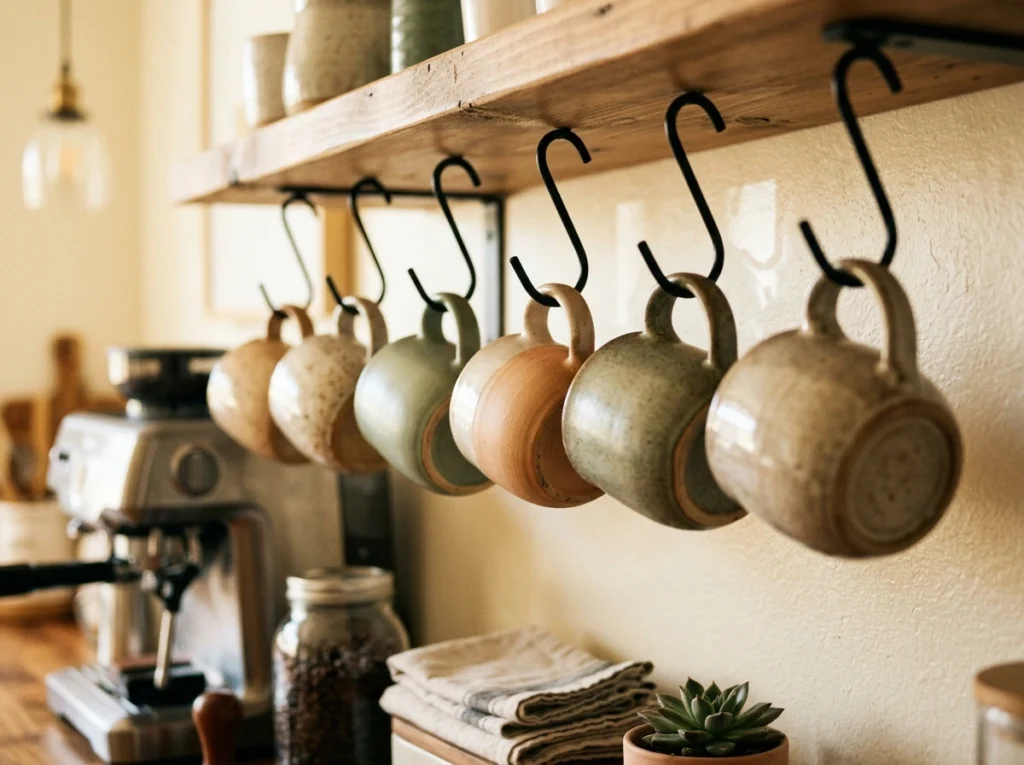
This is such a cozy way to utilize that empty, unused air space directly beneath your upper cabinets or shelves. Your favorite ceramic mugs hang neatly in a row, showing off their unique glazes and handmade textures, while wine glasses slide into slim metal tracks underneath. It feels like your favorite local coffee shop, keeping your everyday mugs within arm’s reach while freeing up entire cabinet shelves for food storage.
Look for slide-on under-cabinet metal racks that require zero drilling and simply slip over your existing cabinet shelves. The main mistake to avoid is overloading these racks with massive, heavy mugs that can cause the shelf to bow over time. Stick to your four or five daily favorites and keep the heavy stoneware elsewhere. You can find these handy slide-on racks for less than $10 to $15 online or at local home goods stores.
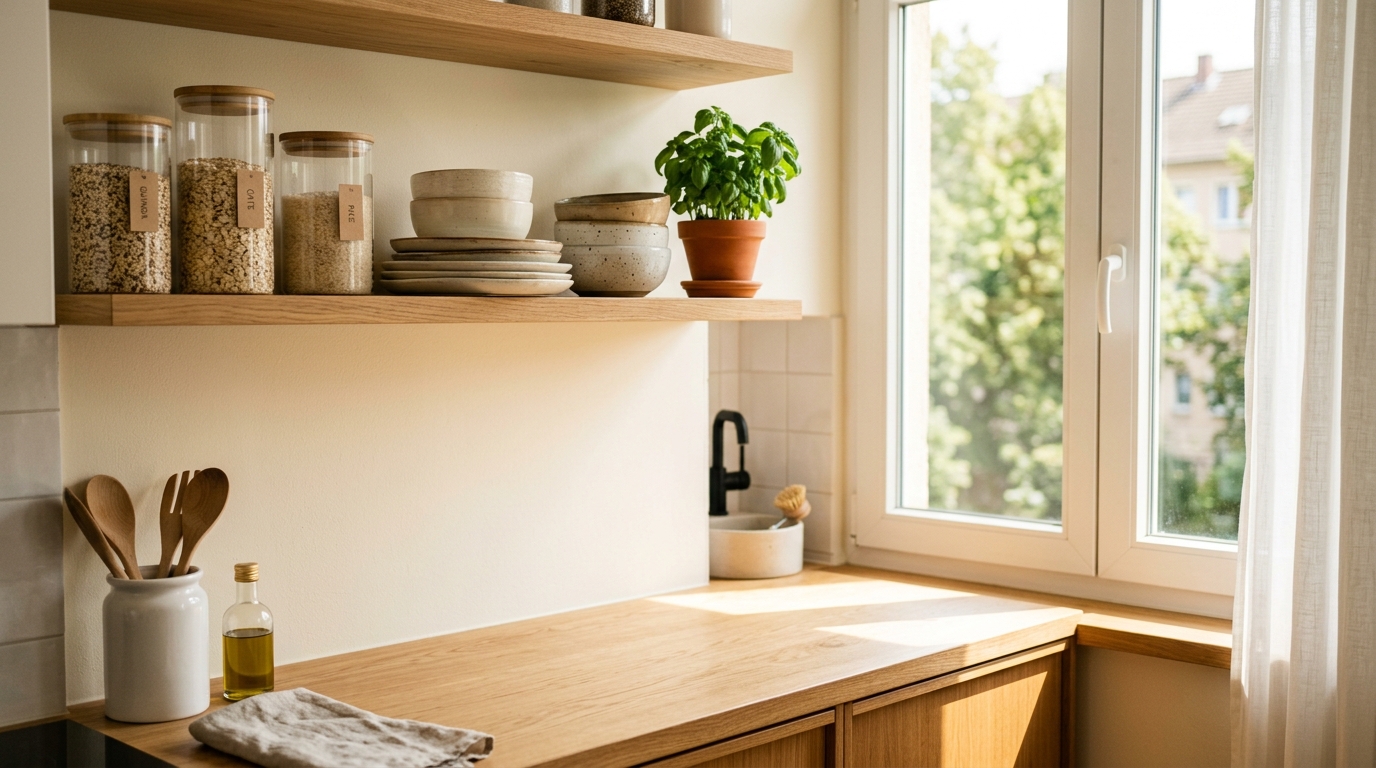
7. Open Floating Shelves to Replace Heavy Cabinets
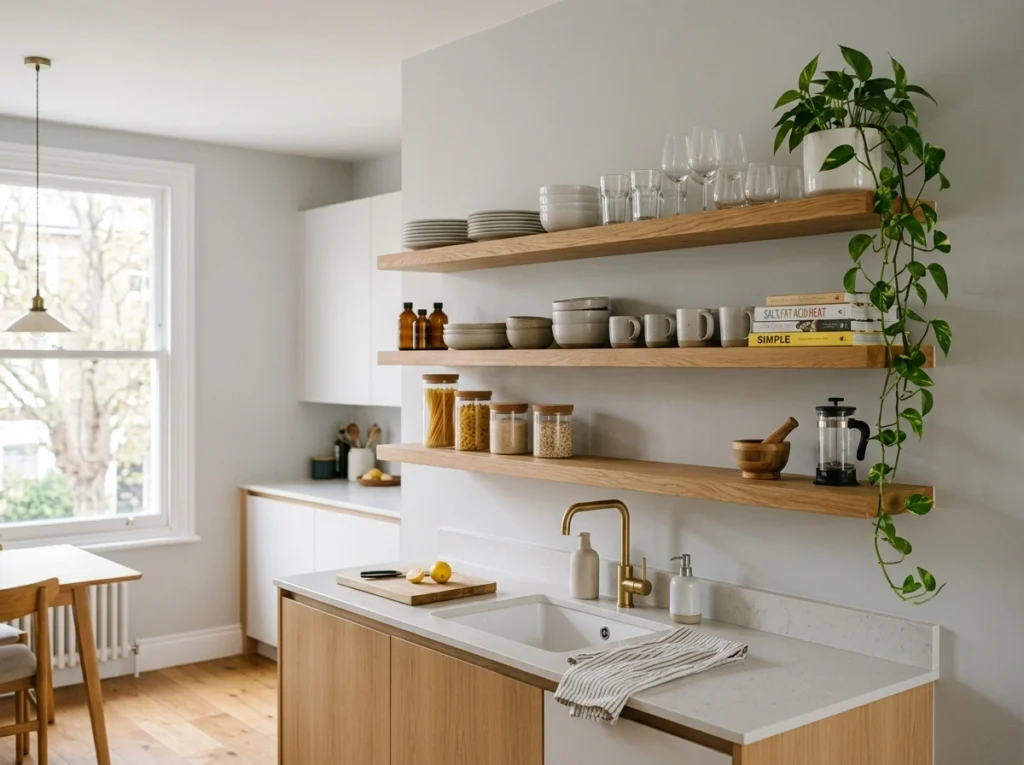
Replacing bulky, dark upper cabinets with thick, warm wooden floating shelves instantly makes a small kitchen feel twice as large and bright. The natural light from your windows can actually reach the back corners of the room, highlighting your pretty glass jars, plates, and small green plants. It creates a breezy, open environment that makes your morning coffee routine feel calm and spacious.
This works especially well if you are willing to store your less aesthetic, plastic storage containers in lower cabinets and keep your prettiest everyday dishes out on display. For a rental-safe option, you can simply remove the cabinet doors of your existing upper cabinets to get that open, airy feel without damaging the walls. If installing new shelves, ensure you use sturdy brackets anchored into studs, which usually costs around $30 to $60 for a beautiful set of wooden shelves.
8. Cabinet Door Organizers for Hidden Storage
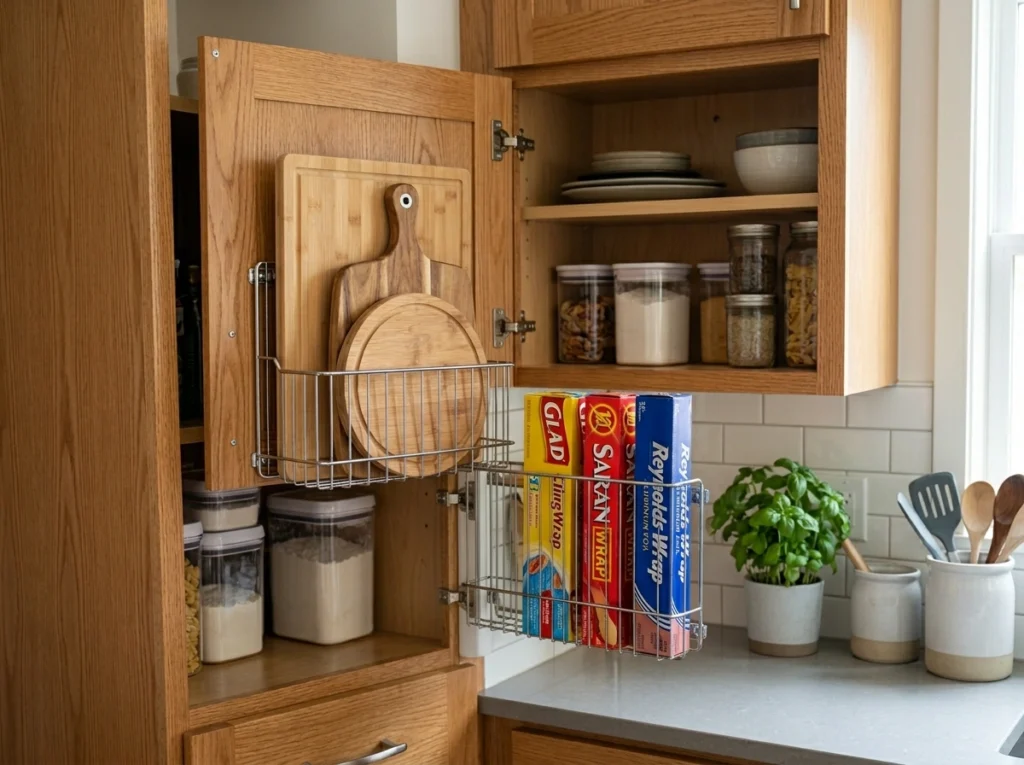
The back of your cabinet doors is prime, unused real estate that is perfect for tucking away those awkward, clutter-prone items. Hanging a slim metal basket or a row of small hooks inside your pantry door keeps cutting boards, pot lids, and plastic wrap neatly out of sight but incredibly easy to grab. It keeps your main kitchen area looking completely tidy while using every single square inch of hidden space.
You can find inexpensive over-the-cabinet-door organizers made of thin wire that require no installation at all. A common mistake is buying organizers that are too deep, which prevents the cabinet door from closing completely against the frame. Measure the clearance between your internal shelves and the door before buying. These simple hanging baskets are incredibly affordable, usually costing between $8 and $20.
9. Slim Pull-Out Pantries for Awkward Gaps
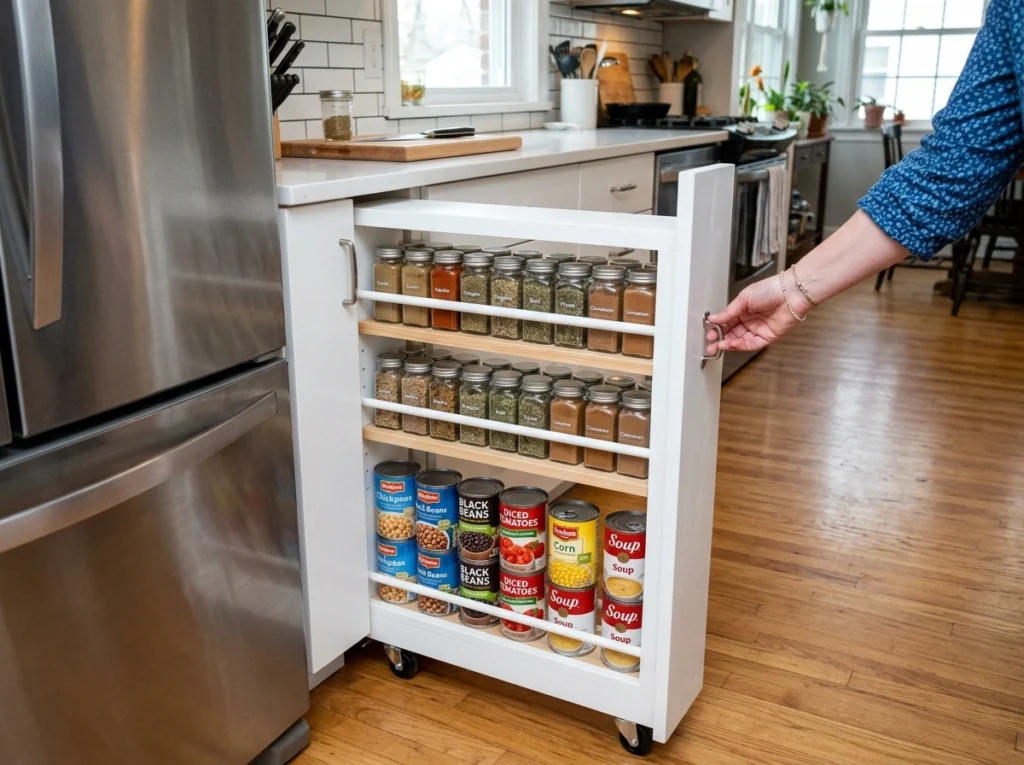
Almost every apartment kitchen has that one awkward, narrow gap between the refrigerator and the counter or wall that just collects dust. Filling that gap with a slim, slide-out pantry tower on wheels feels like discovering a secret storage room. It holds your spices, canned goods, and baking supplies in a vertical stack, disappearing into the gap when you push it closed.
These slim rolling pantry carts are typically only five to six inches wide, making them perfect for those tight spaces. When assembling one, make sure to place heavier cans and bottles on the very bottom shelf to prevent the cart from tipping over when you pull it out. A plastic or metal slide-out pantry cart is a brilliant budget solution, generally costing around $25 to $45.
10. Pegboards for Endless Layout Customization

There is a wonderful, rustic simplicity to a kitchen pegboard that makes your space feel incredibly personal and creative. Hanging a large wooden or metal pegboard on an empty wall allows you to hang pots, strainers, wooden spoons, and even small herb pots exactly where you want them. It keeps your tools completely visible and accessible, turning your functional kitchen gear into a warm, decorative focal point.
You can paint a basic pegboard to match your kitchen walls so it blends in smoothly, or opt for a warm, natural plywood board for a more modern Scandinavian look. Use a mix of straight hooks, loop hooks, and small baskets to hold different items. The biggest mistake is not securing the pegboard with spacers behind it, which you need so the hooks can actually slip into the holes. A full pegboard setup with accessories runs about $30 to $50.
11. Custom Toe-Kick Drawers for Bottom-Level Storage
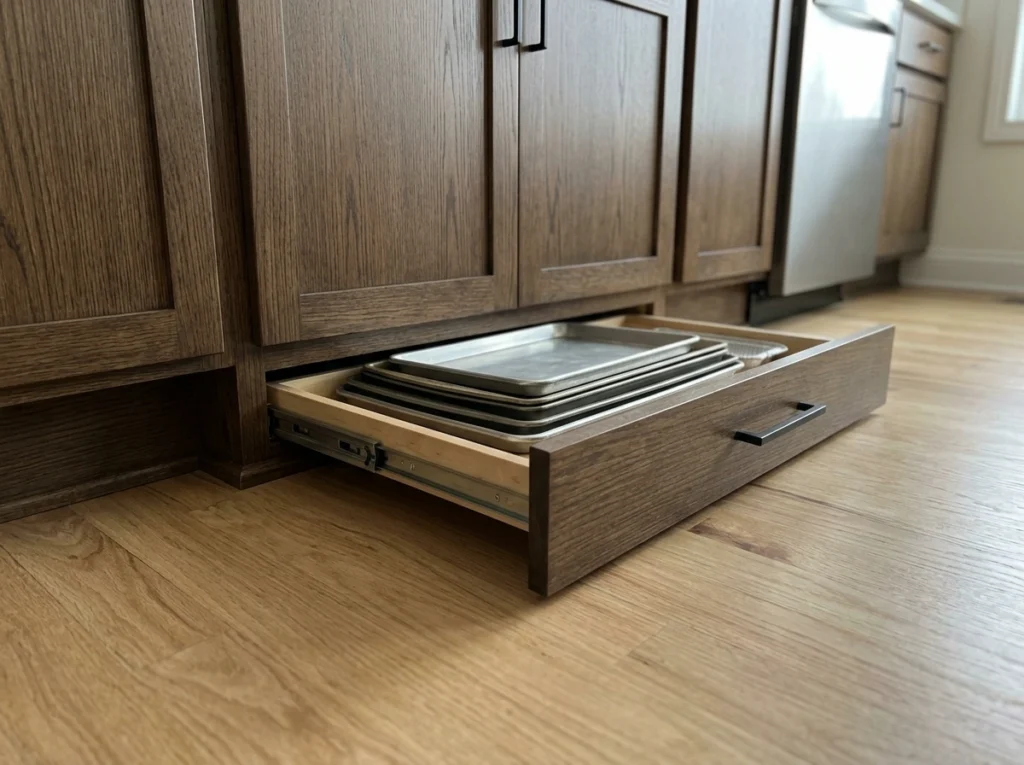
This is a genius, hidden storage trick that utilizes the very bottom few inches of your cabinets, right above the floor. Installing flat, push-to-open drawers in your cabinet toe-kicks is the ultimate way to maximize space that is normally completely walled off and wasted. It is the perfect, out-of-sight spot to store flat items like baking sheets, pizza stones, muffin tins, or extra dish towels.
While this is a slightly more advanced project, it is highly doable with pre-made toe-kick drawer kits or simple drawer slides and a piece of matching wood trim. This works especially well if you plan to stay in your apartment long-term or own your space, as it adds incredible utility without taking up an inch of room space. A DIY toe-kick drawer setup can be completed for around $40 to $80 in materials.
12. Stackable Cabinet Risers to Double Shelf Space
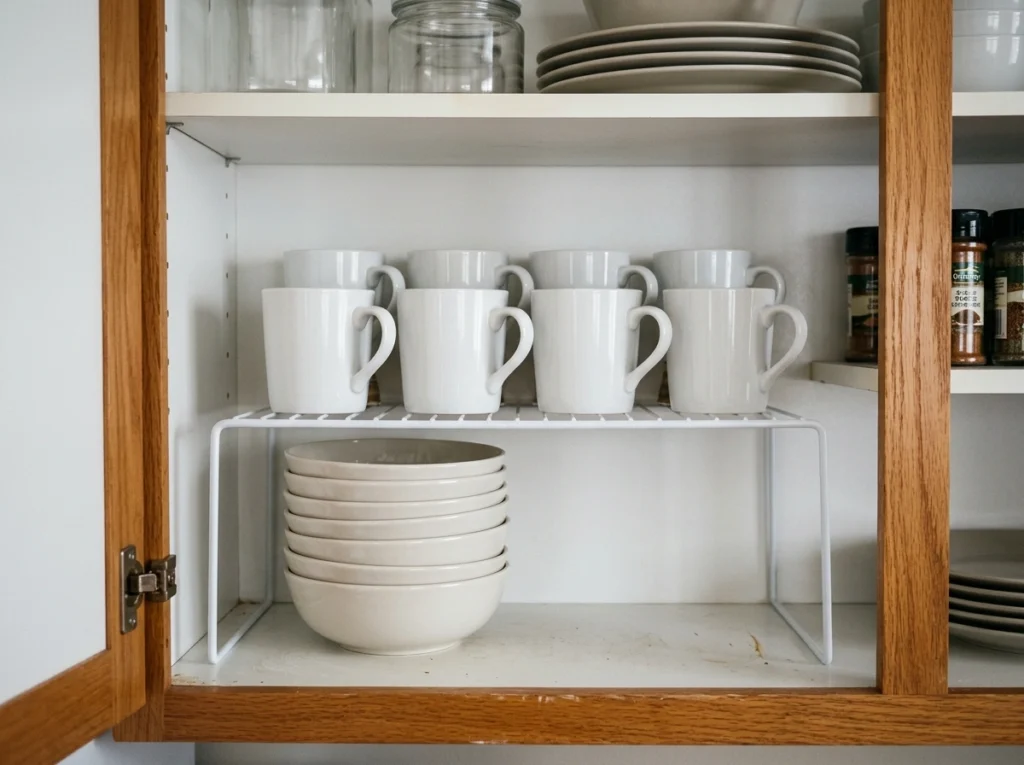
Opening a cabinet only to see a single stack of bowls with eight inches of empty, wasted air above them is a major space drain. Placing metal wire or bamboo shelf risers inside your cabinets instantly doubles your storage capacity, letting you stack plates on the bottom and cups on top. It makes your cabinets look beautifully organized and stops you from having to lift heavy bowls just to get a plate underneath.
I always recommend starting with solid, non-slip wire risers or beautiful bamboo shelves that can stand alone without sliding. Avoid buying flimsy plastic risers that sag under the weight of heavy ceramic plates, as this can lead to chipped dishes. You can find high-quality, adjustable shelf risers in packs of two for about $15 to $25, making this one of the cheapest and easiest upgrades you can make.
13. Fold-Down Wall Tables for Space-Saving Dining
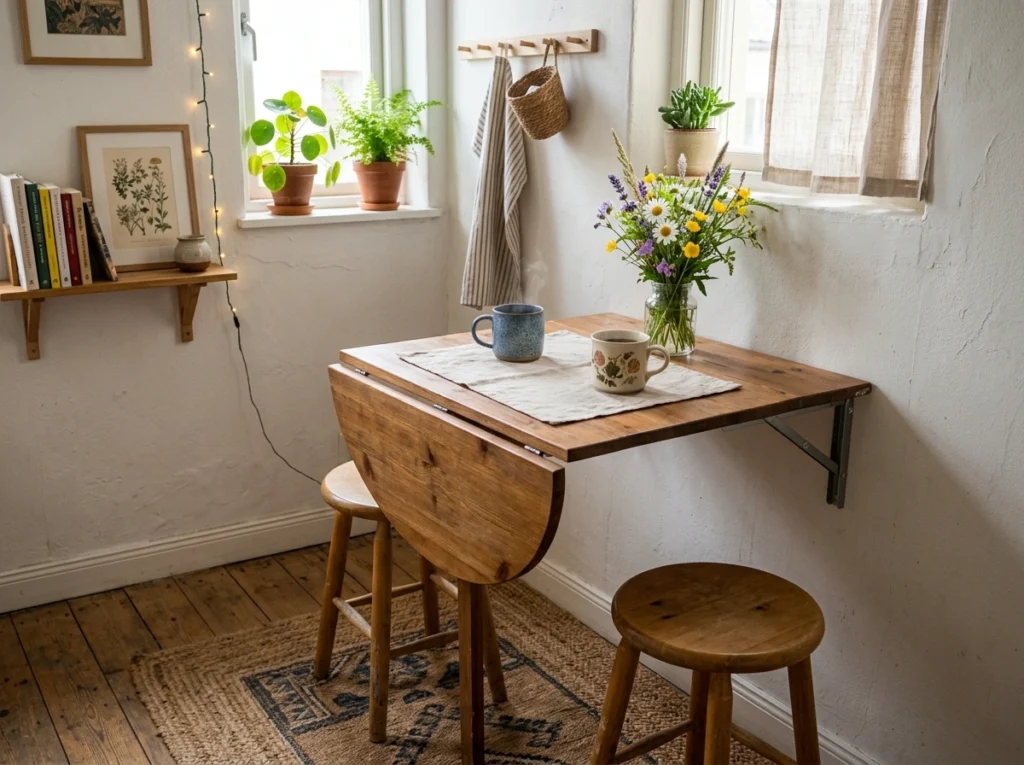
If your apartment kitchen is too small for a dining table, a wooden drop-leaf table mounted to the wall is an incredibly smart, cozy solution. When folded down, it sits flat against the wall, taking up zero floor space while you cook. When you are ready to eat, have a morning coffee, or do some remote work, you simply lift it up and lock it into place to create a gorgeous, sturdy two-person bar.
To style this beautifully, pair it with two lightweight wooden stools that can easily slide under the folded table or double as plant stands when not in use. Ensure you mount the table brackets securely into wall studs, as a drop-leaf table needs to support both its own weight and your dining setup. A simple, beautiful wooden fold-down wall table costs around $40 to $90.
14. Clear Stackable Canisters for Pantry Efficiency
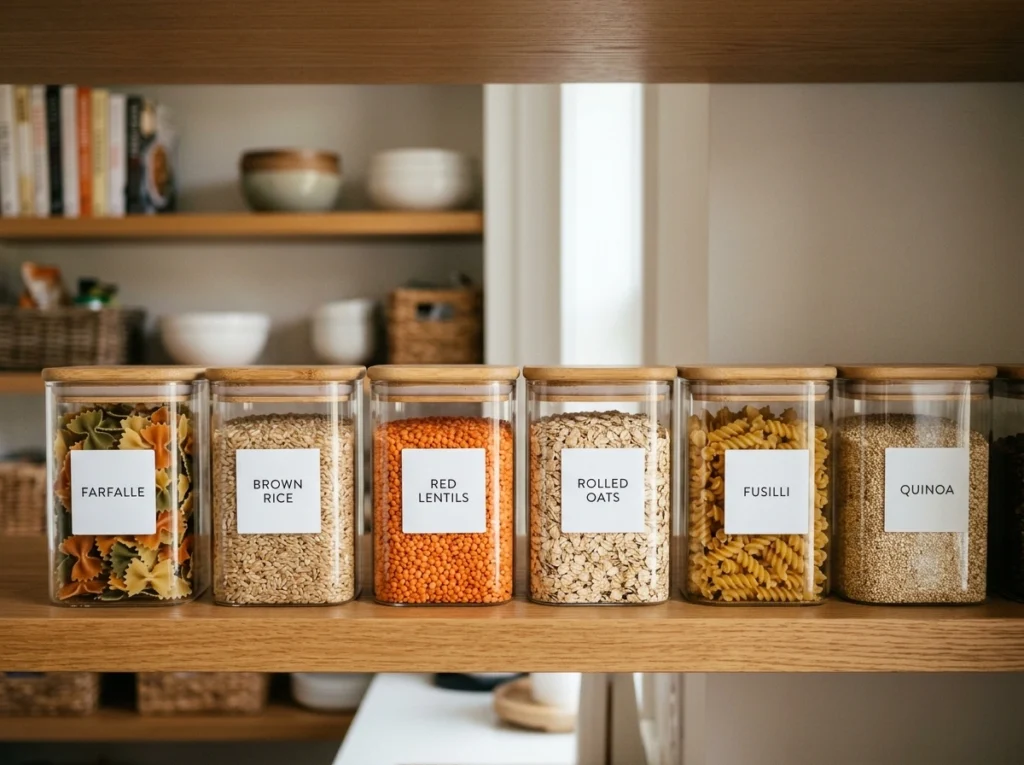
Replacing mismatched, bulky cardboard food boxes with sleek, clear glass or BPA-free plastic canisters makes your pantry look incredibly tidy and calm. Seeing your colorful pastas, grains, oats, and dried beans lined up in clean, airtight jars brings a lovely, natural texture to your shelves. It also makes it instantly clear when you are running low on kitchen staples, saving you money on your grocery trips.
Look for square or rectangular canisters rather than round ones, as square shapes fit together tightly without wasting precious corner space on your shelves. Opt for canisters with airtight silicone seals on the lids to keep your food fresh for months. A set of five or six high-quality stackable canisters usually ranges from $20 to $40 and completely transforms how organized your pantry feels.
15. Stylish Baskets for the Space Above Cabinets
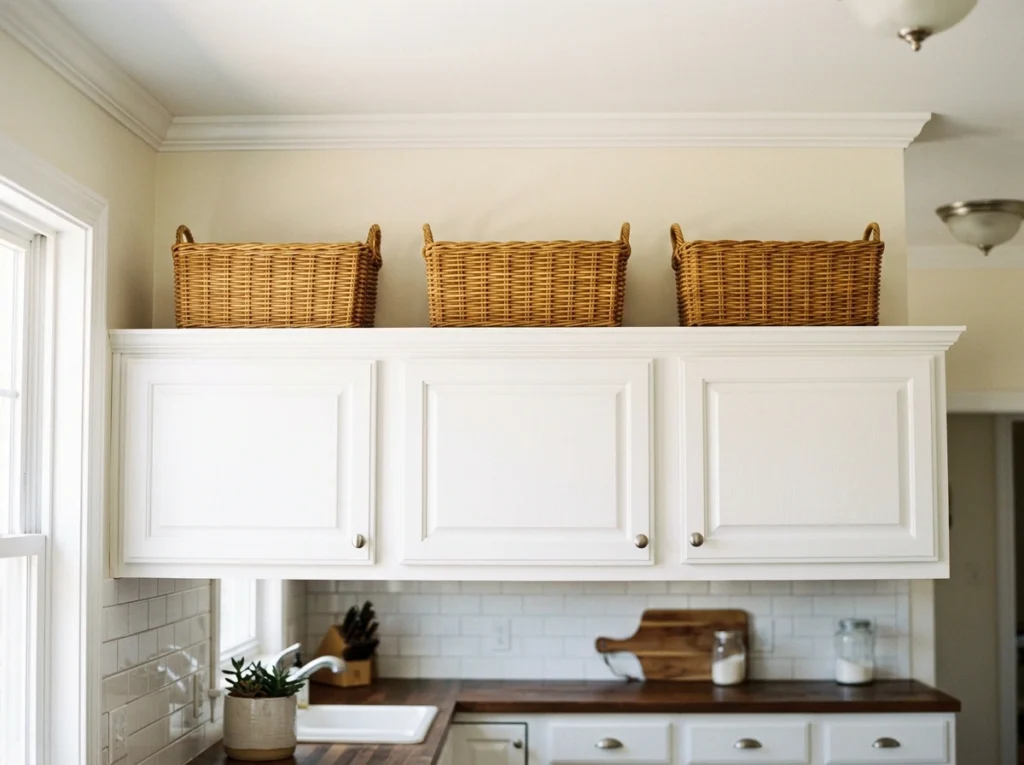
That dusty, awkward gap between the top of your kitchen cabinets and the ceiling is often left completely bare or piled with random clutter. Placing a neat row of matching wicker, wire, or canvas baskets up there looks incredibly intentional and tidy, pulling the look of the whole kitchen together. It is the absolute best spot to store things you only use occasionally, like holiday platters, extra paper towels, or specialty baking molds.
Choose sturdy baskets with handles so they are easy to pull down safely when you need them. I always recommend using wire baskets with fabric liners to keep dust off your stored items, which is a major lifesaver for hard-to-reach areas. A set of three matching woven baskets costs around $25 to $50 and turns a massive dead space into highly functional, beautiful storage.
Conclusion
At the end of the day, your apartment kitchen does not need to be massive to be a place where you love to spend time. Great style and real functionality are not about having expensive custom cabinets or giant quartz countertops; they are about making smart, creative choices with the space you actually have right now. By trying out just one or two of these simple ideas—like adding a magnetic knife strip or putting some beautiful baskets above your cabinets—you can make a huge difference in how your kitchen feels to cook in. Start small, focus on what makes your daily routine easier, and enjoy the process of making your space your own.
Which of these apartment kitchen ideas are you planning to try out first in your own home? I would genuinely love to know, so feel free to leave a comment below!
Frequently Asked Questions
How do I make my small apartment kitchen look more open and spacious?
The best way to make a cramped kitchen feel wider is to clear off your countertops completely. Utilize wall space with magnetic strips, hang your pots on a rail, and use light, neutral colors for your canisters and dish towels to reflect natural light around the room.
How can I get more counter space without remodeling?
You can easily extend your prep area by using an over-the-sink cutting board or placing a large, sturdy wooden noodle board over your stove burners when they aren’t in use. Adding a rolling utility cart that sits level with your counters also gives you a mobile prep station.
Are open shelves a good idea for a small rental kitchen?
Yes, open shelves are fantastic for making a small kitchen feel bright and airy. To make this rental-safe, you can simply unscrew the cabinet doors from your existing upper cabinets and store them safely away, exposing the shelves inside without damaging the walls.
How can I organize a tiny kitchen pantry on a tight budget?
You can double your pantry space for very little money by using stackable wire shelf risers and clear, square plastic canisters. This allows you to utilize the vertical space that is normally wasted in tall shelves, keeping everything organized and visible.
What is the best way to store pot lids in a small kitchen?
Pot lids are notoriously difficult to stack neatly. You can easily organize them by mounting a simple, inexpensive wire rack or adhesive plastic hooks to the inside of your cabinet doors, keeping the lids flat, silent, and completely out of the way.