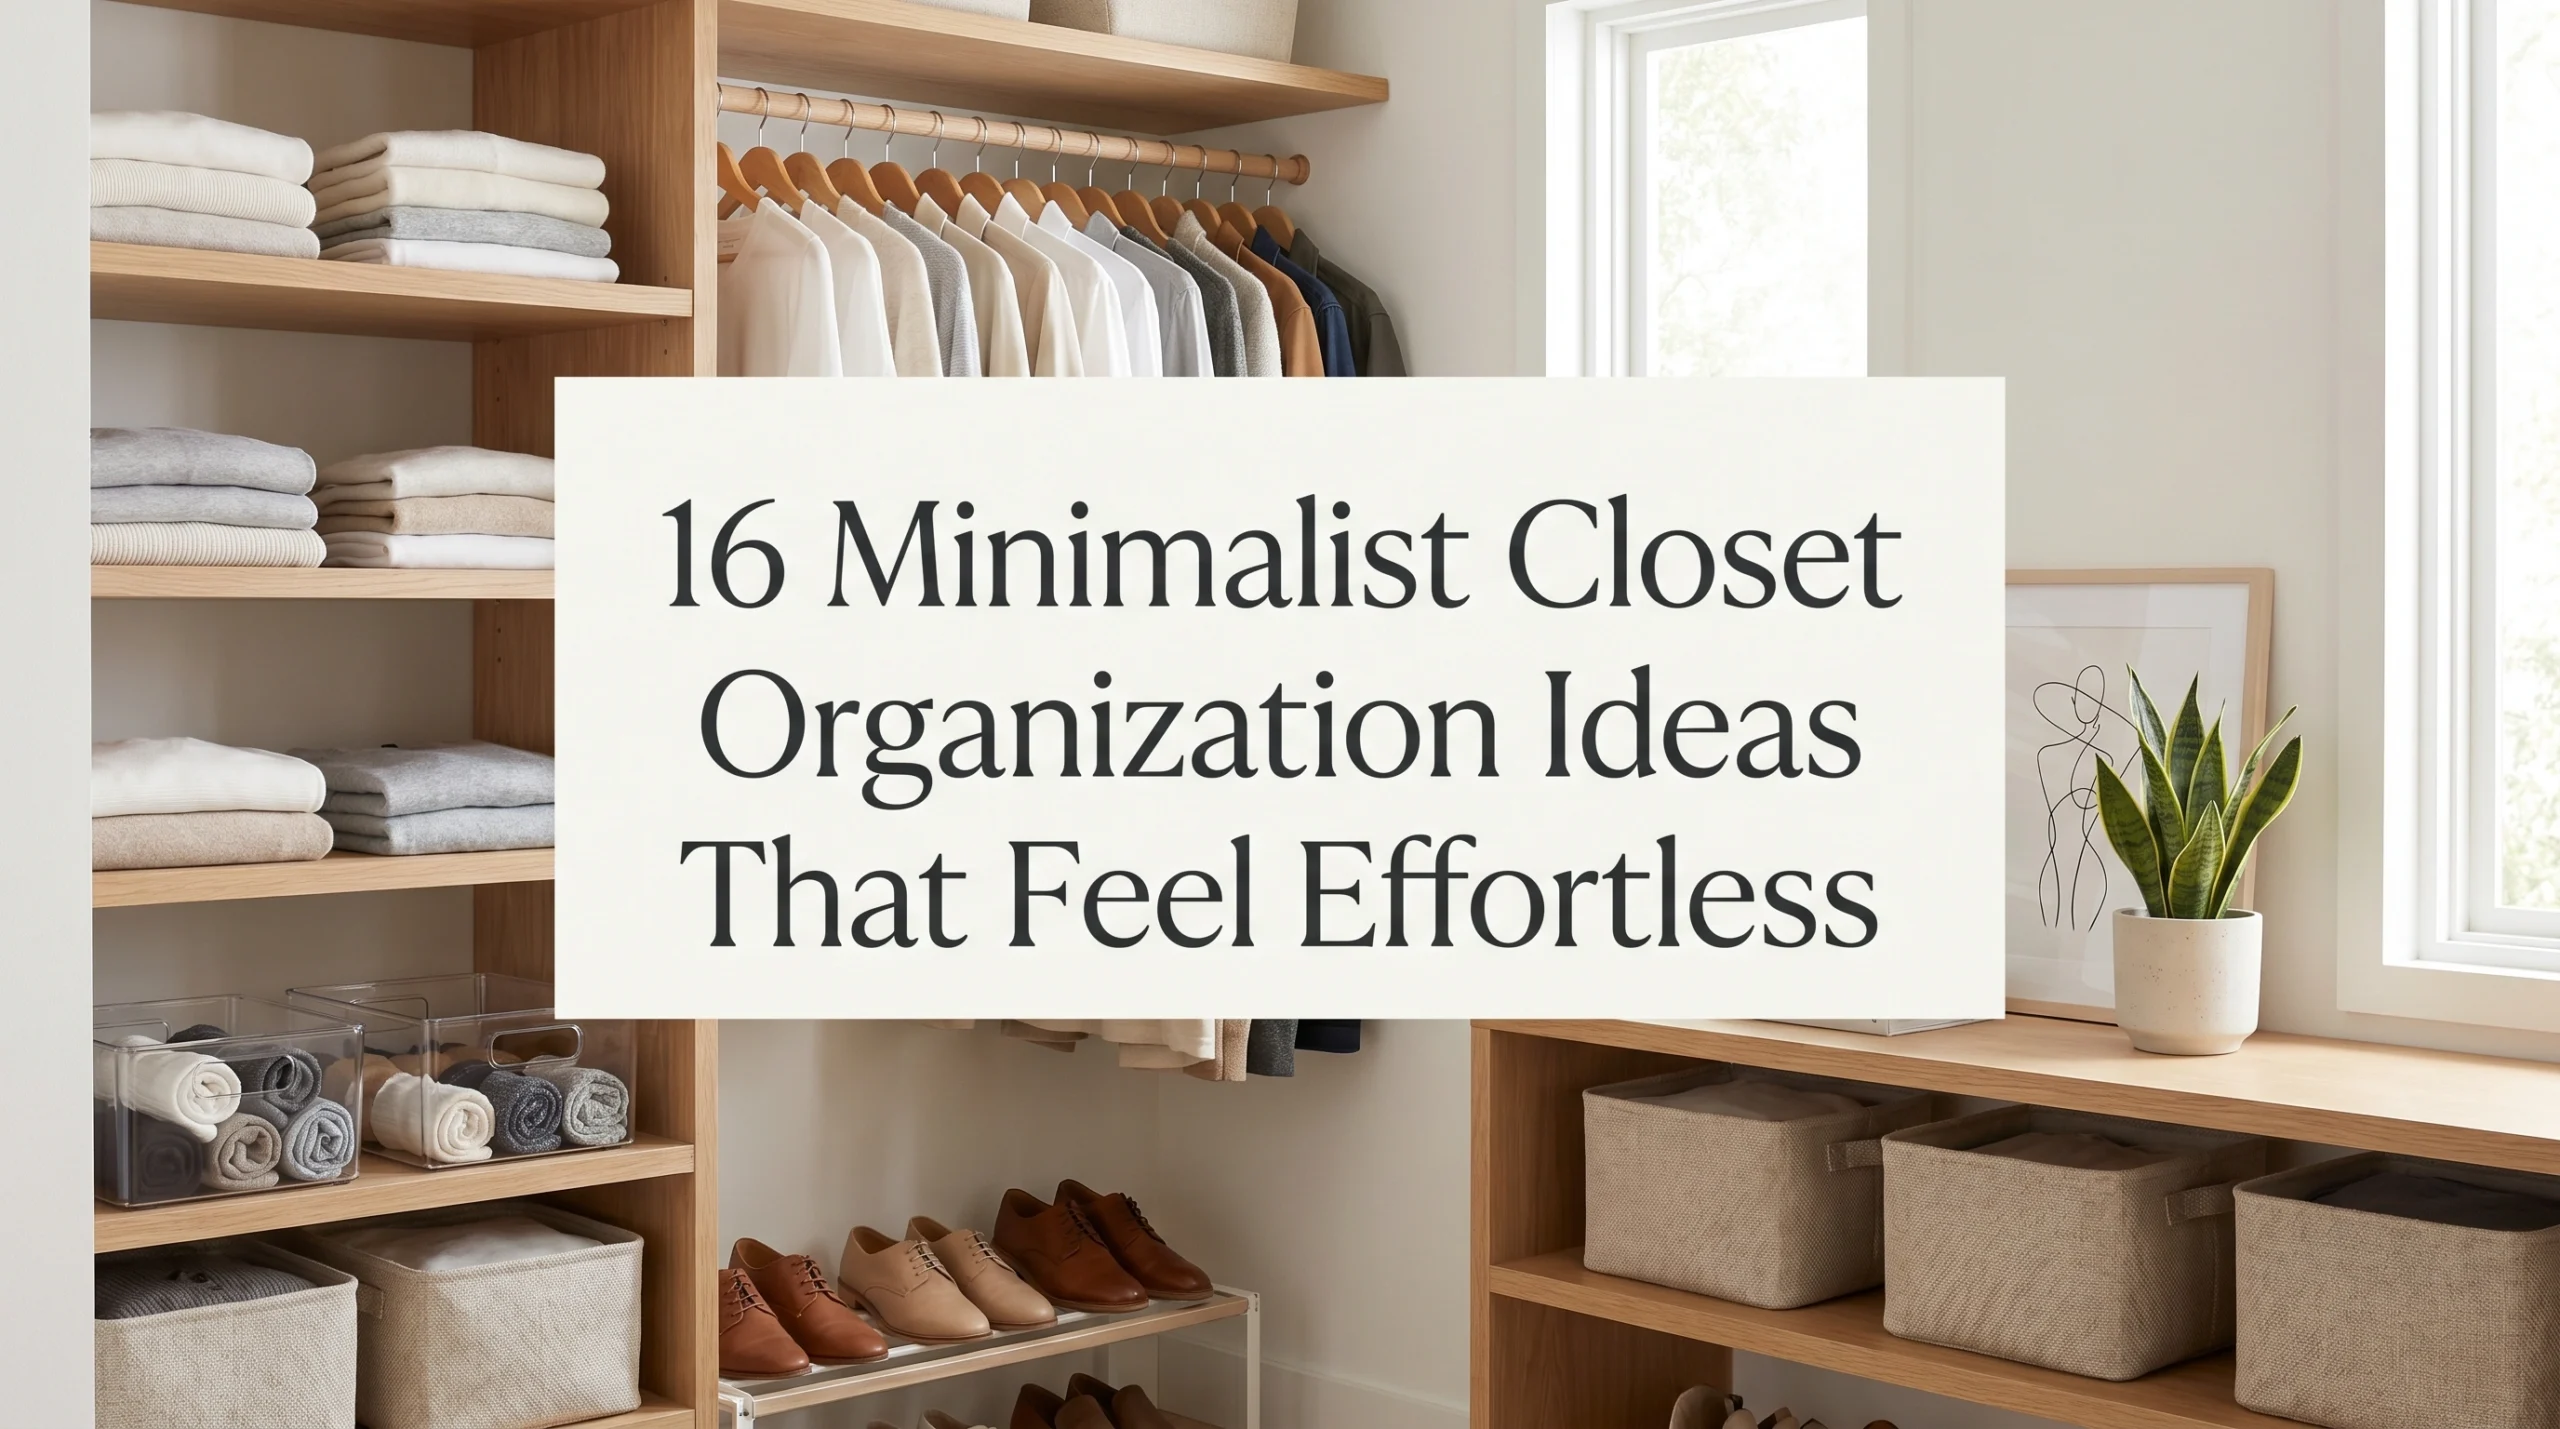
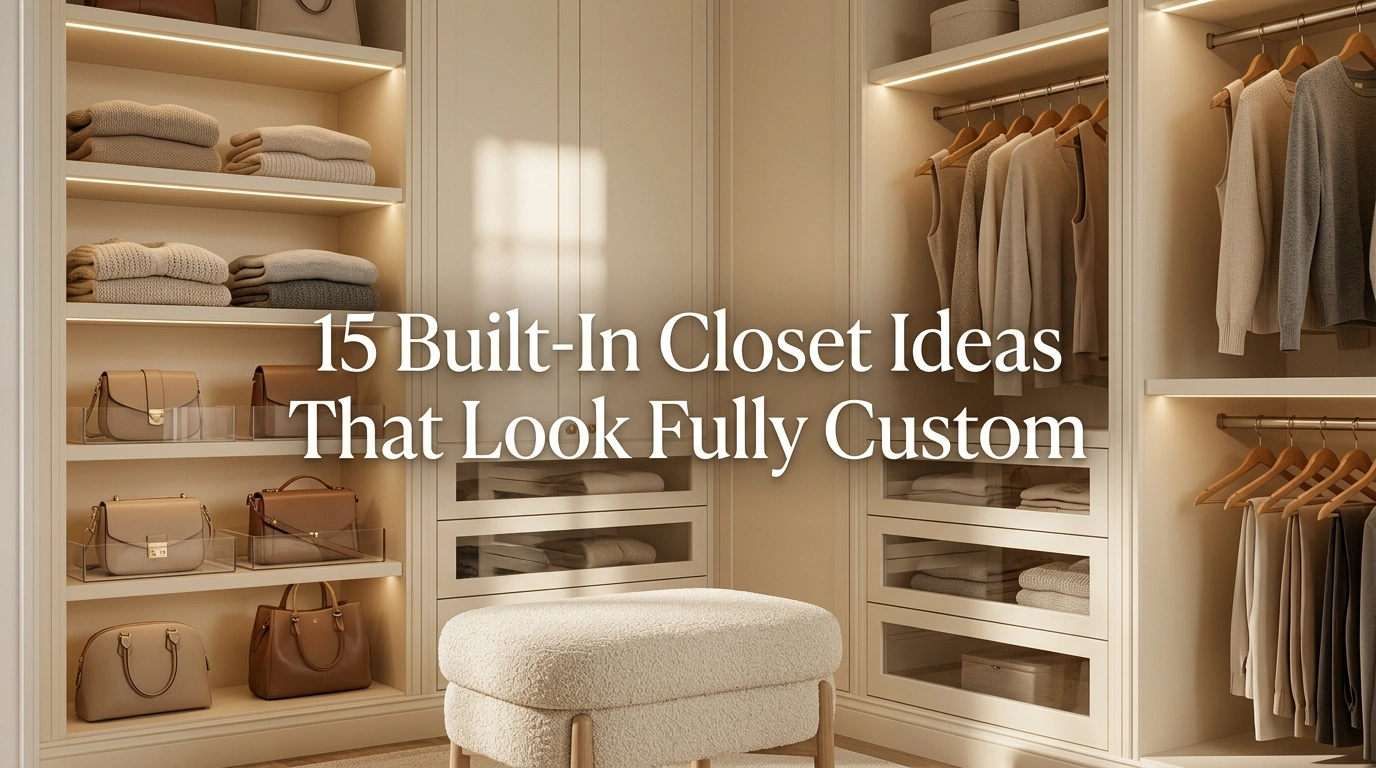
We have all been there: standing in front of a cramped, cluttered wardrobe, staring at cheap wire shelving that feels more like a pantry than a personal sanctuary. It is incredibly frustrating when your clothes are piled high, and your morning routine feels chaotic before it even begins. In my experience, the biggest mistake people make is assuming they need to spend tens of thousands of dollars on a professional designer to get that beautiful, high-end look. The truth is, you do not need an astronomical budget to achieve an organized, gorgeous space. With the right 15 built-in closet ideas that look fully custom, you can completely change how your space functions and feels. By focusing on small, smart styling decisions, you will create a wardrobe area that brings you joy every time you get dressed. In this guide, I will show you exactly how to turn basic, affordable elements into a luxury setup that maximizes space, keeps your clothes in pristine condition, and makes your entire home feel more organized and intentional.
1. The Seamless Floor-to-Ceiling Built-In
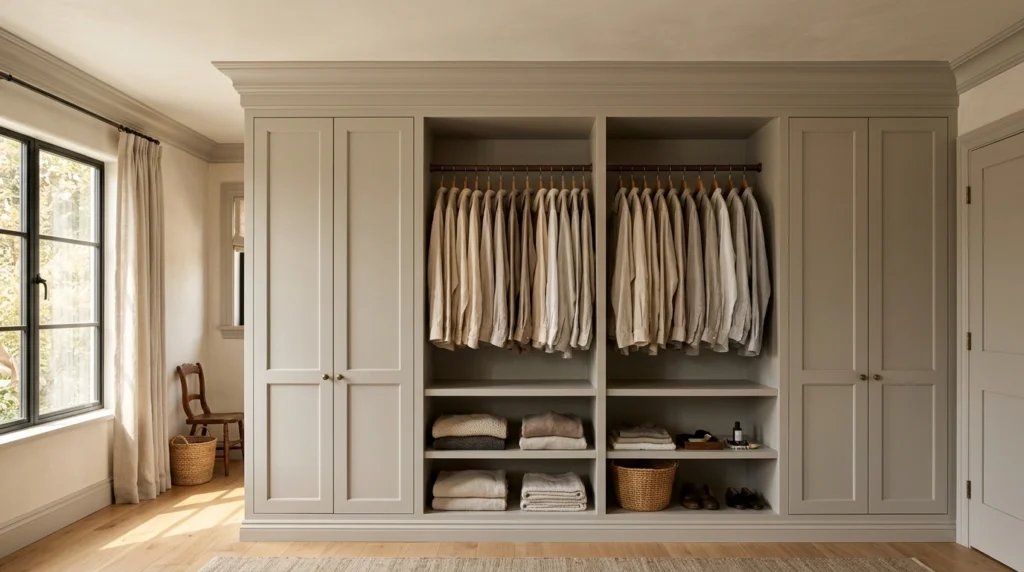
What I personally love about this setup is how it tricks your eyes into thinking the room is much taller than it actually is. Standing in front of a closet that stretches all the way to the ceiling feels incredibly grand, creating a sense of calm and order. The texture of smooth, solid cabinetry reaching up to meet the plaster is warm and grounding. This design works wonderfully in both small primary bedrooms and spacious walk-in dressing rooms, immediately replacing the visual clutter of open space above standard wardrobes with clean, architectural lines.
To recreate this without hiring a cabinetmaker, I always recommend starting with standard, flat-pack wardrobe frames and building them in yourself. You can achieve this look by adding thick baseboards at the bottom and wide crown molding at the top to close the gap between the unit and your ceiling. Fill any remaining side gaps with wood trim, caulk the edges, and paint everything the exact same color. A lot of people overlook this detail, but taking the extra weekend to add trim completely changes the entire look, making off-the-shelf furniture look like an expensive architectural feature. Expect to spend around $150 to $350 on wood, trim, and paint if you do the installation yourself.
2. Integrated Warm LED Strip Lighting
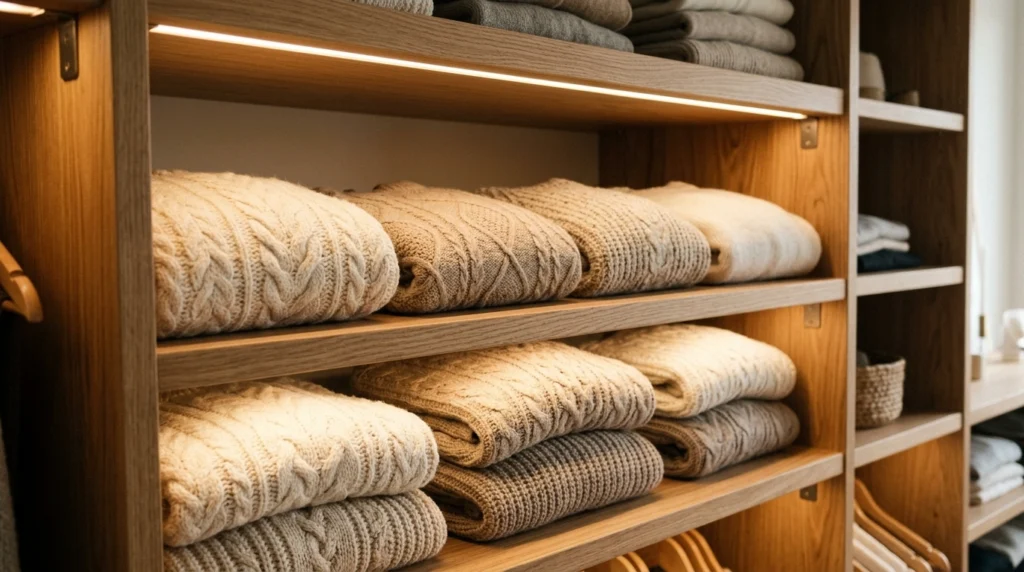
Walking into a closet that softly glows the moment you open the door is an absolute game-changer for your morning routine. This look creates a cozy, high-end boutique atmosphere, using soft, warm light to illuminate your favorite fabrics, knits, and shoes. Instead of squinting under a harsh, clinical overhead bulb, you get a beautiful, diffused glow that makes even basic t-shirts look like luxury pieces. It makes getting dressed feel like an indulgent, peaceful experience rather than a rushed chore.
This works especially well if you install recessed channel tracks under shelves or just behind the front face frames of your closet. I always recommend using warm white LED strips (around 2700K to 3000K) to avoid a cold, futuristic blue tint. You can find high-quality, motion-activated battery or rechargeable LED strips online if you want to avoid expensive hardwiring. A common mistake is leaving the wires exposed; make sure to use slim plastic channels to hide the cords along the inner corners of your shelving. This simple lighting upgrade can cost anywhere from $40 for basic adhesive lights to $300 for a fully wired system.
3. Back-Panel Wallpaper Accents
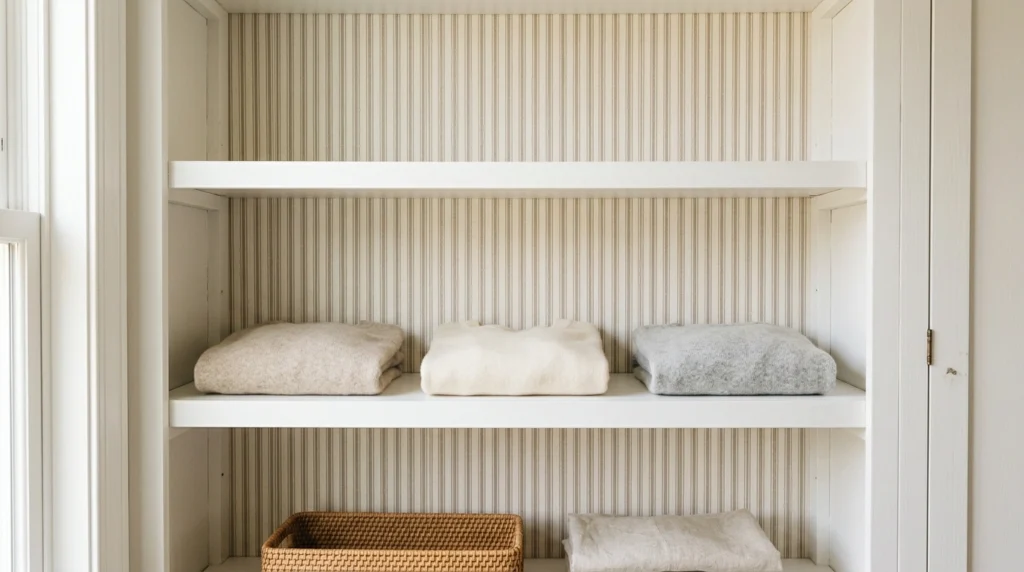
There is something so delightful about opening your closet doors to find a surprising pop of color or a beautiful pattern hiding behind your clothes. Using a subtle, textured wallpaper on the back wall of your shelving units adds immediate depth and personality without overwhelming the rest of your bedroom. It provides a gorgeous backdrop for your clothing, making every hanger feel like a deliberate display. The soft contrast of a delicate botanical pattern or a faux-grasscloth texture behind neutral sweaters creates a cozy, layered visual interest.
To make this look expensive, opt for peel-and-stick wallpaper with a matte, high-quality finish rather than a shiny plastic look. Choose neutral, classic patterns like thin ticking stripes, soft watercolor florals, or solid textured linen finishes. Before applying the paper, ensure your back panel is completely clean, dry, and free of dust. If you are styling on a budget, you can get a similar effect by using textured fabric or simply painting the back wall a deep contrast color like charcoal, olive green, or warm terracotta. A single roll of high-quality peel-and-stick wallpaper will cost between $35 and $80.
4. Velvet-Lined Jewelry Drawers
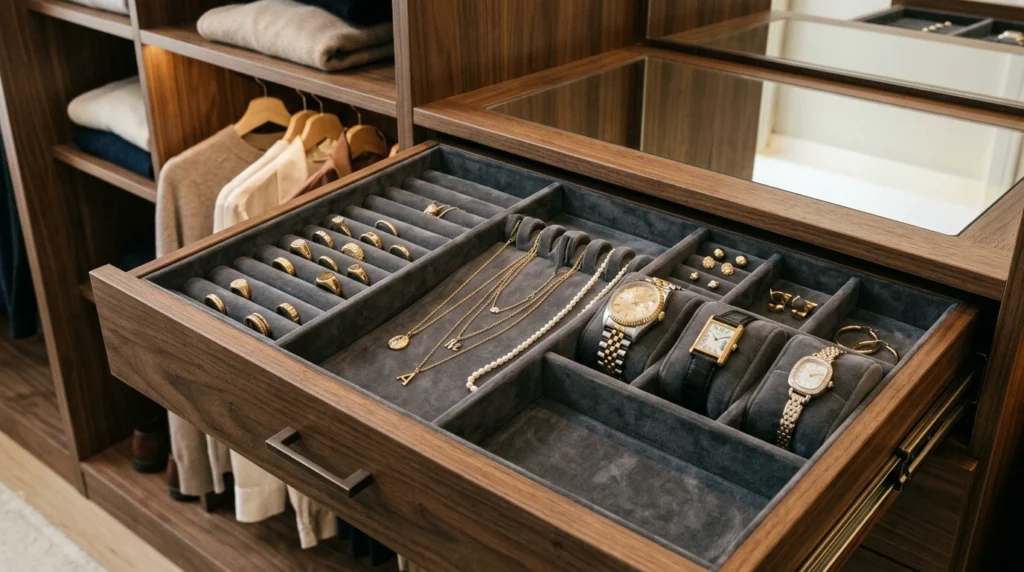
Having a dedicated, organized spot for your rings, necklaces, and watches brings a wonderful sense of order to your day. When you open a drawer to see your accessories neatly laid out on soft, plush velvet, it feels incredibly luxurious. The rich texture of dark velvet contrasts beautifully with metallic jewelry, keeping everything safe from scratches and tangles. It turns a simple drawer into a beautiful jewelry display, making the act of choosing your daily accessories feel special and calm.
Instead of paying a custom designer for built-in velvet inserts, you can easily buy modular velvet drawer organizers that fit snuggly inside your existing drawers. Measure the interior dimensions of your drawers carefully before purchasing, and look for low-profile trays in soft gray, beige, or rich emerald green. If your drawers are an unusual size, you can purchase adhesive-backed velvet liner sheets and cut them to fit the bottom of the drawer yourself. Avoid storing chunky items with delicate necklaces to keep the layout looking neat and tidy. This DIY customization typically costs between $15 and $50.
5. Mixed-Media Pull-Out Baskets
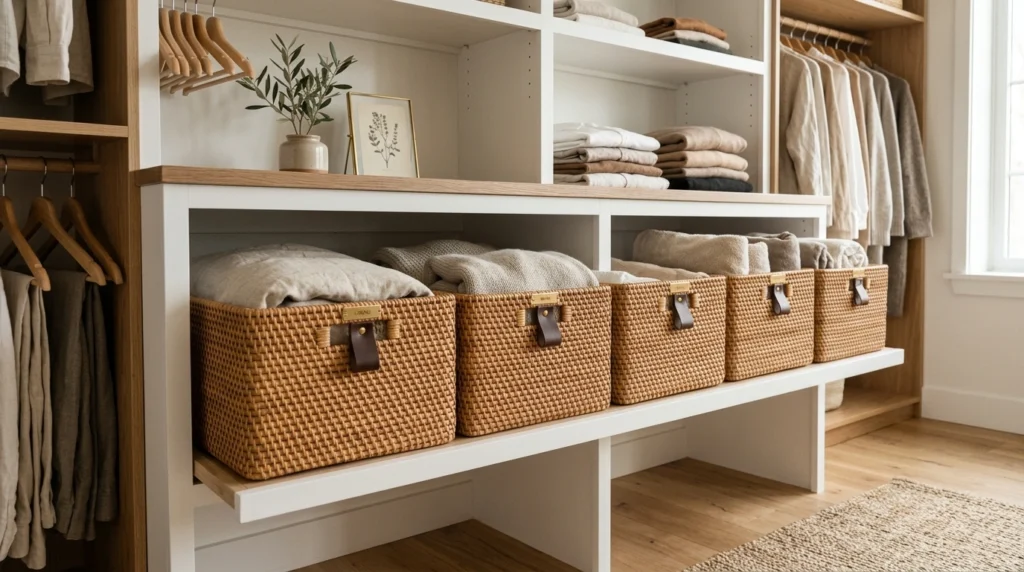
Combining different textures is one of the easiest ways to make a space feel warm and lived-in rather than sterile. Integrating woven rattan baskets or fabric bins on slide-out tracks provides a relaxed, organic feel to your closet organization. The contrast between smooth painted wood, matte metal hardware, and natural fibers creates a beautiful, balanced aesthetic that feels incredibly cozy. It is the perfect solution for storing bulkier items like scarves, seasonal sweaters, or pajamas out of sight.
When choosing baskets, I recommend looking for options with straight, sturdy sides so they do not sag over time and look messy. To make them feel truly custom, attach small leather pull tabs or brass label holders to the front of each basket. If you want to avoid the high cost of custom sliding tracks, you can simply place standard, high-quality baskets on fixed shelves, ensuring there is just a two-inch gap at the top so they are easy to slide in and out. Be sure to stick to a consistent color palette for your baskets to keep the visual look cohesive. High-quality natural baskets generally run from $15 to $45 each.
6. The Built-In Dressing Island
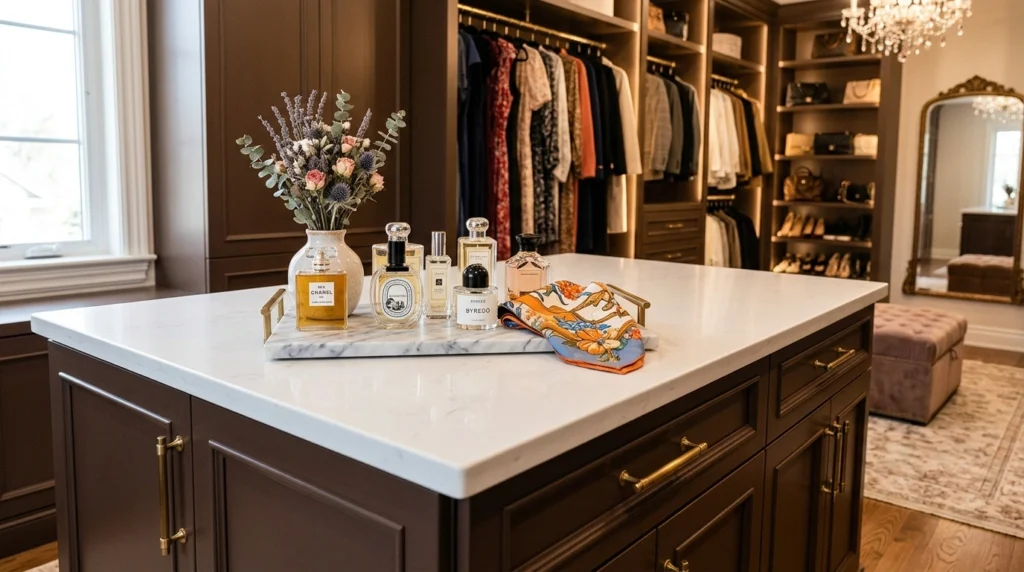
If you are fortunate enough to have a spacious walk-in closet, adding a central island is the ultimate way to create a functional, boutique-style dressing area. An island provides a solid, anchoring centerpiece where you can fold laundry, lay out outfits for the next day, or display a beautiful tray with your signature perfume. The smooth countertop—whether stone, wood, or painted quartz—contrasts beautifully with the surrounding open hanging space, giving the room a sense of balance and luxury.
To build an affordable island that looks custom, you can secure two standard kitchen drawer cabinets back-to-back, add a decorative plinth base, and top them with a custom piece of wood or quartz. This works especially well if you paint the island a slightly darker accent color than the surrounding closet walls to make it a true focal point. A common mistake is making the island too large for the space; ensure you leave at least 32 inches of walking clearance on all sides so you can move around freely. A DIY island project like this can range from $300 to $800 depending on your choice of cabinets and countertop materials.
7. Soft Curved Archway Openings
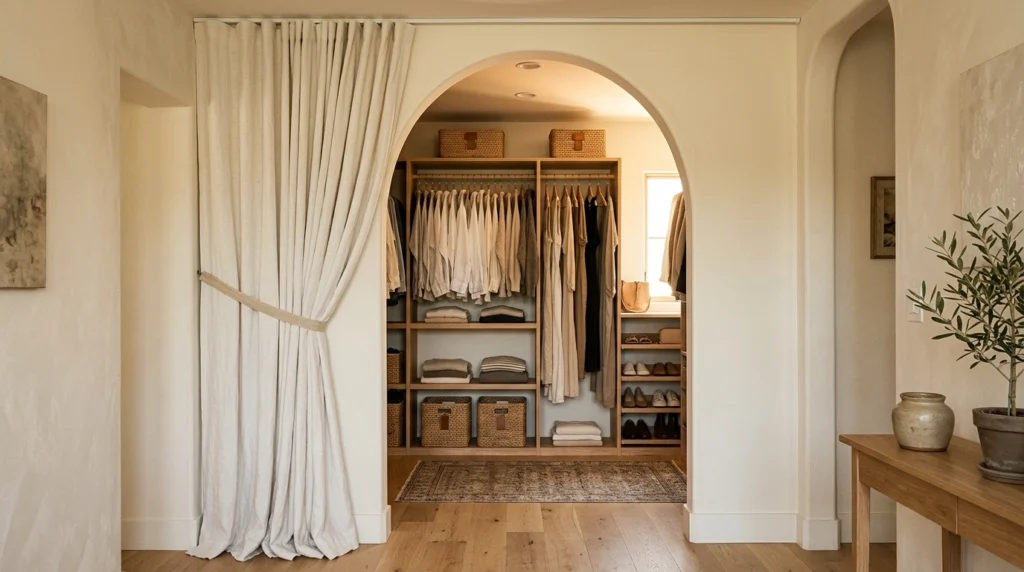
Architectural details like curved archways add an incredible amount of warmth, character, and elegance to a home. Replacing a standard, harsh rectangular closet door with a soft, open archway turns your wardrobe into a beautiful, inviting nook. The curved line draws the eye upward, making the ceiling feel higher and softening the overall look of the bedroom. It feels gentle, modern, and artistic, turning your clothing collection into a subtle, stylish design feature.
You can easily create an archway yourself using flexible drywall arch kits that attach directly to your existing door frame. Once the kit is secured, you simply plaster over the joints, sand it smooth, and paint it to match your bedroom walls. This works especially well if you keep the interior of the closet meticulously organized, as it will be visible from the main bedroom area. If you prefer to keep your clothes hidden, you can hang a heavy, floor-length linen curtain from a hidden tension rod inside the archway for a soft, European-inspired look. DIY archway kits and plaster supplies usually cost around $60 to $120.
8. Monochromatic Color Drenching
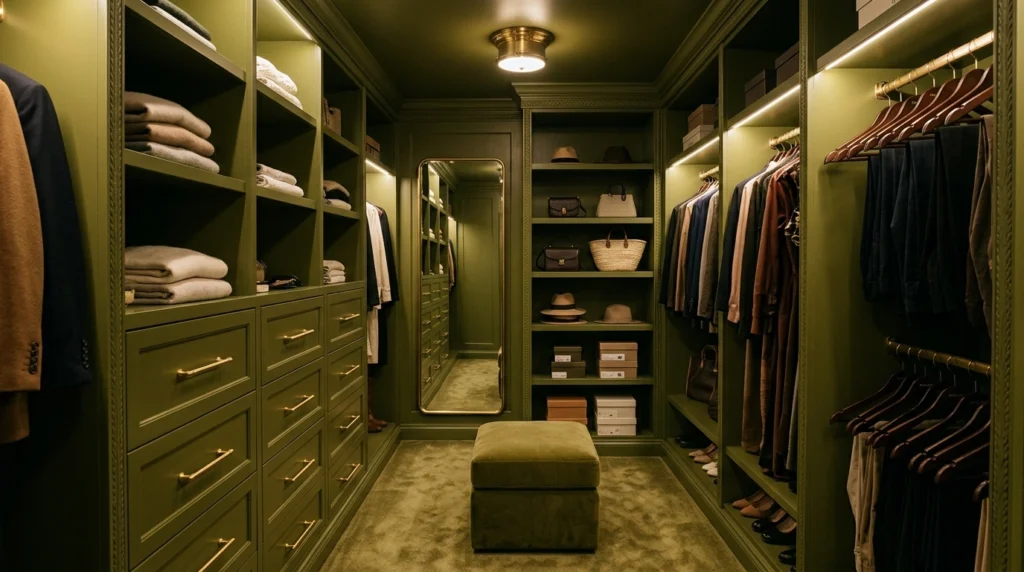
Painting your closet walls, shelves, trims, and drawers the exact same shade is a brilliant styling secret used by top designers. This monochromatic look feels incredibly cohesive, calming, and expensive, as it hides mismatched lines and makes the entire unit look like one single, solid piece of custom millwork. The rich, continuous color creates a cozy, cocoon-like atmosphere that makes your colorful clothing stand out beautifully against the uniform backdrop.
I always recommend starting with a warm, sophisticated neutral like cream, mushroom, soft olive, or charcoal gray. Be sure to use a durable satin or semi-gloss finish on the shelves and trim so they are easy to wipe down and resistant to scuffs. A lot of people overlook the ceiling, but painting the closet ceiling the same color as the walls completes the cozy effect. Make sure you use a high-quality primer first, especially if you are painting over laminate or veneer shelves. A couple of gallons of premium paint and primer will cost you around $80 to $150.
9. Custom Glass-Front Cabinet Doors
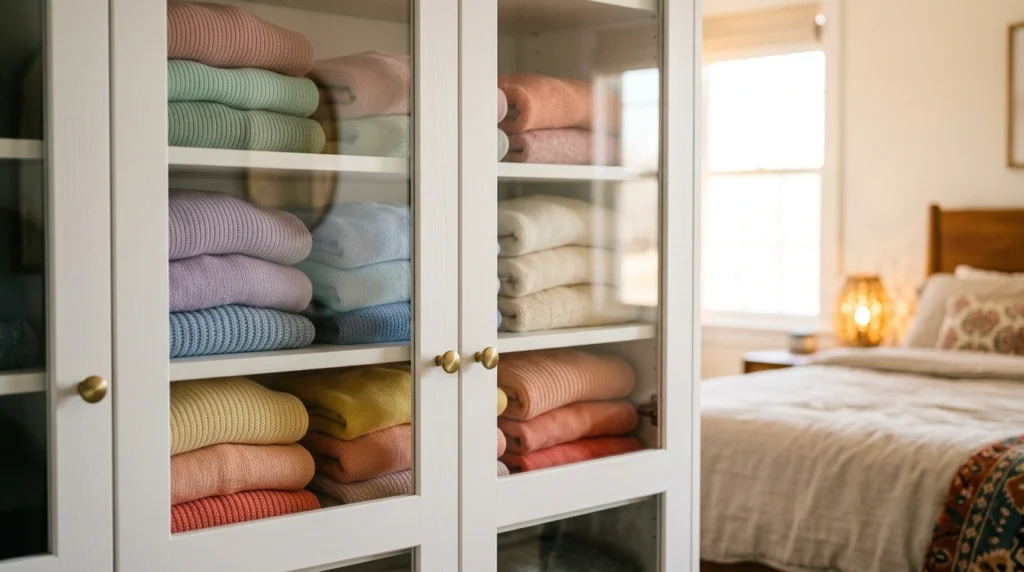
There is something deeply satisfying about looking at your neatly folded sweaters through clear, pristine glass doors. This design keeps your clothes entirely dust-free while still letting you see exactly where everything is, blending the benefits of open shelving and closed cabinets. The reflection of light off the glass panels brightens up the entire closet, creating an open, airy, and high-end feel that resembles a high-end designer boutique.
To achieve this look on a budget, you can use standard cabinet frames and purchase glass-insert doors that fit them. If you already have solid cabinet doors, you can use a jigsaw to cut out the center panels and insert custom-cut glass or clear acrylic sheets secured with silicone. I recommend using frosted or fluted glass if you want to obscure slightly messy stacks of clothes while still keeping that light, airy feel. Always make sure to clean the glass regularly to keep the space looking sharp. This custom door project typically costs between $100 and $250 per door.
10. Pull-Down Wardrobe Rods
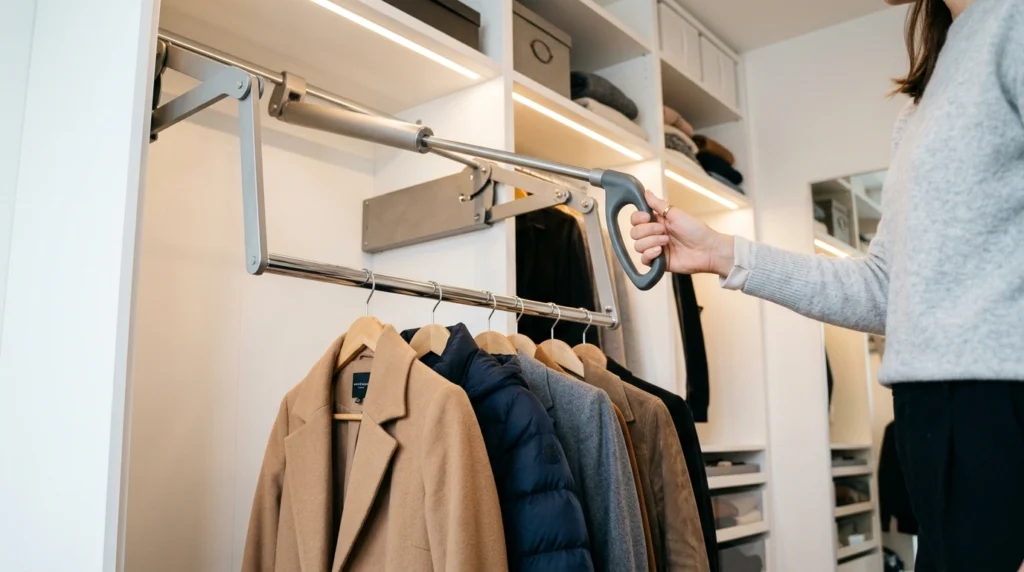
Maximizing high, vertical space in a closet can be a real challenge, especially if you are on the shorter side. Pull-down wardrobe rods are an ingenious custom solution that allows you to hang seasonal clothes near the ceiling and easily lower them to waist height with a smooth, sturdy pull handle. This feature feels incredibly modern and functional, making full use of every single inch of wall space without requiring a step stool. It gives you a sense of accomplishment knowing you have utilized your space to its absolute fullest potential.
When installing these hydraulic rods, ensure they are securely anchored into the wall studs, as wet jackets or heavy winter coats can become very heavy when hung together. I always recommend placing your less-frequently worn items, like formal wear or winter coats, on the upper pull-down rod and your daily basics on the lower, standard rod. Make sure to check the weight capacity of the rod before buying to prevent bowing or strain. A high-quality hydraulic pull-down rod costs between $70 and $150.
11. Built-In Bench Seating with Hidden Storage
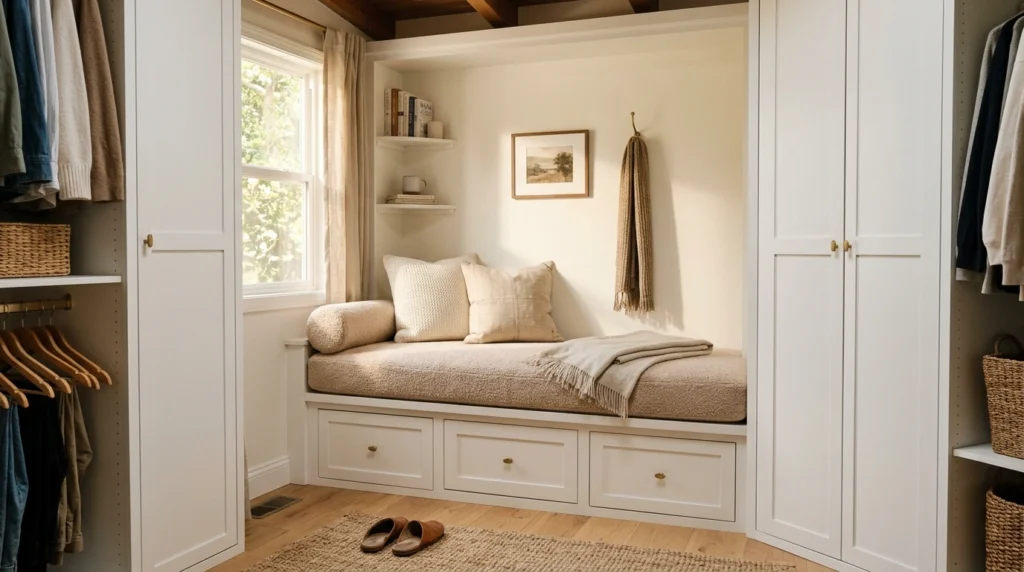
Having a cozy, dedicated spot to sit down while putting on your shoes makes your morning feel much more relaxed and intentional. A built-in bench seat tucked between two wardrobe units provides a comfortable, grounding focal point in any closet. The addition of a plush, custom-upholstered cushion in a soft boucle or linen fabric adds wonderful warmth and texture to the space. It is a highly practical element that makes your closet feel like a comfortable room rather than just a storage closet.
You can easily build a custom bench by using a sturdy, low-profile cabinet or a deep bookshelf turned on its side. Secure it to the adjacent wardrobe towers, top it with a sturdy piece of wood, and add a custom foam cushion wrapped in your favorite fabric. For the hidden storage underneath, use pull-out drawers or large matching storage baskets to keep extra bedding, winter blankets, or out-of-season shoes out of sight. A DIY built-in bench project like this will cost around $100 to $250 depending on the cushion fabric and lumber used.
12. Floating Shelves with Concealed Hardware
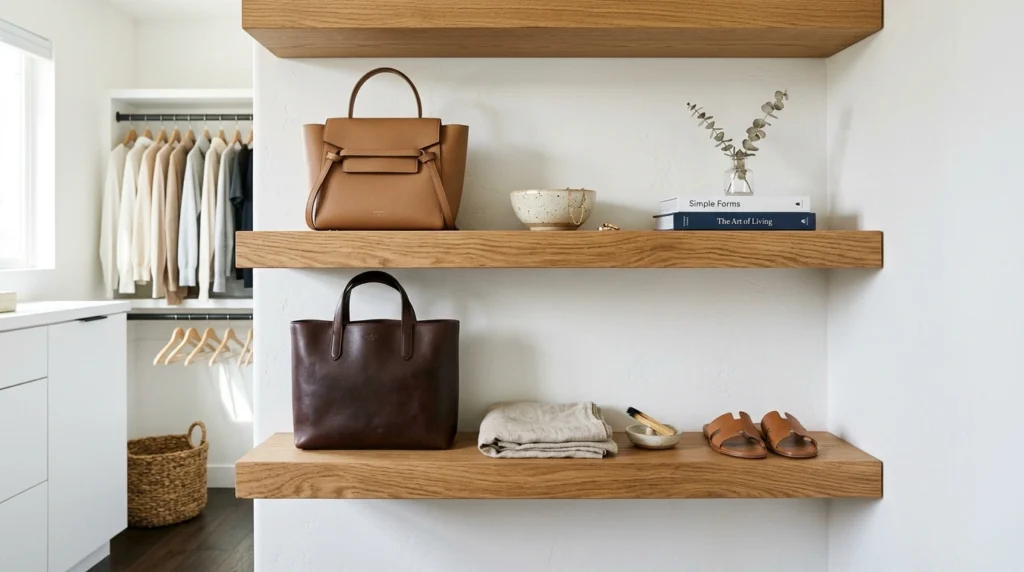
For a clean, ultra-modern look, floating shelves with hidden support brackets are an exceptional choice. The absence of visible brackets or side panels makes your clothing look as if it is floating beautifully on the wall, creating a light, spacious, and uncluttered feeling. This minimalist approach is incredibly soothing to look at and works perfectly for highlighting a collection of bags, folded knits, or neatly organized denim.
To make these shelves look truly custom, opt for thick, chunky wood shelves (around 2 inches thick) rather than thin, cheap boards. Use heavy-duty internal steel brackets that screw directly into your wall studs to ensure they can hold substantial weight without sagging. If you are working with drywall where there are no studs, be sure to use high-quality toggle bolts. A common mistake is overloading floating shelves; keep them looking high-end by leaving a bit of breathing room between your items. A set of three custom-looking floating shelves will cost about $60 to $120.
13. Brass Hardware & Statement Handles
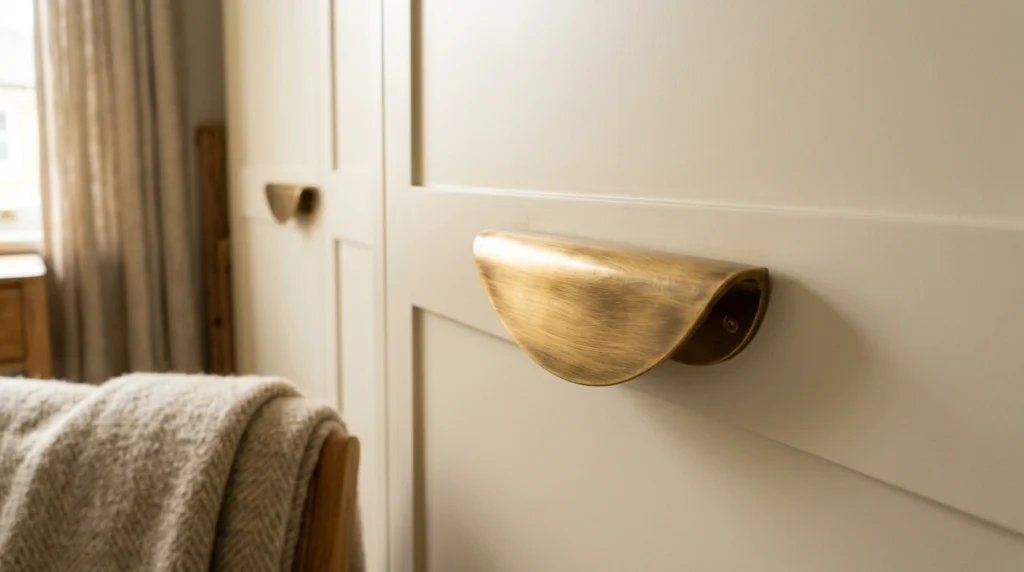
It is often said that hardware is the jewelry of the home, and this is especially true in a closet. Replacing cheap, standard plastic or silver knobs with heavy, solid brass pulls completely transforms the look of simple white doors. The warm, metallic gleam of polished or brushed brass adds a touch of sophistication and craft to the space. It is a small tactile detail that you touch every single day, making the act of opening your wardrobe feel satisfying and expensive.
I always recommend choosing oversized bar pulls, T-bar handles, or elegant crescent-shaped pulls to make a bolder design statement. Look for solid brass or heavy metal hardware rather than lightweight hollow aluminum, as the physical weight of the handle makes a massive difference in how expensive it feels to use. If you are on a tight budget, you can find incredible multipacks of high-quality brass hardware online for a fraction of store prices. This simple, high-impact swap will only cost about $30 to $100 for an entire closet.
14. Dedicated Purse Cubbies with Acrylic Dividers
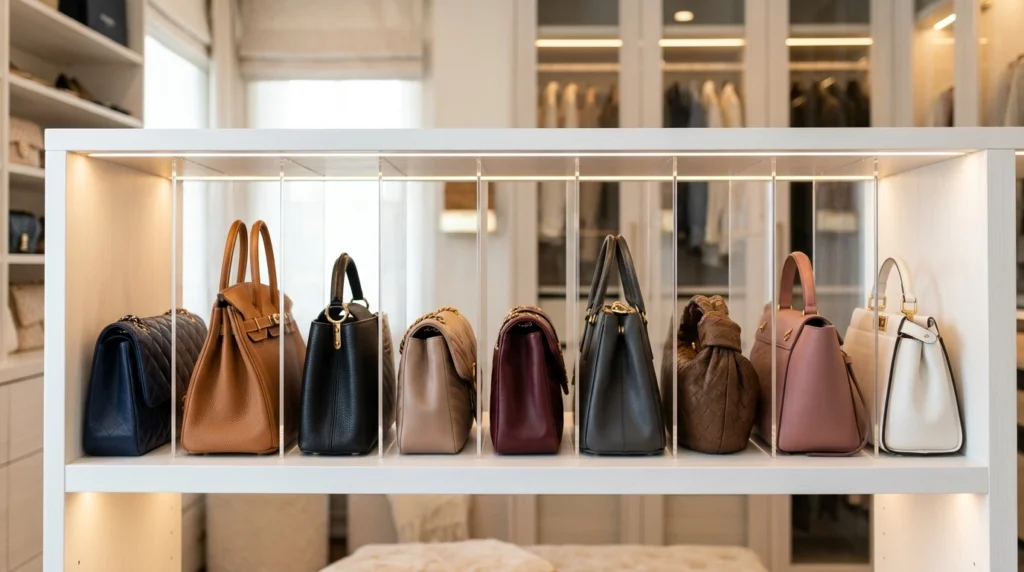
Keeping your bags upright, organized, and beautifully displayed is key to making your closet look like a professional, custom-designed space. When purses are thrown into a large bin or piled on top of each other, they quickly lose their shape and get damaged. Individual cubbies or shelves separated by clear acrylic dividers keep each bag perfectly in place, showcasing their colors and shapes while protecting them from dust and wear. It makes your collection look intentional, tidy, and incredibly neat.
To recreate this, you can install simple white wood shelves and slide clear, vertical acrylic dividers onto them to create individual slots for each bag. This works especially well because the dividers are virtually invisible, leaving the focus entirely on your beautiful bags. Group your purses by size and color to create a visually pleasing flow, and stuff your softer bags with tissue paper so they stand upright beautifully. A pack of high-quality acrylic shelf dividers typically costs between $15 and $35.
15. Corner Carousel Shoe Racks
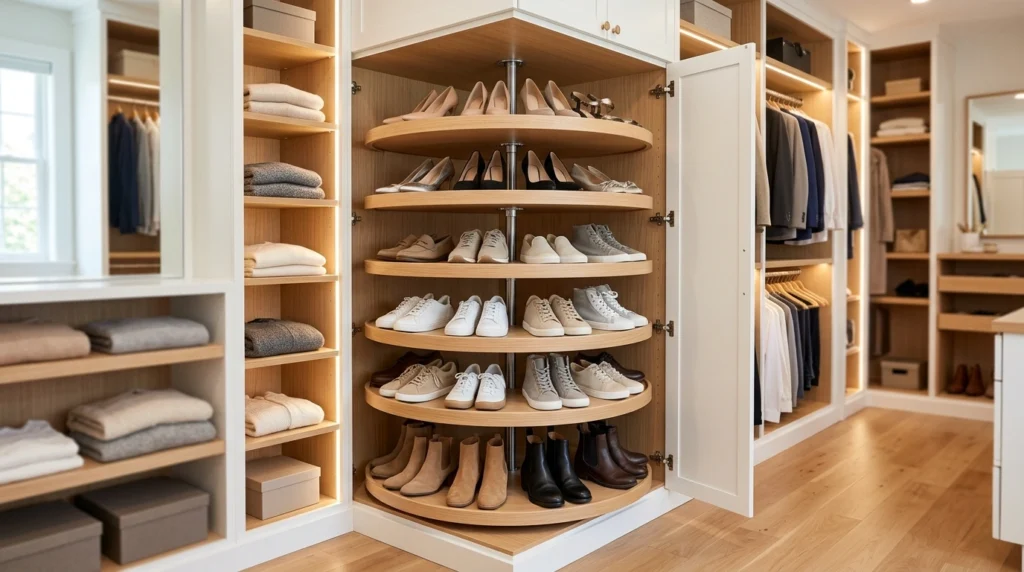
Corners are notoriously difficult to utilize in closets, often becoming dark, dusty dead zones where clothes go to be forgotten. A built-in corner rotating shoe carousel is an ingenious way to turn an awkward corner into a highly functional and exciting feature. Watching your shoe collection smoothly rotate with a simple touch is incredibly satisfying and makes finding the perfect pair of shoes for your outfit effortless. It brings a dynamic, high-end showroom feel to your everyday routine.
You can purchase rotating lazy-susan shoe kits online that are specifically designed to fit into standard L-shaped corner closet cabinets. When assembling, make sure the rotating mechanism is level and has enough clearance from the side walls to spin smoothly without rubbing. If a full rotating system is too complex, you can achieve a similar custom look by installing angled, fixed corner shelves with a small wood lip to prevent shoes from sliding off. A DIY corner rotating shoe system will generally cost between $150 and $300.
Conclusion
Creating a beautiful, organized wardrobe space is not about spending a fortune on expensive designers; it is about embracing clever design choices that make your daily routine smoother and more enjoyable. By implementing just one or two of these 15 built-in closet ideas that look fully custom, you can completely change the energy of your bedroom and make getting dressed a peaceful, happy experience. Whether you start with a simple weekend project like swapping out your drawer hardware for beautiful brass handles, or decide to tackle a bigger project like building floor-to-ceiling trim, remember that the goal is to make a space that works perfectly for your life. You do not need a massive walk-in closet to feel organized and stylish—you just need a space that was built with care, intention, and a touch of your own personal style.
Which of these custom closet ideas are you most excited to try in your own home first? I would genuinely love to know!
FAQ
How do I make basic built-in closets look more expensive?
In my experience, the easiest way to make cheap, basic units look custom is to close any gaps between the top of the cabinets and the ceiling using wood trim and crown molding. Adding high-quality paint in a beautiful matte or satin finish and upgrading to solid brass handles will instantly make the entire unit look like expensive, custom-built millwork.
What paint finish is best for closet shelves and drawers?
I always recommend using a satin or semi-gloss finish for closet shelves, doors, and drawers. These finishes are incredibly durable, easy to wipe clean, and highly resistant to the scuffs and scratches that naturally happen when sliding hangers, boxes, and shoes around.
Can I build a custom-looking closet in a small rental apartment?
Yes, absolutely! You can achieve a highly customized look without losing your security deposit by using temporary, renter-friendly upgrades like high-quality peel-and-stick wallpaper on the back panels of your shelves, motion-activated adhesive LED lighting, and clear acrylic shelf dividers to keep things perfectly organized.
How do I stop my open built-in shelves from looking cluttered?
A lot of people overlook this, but keeping a consistent color palette is key to avoiding visual clutter on open shelves. Try using matching storage baskets for smaller items, leave a small amount of empty breathing room between your folded clothes, and organize your hanging clothes by category and color from light to dark.
Are wire shelves worth keeping, or should I replace them?
While wire shelves are highly affordable, they often sag, leave deep indentations in folded clothes, and tend to look cheap. If you cannot replace them completely, you can easily cover them with custom-cut thin plywood sheets or wrap them in decorative contact paper to create solid, flat shelves that look significantly more expensive.