
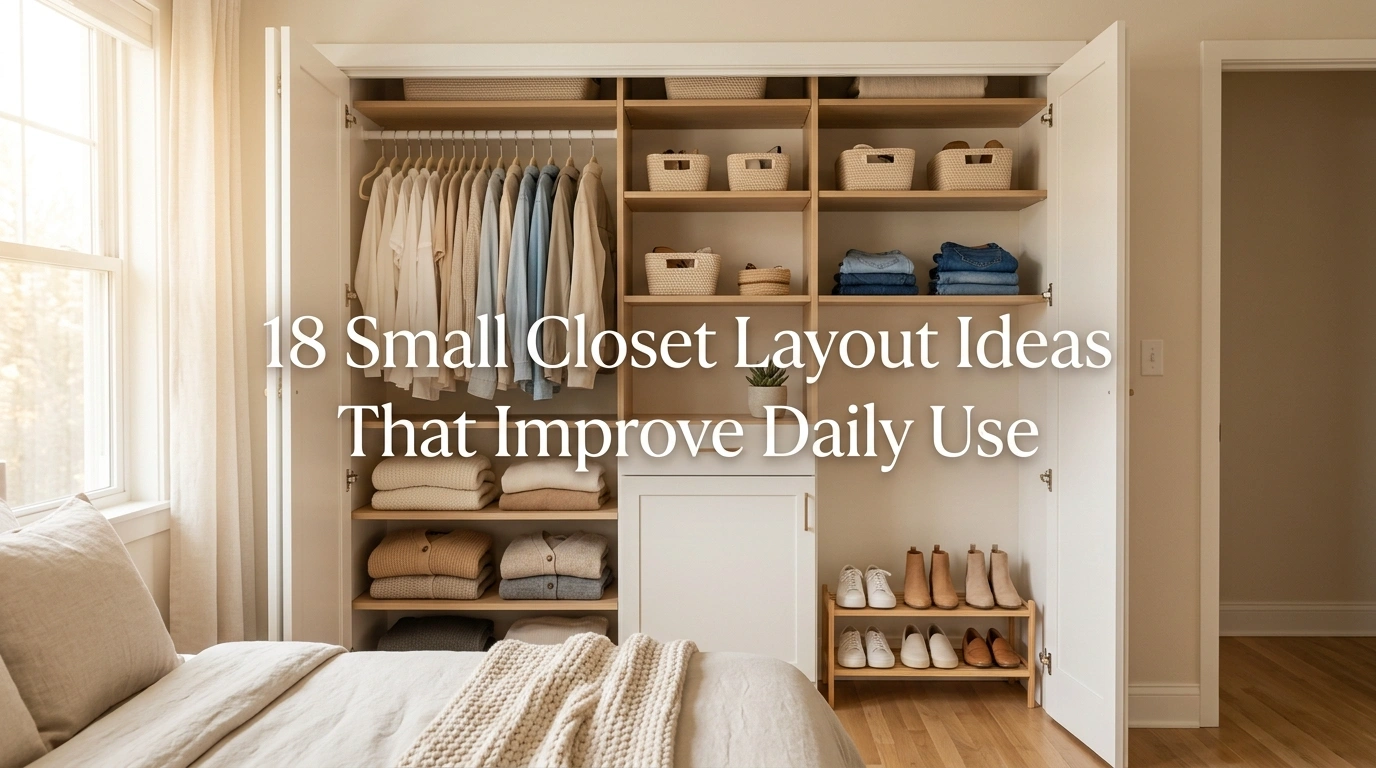
We have all been there: standing in front of a cramped, overflowing closet on a busy morning, feeling like we have absolutely nothing to wear. It is incredibly frustrating when your clothes are crammed together so tightly that you cannot even see what you own. In my experience, the biggest mistake people make is assuming they need a massive walk-in wardrobe to feel organized. The truth is, you do not need more space; you just need to rethink the space you already have. By using smart, highly functional setups, you can turn even the smallest wardrobe into an organized, stress-free zone that actually makes getting dressed fun.
In this guide, we are exploring 18 small closet layout ideas that improve daily use without requiring a massive budget or a complete home renovation. We will look at practical tricks that maximize vertical space, prevent messy piles of clothes, and make your daily routine much smoother. When your closet is laid out logically, you save time, protect your favorite garments from damage, and feel more confident starting your day. Let us dive into these simple, transformative layout strategies that you can start using today.
1. The Double-Hang Rod Configuration
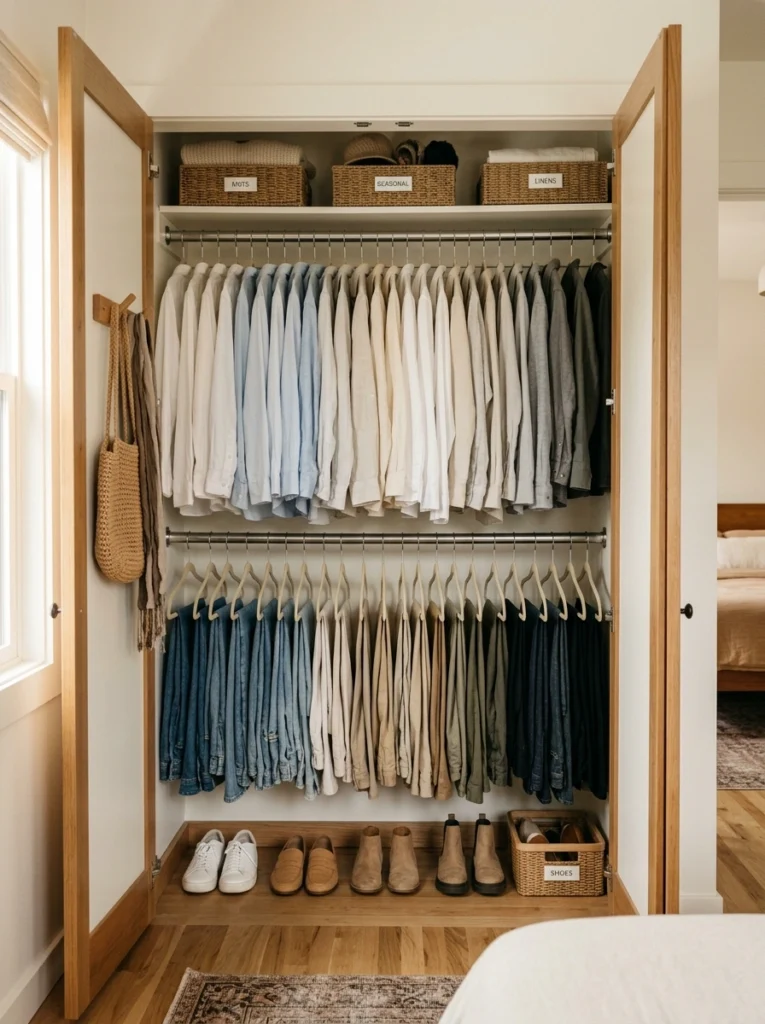
What I personally love about this layout is how quickly it doubles your usable hanging space without changing the physical footprint of your closet. When you walk into your closet, you see two neat, parallel levels of clothing: tops on the upper rack and skirts, folded pants, or shorts on the lower rack. This setup creates a visually balanced, highly organized system where everything has a clear home. It works especially well for standard reach-in closets because it instantly eliminates empty, wasted space beneath short-hanging items.
To recreate this layout, you will want to measure the height of your closet and install a second tension rod or fixed rod roughly 35 to 40 inches below the top one. Keep your longer items, like dresses or duster cardigans, to one side if you have a partial double-rod setup, or store them in a separate wardrobe. A common mistake is hanging heavy coats on the lower rod, which can drag on the floor and collect dust. Aim for a budget of $15 to $35 for a sturdy, adjustable metal closet rod.
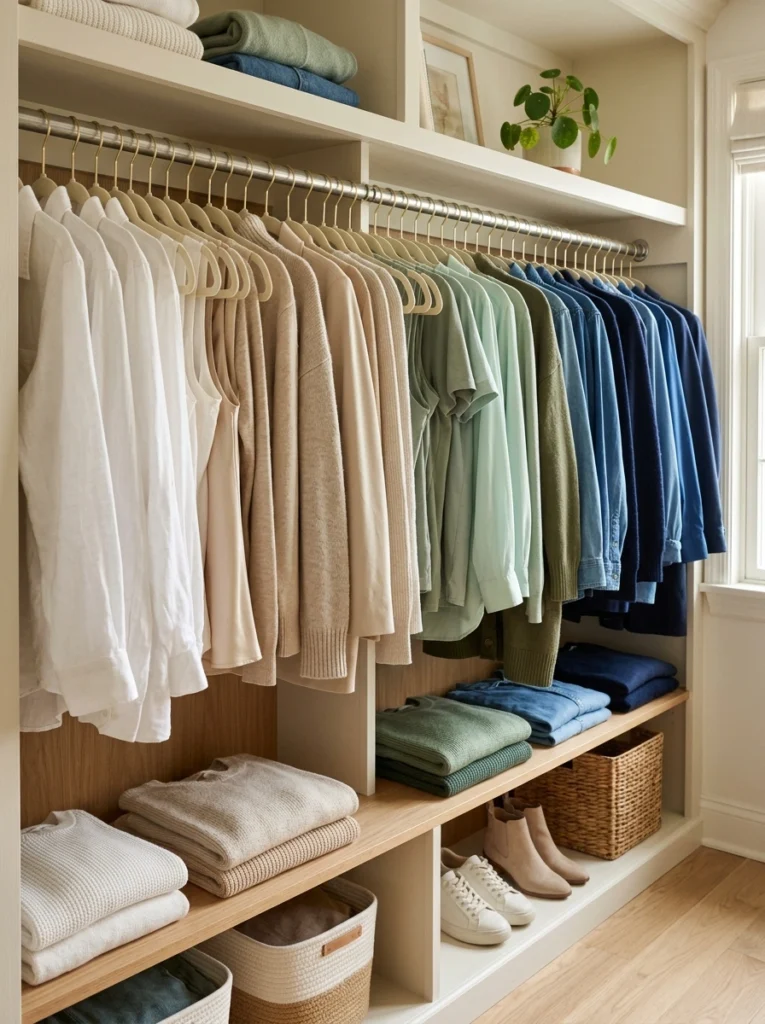
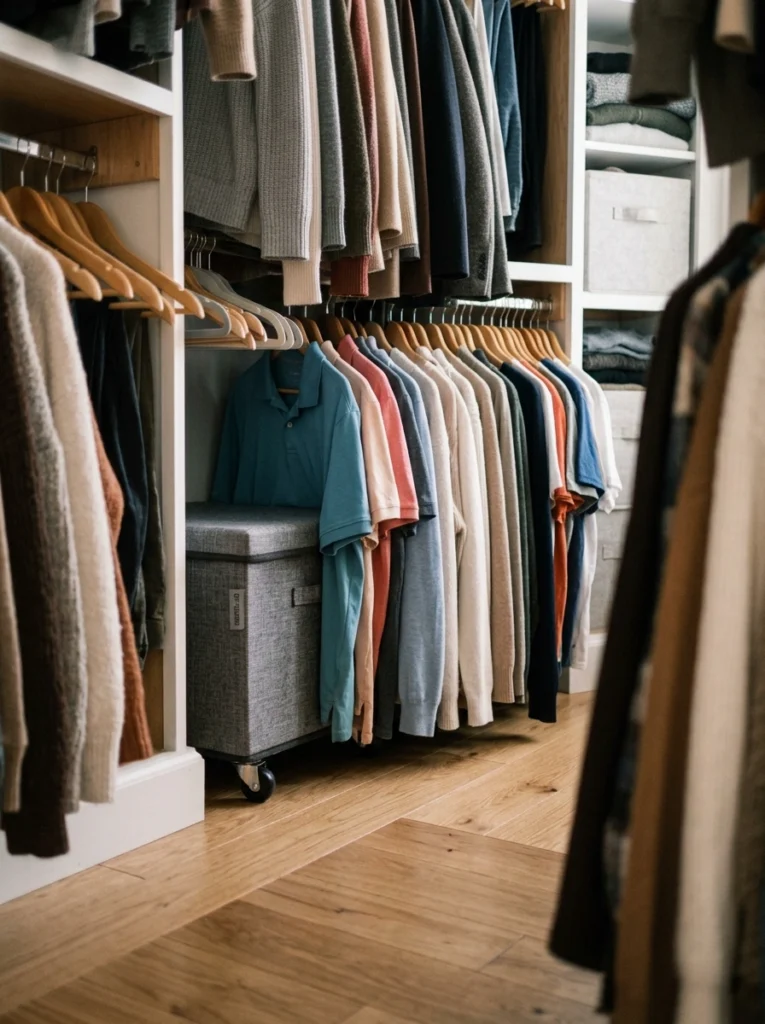
2. The Eye-Level Open Shelving Strategy

A lot of people overlook this detail, but putting open shelves right at eye level changes the entire outfit selection process. Instead of digging through dark drawers, your favorite knitwear, basic t-shirts, and everyday denim are beautifully folded and instantly visible. The mood of this layout is calm and functional, displaying soft textures like cotton and wool in warm, neutral colors like cream, beige, and soft gray. It makes your morning routine feel incredibly efficient because you can grab your base layers in a single second.
To build this setup, remove a section of your hanging rod and install three to four sturdy wooden or laminate shelves directly in the middle zone of your closet. Make sure your folded stacks are no more than three or four items high to keep them from tipping over or looking messy. Avoid using deep shelves where clothes can get lost in the back; 12 to 14 inches of depth is the sweet spot. You can find simple, paintable wood shelves at your local hardware store for about $20 to $40.
3. The Slide-Out Wire Basket System
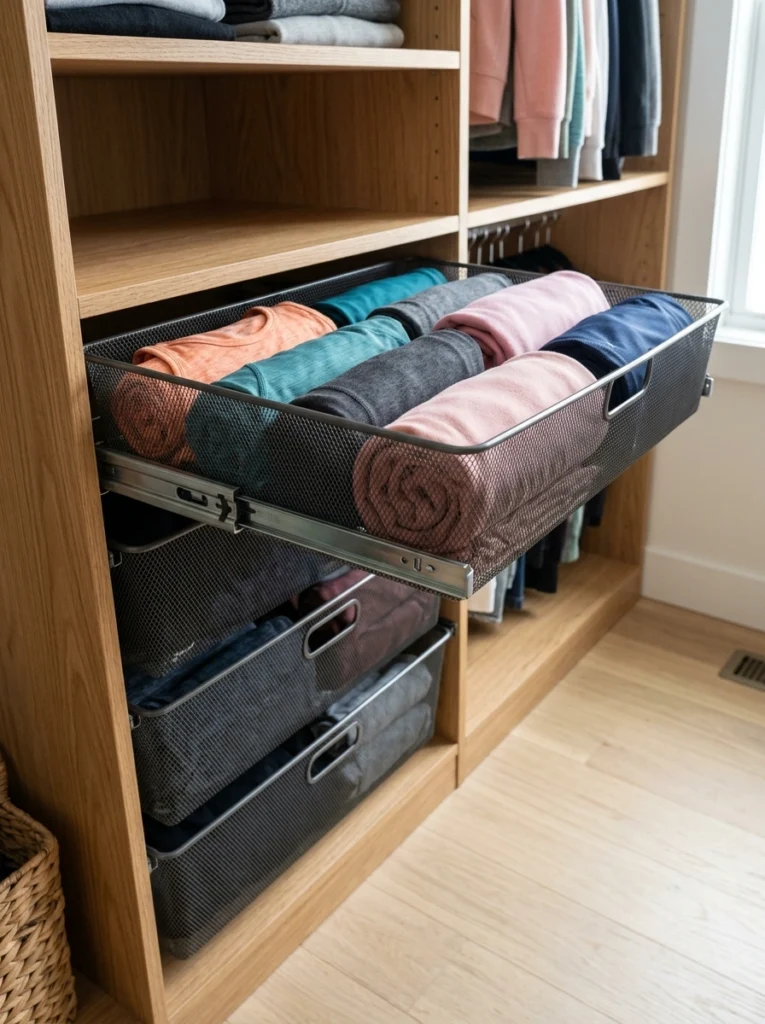
This layout is a game-changer if you struggle with keeping smaller accessories, socks, or bulky loungewear tidy. The visual appeal lies in the mesh or wire textures, which offer a clean, industrial-meets-modern aesthetic while allowing you to see exactly what is inside each basket. Pulling out a smooth glider drawer to find your favorite soft scarf or cozy rolled sweater feels much nicer than rummaging through plastic bins. It brings a sense of order and lightweight breathability to the bottom half of a small closet.
I always recommend starting with a stack of three slide-out baskets installed right on the closet floor or tucked under a short hanging section. Use these baskets specifically for items that do not hang well, such as denim, athletic wear, and thick pajamas. A common mistake here is overstuffing the baskets so they get stuck on the tracks or stretch out your knitwear. A high-quality metal slide-out basket kit usually runs between $30 and $60, making it a very affordable upgrade.
4. The Monochromatic Velvet Hanger Setup
This is easily one of the easiest ways to make a cluttered closet look instantly neat and cohesive. When you replace a mismatched collection of plastic, wooden, and wire hangers with identical velvet ones, you create a uniform line that is incredibly soothing to look at. The slim profile of velvet hangers lets you fit up to 30 percent more clothes on the exact same rod. The velvet fabric also grips delicate silks and wide necklines perfectly, preventing your clothes from slipping off into a heap on the floor.
To get the best results, buy a bulk pack of matching velvet hangers in a neutral tone like ivory, black, or soft gray. Group your clothes by category (tops, button-downs, jackets) and then color-coordinate them within those sections from light to dark. Avoid hanging heavy winter coats or damp clothes on these hangers, as they can bend the thin metal wire or damage the velvet flocking. You can easily find a pack of 50 high-quality velvet hangers online or at discount home stores for around $15 to $25.
5. The Vertical Shoe Grid
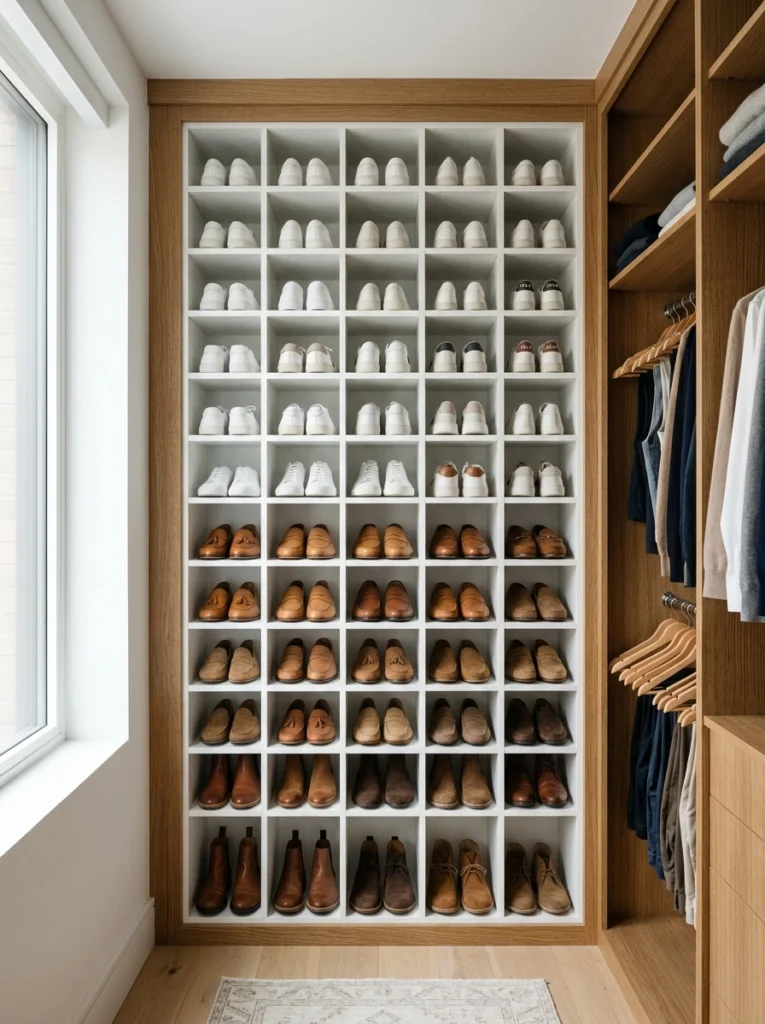
Instead of letting your shoes pile up in a messy, disorganized mountain on the floor, this layout treats them like a neat display wall. A narrow, floor-to-ceiling shelving grid showcases your shoes in pairs, making it easy to find your favorite leather loafers or clean white sneakers. The clean lines of the grid structure bring structure to the bottom of the closet, transforming what is usually a chaotic zone into a calm, functional feature. It works incredibly well for making your entire wardrobe feel more organized.
You can build this layout by placing a narrow bookshelf inside your closet or installing adjustable wall-mounted shelves on an unused side wall. Arrange your shoes by frequency of use, placing daily sneakers and flats at waist height and seasonal boots or heels on the very top or bottom shelves. A common mistake is storing dirty, wet shoes directly on wooden shelves without a protective liner, which can ruin the finish. A simple wooden or metal shoe tower typically costs between $25 and $50.
6. The Clear Acrylic Shelf Dividers
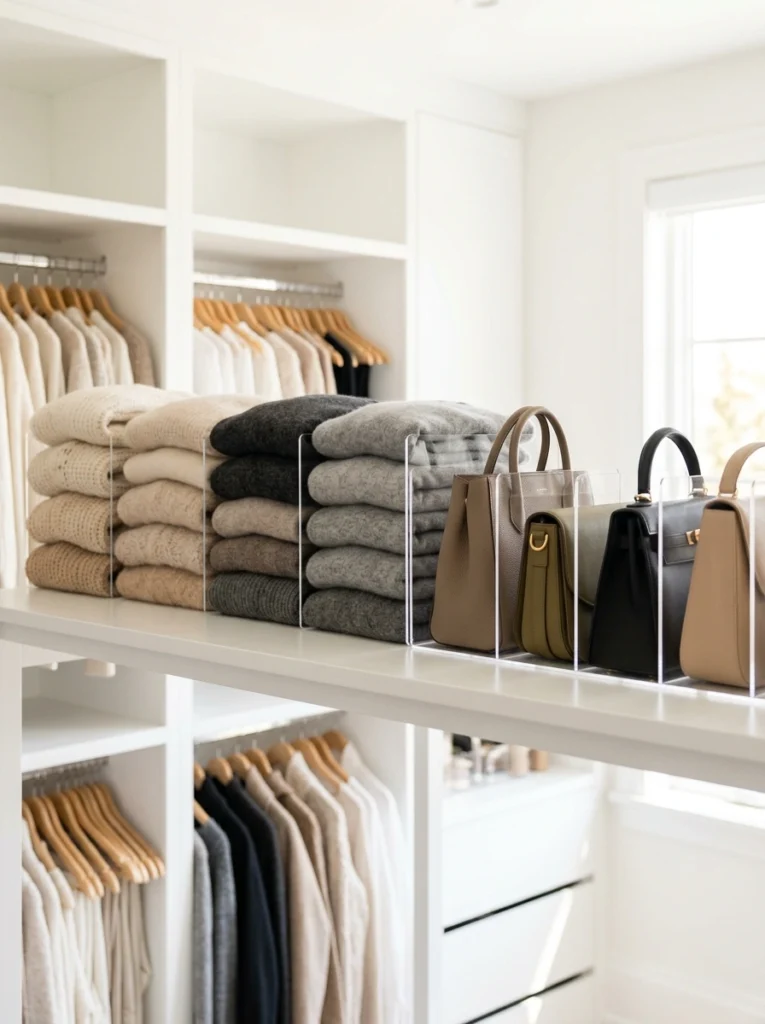
This layout is perfect for anyone who wants the neat look of a high-end boutique in their own home. Clear acrylic dividers slide onto your existing top shelves, creating invisible walls that keep stacked sweaters, handbags, and folded jeans perfectly upright. The visual effect is clean, open, and airy, allowing the colors and textures of your clothing to stand out without bulky wooden dividers blocking the light. It gives you a great sense of satisfaction to see perfectly straight, non-toppling stacks of clothes.
To set this up, simply slide the acrylic dividers onto your solid wood or wire shelves, spacing them about 8 to 12 inches apart depending on what you are storing. Use them to keep fluffy sweaters separated from structured denim, which prevents the stacks from leaning and blending together. Avoid forcing too many thick items between the dividers, as this can crack the acrylic material or make it slide out of place. A set of four to six acrylic dividers usually costs between $15 and $30.
7. The Over-the-Door Canvas Organizer
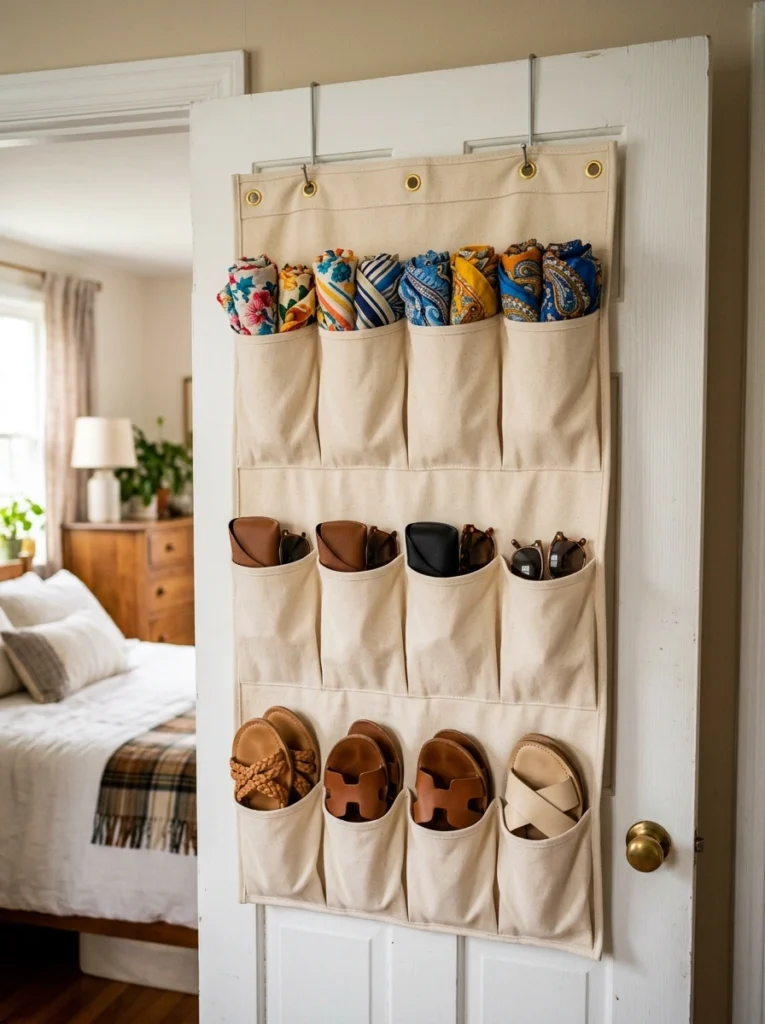
If you have a traditional hinged closet door, you are sitting on a goldmine of unused storage space. Hanging a sturdy canvas organizer over the inside of the door creates dozens of small pockets for accessories, flat shoes, rolled-up belts, and scarves. This layout keeps your floor completely clear and brings smaller, easy-to-lose items up to eye level. The soft canvas texture adds a cozy, practical feel to the closet entryway, making it easy to grab your final accessories right before you walk out the door.
Look for a heavy-duty canvas or fabric organizer with deep, structured pockets rather than cheap, flimsy plastic ones that tear easily. Use the pockets to store things like sunglasses, lint rollers, hair accessories, and summer sandals. The biggest mistake here is putting heavy items in the top pockets, which can strain the door hinges and cause the organizer to sag and flap when the door opens. A high-quality canvas door organizer will set you back about $15 to $30.
8. The Corner Carousel System
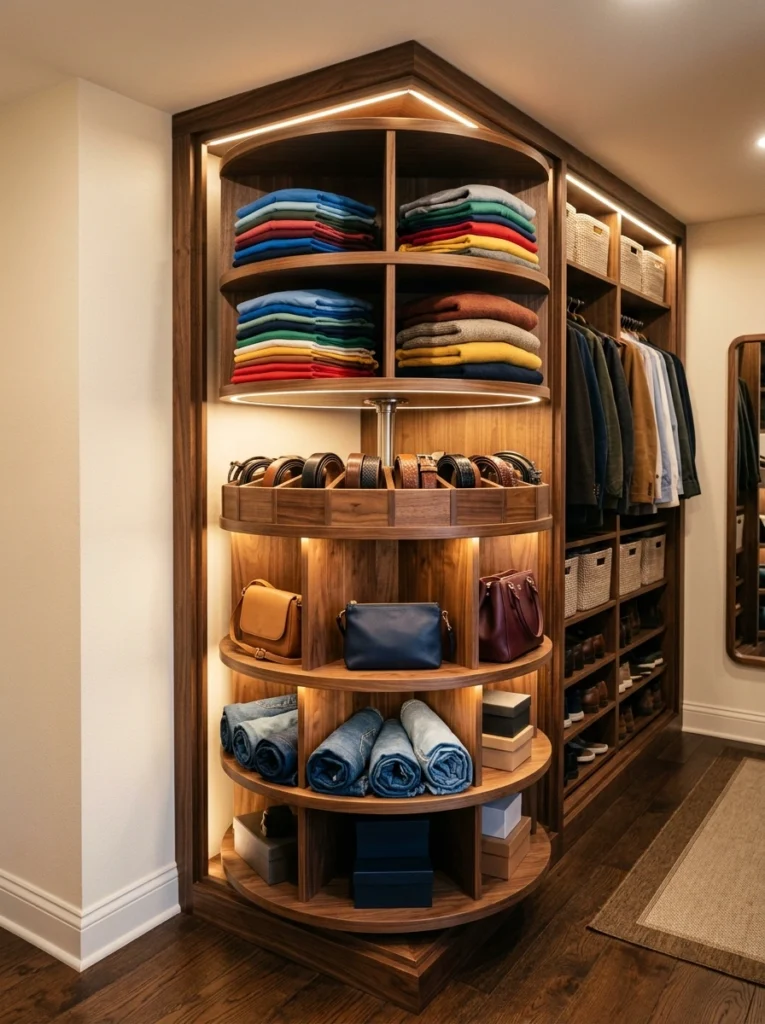
L-shaped closets or deep walk-ins often have awkward, dark corners where clothes go to be forgotten. This layout solves that problem by introducing a rotating shelving unit or carousel in the corner, allowing you to spin your clothes or accessories right into view. It feels incredibly satisfying to rotate the shelves and watch your folded t-shirts, handbags, or shoes glide into reach. This layout turns a frustrating, hard-to-reach corner into one of the most useful and fun parts of your entire closet.
To implement this, you can purchase a lazy-suzan style spinning organizer designed for closets or install curved, corner-hugging shelves. Use this zone for items you do not use every single day, like seasonal bags, hats, or special-occasion shoes, so they stay neat but accessible. A common mistake is over-allocating heavy items to one side of the carousel, which can cause the rotating mechanism to wear out unevenly. A quality rotating corner shelf system can range from $40 to $100.
9. The Pull-Out Valet Hook
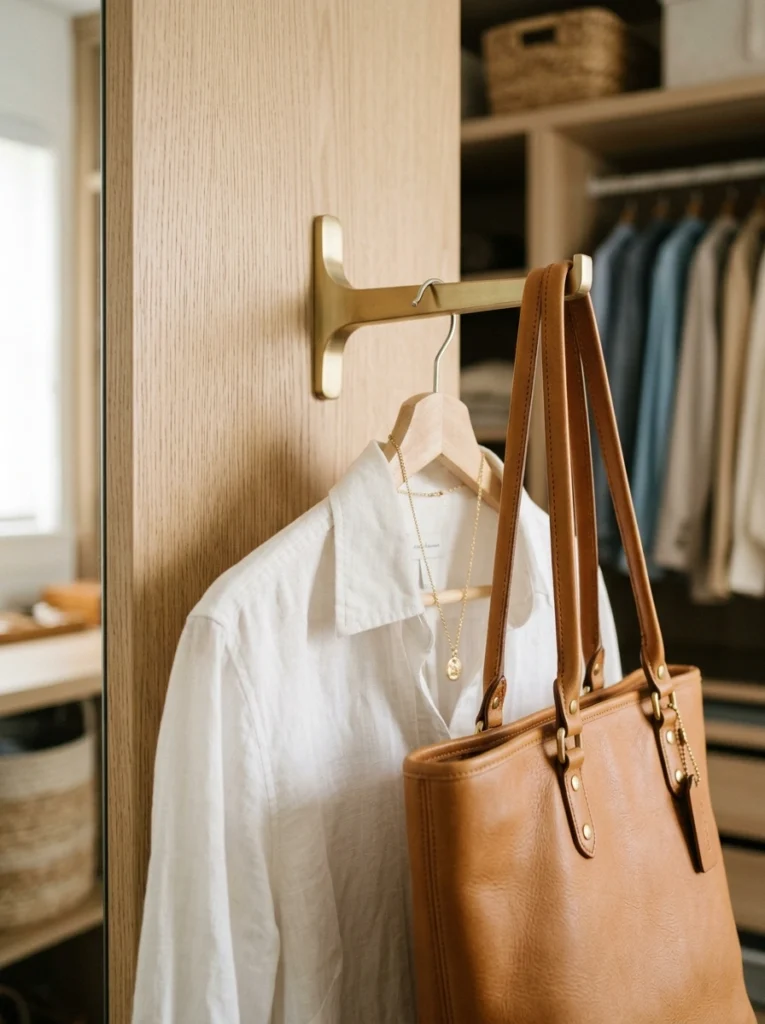
This is a tiny detail that makes a massive difference in how you plan your outfits and prep for the day ahead. A valet hook is a small, extendable metal rod that mounts to the side of your closet wall or shelving unit. When pulled out, it gives you a dedicated spot to hang your outfit for the next morning, your dry cleaning, or a piece you are trying to style. The mood is highly intentional and organized, helping you feel calm and prepared instead of rushed when getting ready.
To install this, simply screw a metal valet rod into the side panel of your wooden closet organizer or directly into a wall stud near the front of your closet. Use it every evening to plan your next outfit, including your jewelry and handbag, so you do not have to think about it in the morning. Avoid hanging heavy, damp coats on it when it is fully extended, as this can bend the sliding track over time. A stylish chrome or brass valet hook costs between $12 and $25.
10. The Built-In Drawer Insert Hack
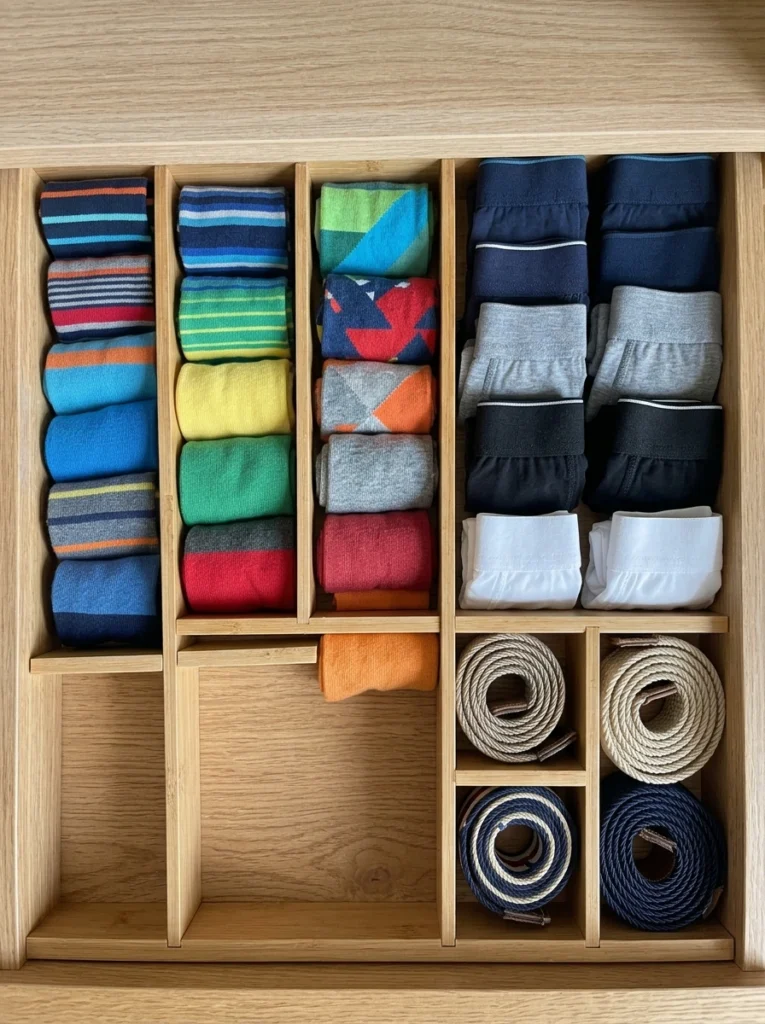
If you have built-in drawers or a small dresser inside your closet, this layout layout completely redefines how you store smaller items. By adding adjustable wooden or felt dividers inside your drawers, you create custom compartments for underwear, socks, belts, and jewelry. Opening a drawer to see everything neatly rolled and separated—rather than a tangled mess of fabric—is an instant stress-relief. It makes your daily essentials feel premium, organized, and easy to find.
To try this, buy inexpensive bamboo or plastic drawer dividers that expand to fit your drawer’s depth. Roll your t-shirts, activewear, socks, and underwear using the file-folding method so they stand upright in their compartments instead of stacking them on top of each other. A common mistake is letting random receipts, loose change, and trash pile up in these dividers, turning them into junk drawers. You can find excellent adjustable bamboo drawer dividers for about $15 to $30 a set.
11. The High-Shelf Bin System
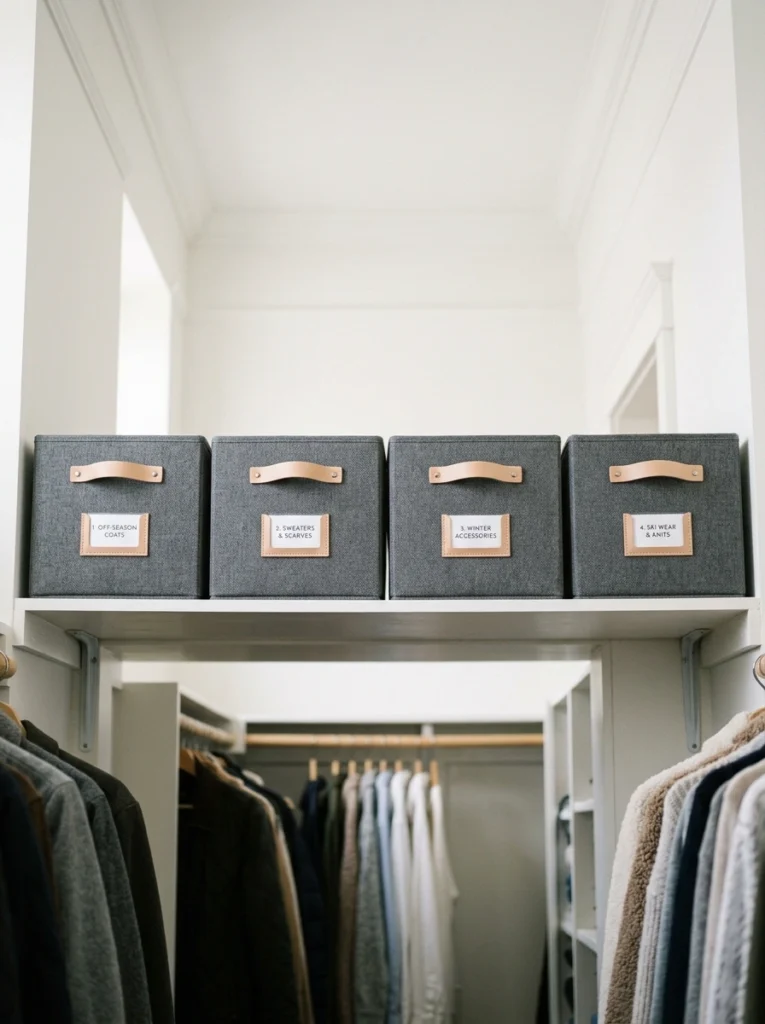
That hard-to-reach top shelf in your closet is often a magnet for messy piles of blankets and old clothes you never wear. This layout replaces that clutter with a neat row of matching, labeled fabric bins that fit perfectly side-by-side. The visual effect is clean, orderly, and architectural, drawing the eye upward and making the closet ceiling feel higher. It feels wonderful knowing that your off-season sweaters and extra linens are dust-free, organized, and completely out of the way.
To recreate this look, measure the height and depth of your top shelf and buy bins that utilize every inch of that space. Label each bin clearly (e.g., “Winter Knits,” “Beachwear,” “Extra Bedding”) so you never have to guess what is inside. Avoid using heavy wooden or plastic bins that are difficult and dangerous to pull down from a high height; soft fabric or lightweight woven baskets are much safer. A set of three matching fabric storage bins typically costs between $20 and $40.
12. The Tension Rod Shoe Rack
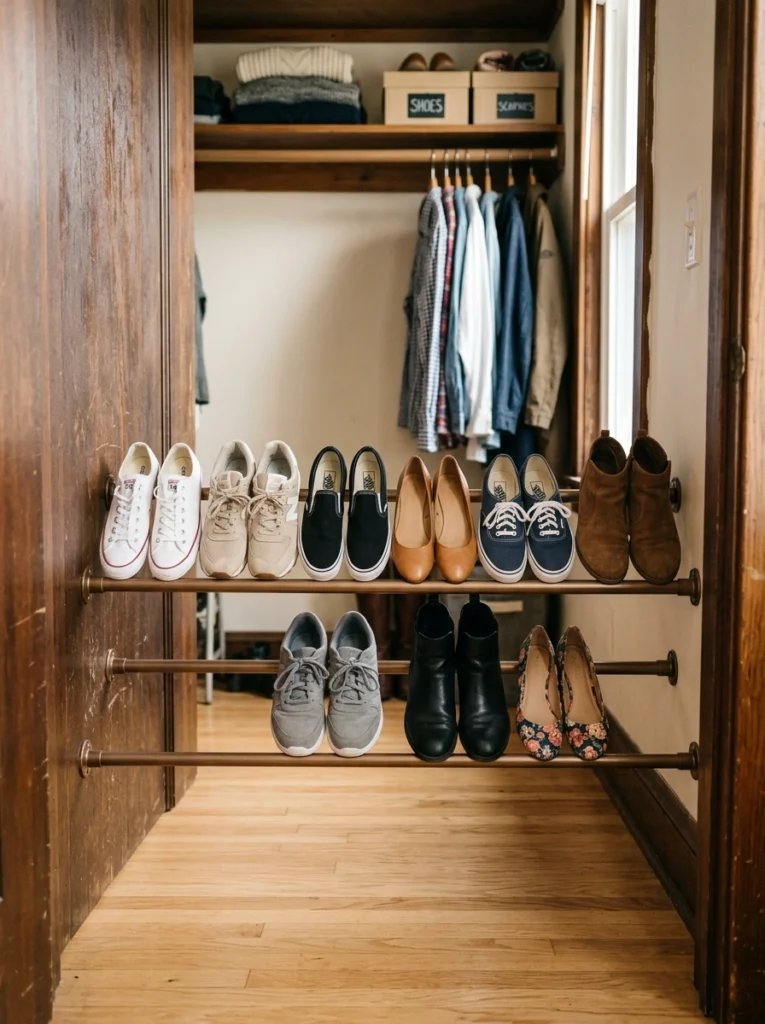
This is a brilliant, budget-friendly layout hack for utilizing the empty floor space under your hanging clothes. By placing two parallel tension rods low to the ground, one slightly higher than the other, you create a slanted, custom shoe rack. This layout keeps your everyday flats, sneakers, and boots organized and off the carpet, making the floor of your closet much easier to vacuum. It has a clever, minimalist look that proves you do not need expensive custom cabinetry to stay organized.
To install this, buy two inexpensive, heavy-duty shower tension rods and wedge them between the side walls of your closet floor. Position the front rod about two inches lower than the back rod so your shoes sit at a comfortable, visible angle without sliding off. Avoid using thin, cheap tension rods that will slip down under the weight of heavy winter boots or leather shoes. This incredibly smart, damage-free DIY layout hack will only cost you about $10 to $20 in total.
13. The Pegboard Accessory Wall
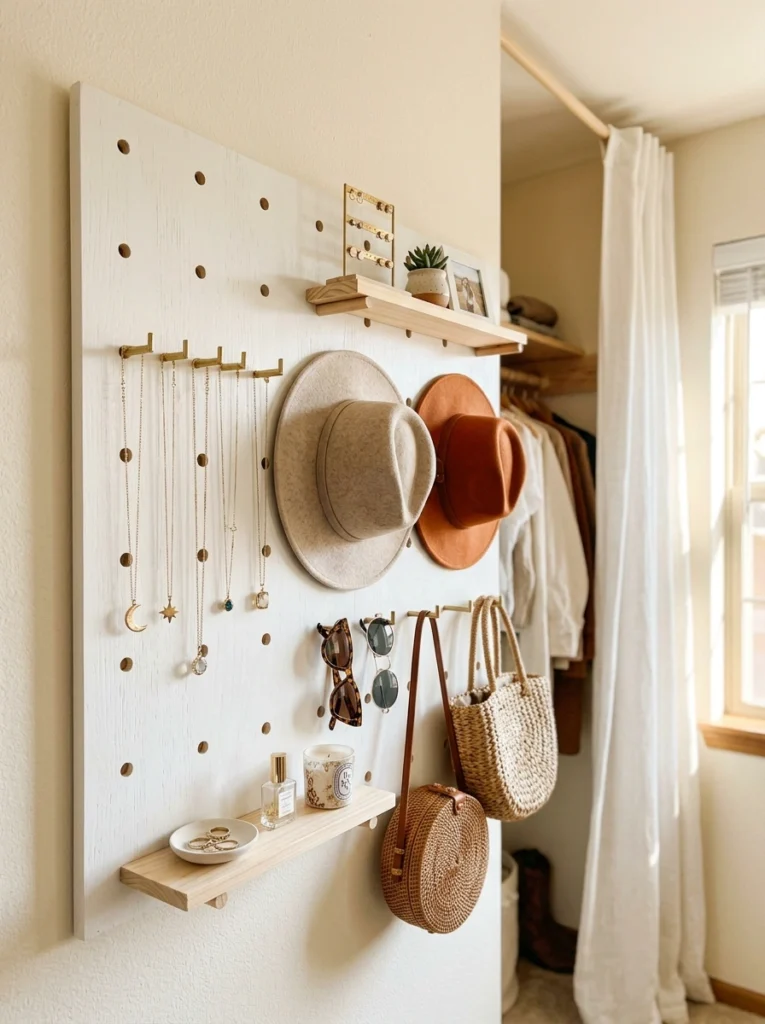
If you have a blank wall inside your closet or even on the back of your closet door, this layout turns it into a customizable storage hub. A white or wooden pegboard allows you to arrange hooks, baskets, and small shelves to hold your jewelry, sunglasses, hats, and small bags. The aesthetic is incredibly creative, colorful, and fun, turning your accessories into a beautiful focal point. It is a fantastic layout for making your daily outfit finishing touches feel easy and fun to pick out.
To set this up, mount a sturdy wooden or metal pegboard to your wall using drywall anchors to ensure it can hold weight. Arrange your hooks to hang necklaces so they do not get tangled, and hang small wire baskets for sunglasses and hair clips. The biggest mistake is overcrowding the pegboard, which makes it look cluttered and makes items hard to grab. A basic pegboard with an assortment of hooks and baskets will cost around $20 to $45.
14. The S-Hook Jean Hanging Method
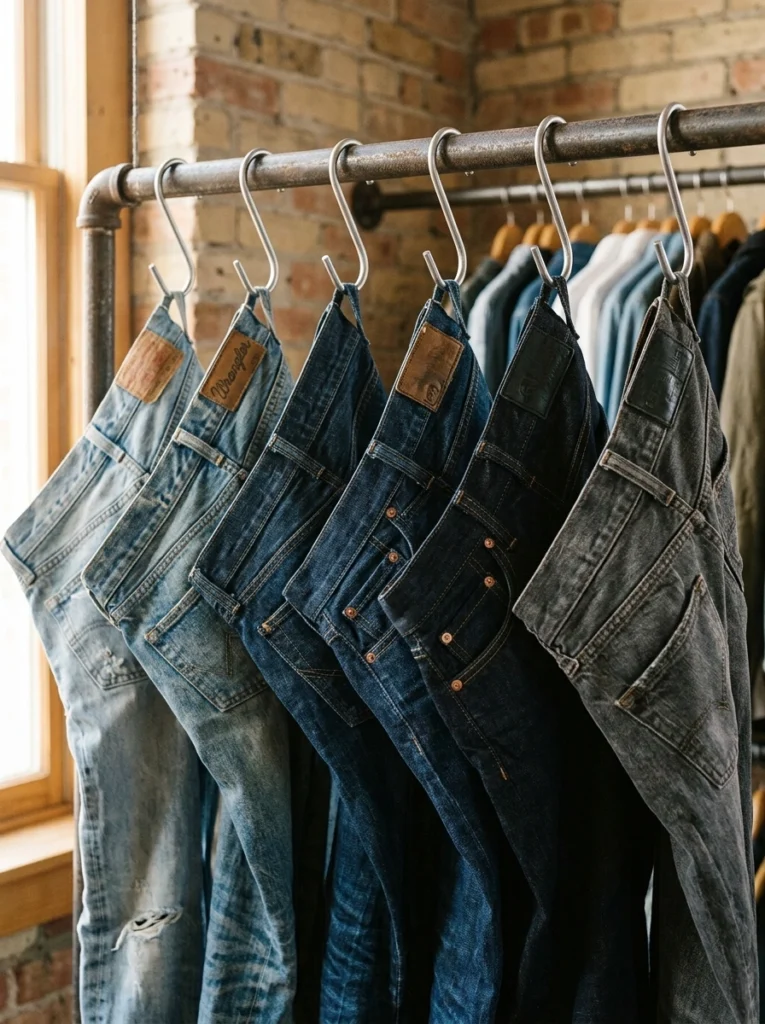
This layout is a personal favorite of mine for storing denim because it saves a massive amount of shelf and drawer space. By hanging your jeans from sturdy metal S-hooks by their belt loops, you create a rustic, boutique-style display along your hanging rod. The visual texture of different denim washes—from light blue to deep indigo—looks organized and stylish hanging together. It makes finding your favorite pair of jeans incredibly fast and keeps them completely wrinkle-free.
To recreate this, simply buy a pack of metal S-hooks (or heavy-duty shower curtain rings) and slide them onto your closet rod. Fold your jeans in half vertically, hook the S-hook through the two back belt loops, and hang them up. This works best with sturdy, structured denim rather than super stretchy leggings or thin trousers, which can stretch out or sag at the belt loops. A pack of ten metal S-hooks is incredibly budget-friendly, costing only about $8 to $15.
15. The Sliding Pants Rack
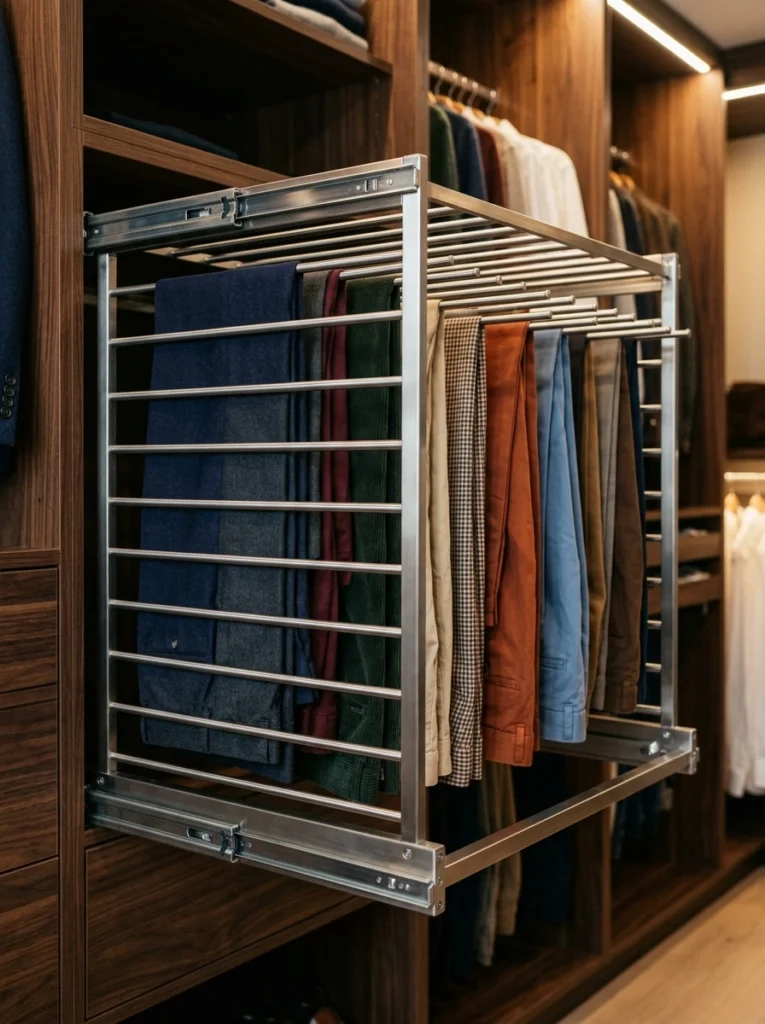
If you wear a lot of trousers, slacks, or jeans, a sliding pants rack is one of the most efficient layouts you can install. This specialized organizer features a series of thin, horizontal rods that slide out on a track, allowing you to hang your pants folded over. The look is incredibly sleek, professional, and compact, compressing multiple pairs of pants into a very small horizontal space. It makes selecting your daily pants feel smooth and prevents them from getting creased or dusty.
To implement this layout, mount a pull-out pants rack underneath an open shelf or directly to the side panel of your closet frame. Hang your trousers over the individual non-slip rods, keeping them sorted by color or fabric weight. Avoid hanging thick, heavy wool trousers next to delicate silk pants, as they can crowd the rack and cause fabrics to catch on one another. A high-quality, sliding metal pants rack system typically costs between $35 and $70.
16. The LED Sensor Light Bar
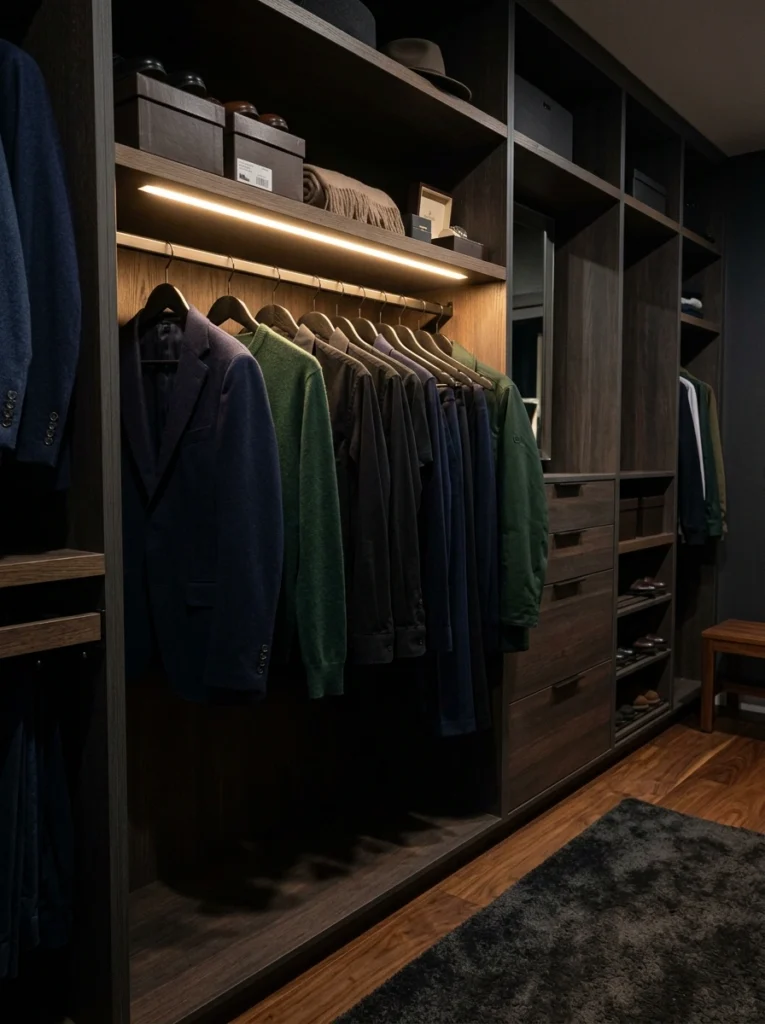
This layout upgrade has nothing to do with shelving and everything to do with how you experience your closet. Dark, poorly lit closets make it hard to distinguish navy blue from black, leading to frustrating outfit mistakes in the morning. Installing a sleek, rechargeable LED light bar that automatically turns on when you open the closet door completely changes the mood. It bathes your clothes in a bright, clean, warm light, making your entire closet feel premium, welcoming, and easy to navigate.
To set this up, purchase wireless, magnetic LED light bars that recharge via USB and stick them to the underside of your shelves or above your hanging rods. The built-in motion sensors will light up your wardrobe the moment you open the door, saving energy when the door is closed. Avoid buying lights with cheap adhesives that fall off in the middle of the night, or lights with cold, blue-toned bulbs that distort colors. A set of two rechargeable LED light bars costs around $15 to $30.
17. The Behind-the-Clothes Storage Boxes
This layout is the ultimate secret weapon for people with extremely tiny closets who need to store off-season clothing. By placing flat, sliding storage boxes on the floor behind your hanging clothes, you utilize deep, hidden space that is normally wasted. The visual layout remains completely clean and uncluttered up front, while your summer dresses or winter sweaters are safely stored away out of sight. It brings a great sense of peace knowing your extra clothes are packed away but still easily accessible.
To get this layout working, choose low-profile plastic bins or fabric zippered bags with wheels that can slide under the lowest part of your hanging clothes. Use these boxes to store items you only need a few months out of the year, keeping your active wardrobe lightweight and easy to navigate. A common mistake is using heavy, lidless cardboard boxes that gather dust, attract moisture, and are difficult to slide out. A pair of rolling under-closet storage bins costs between $20 and $40.
18. The Minimalist Capsule Zone
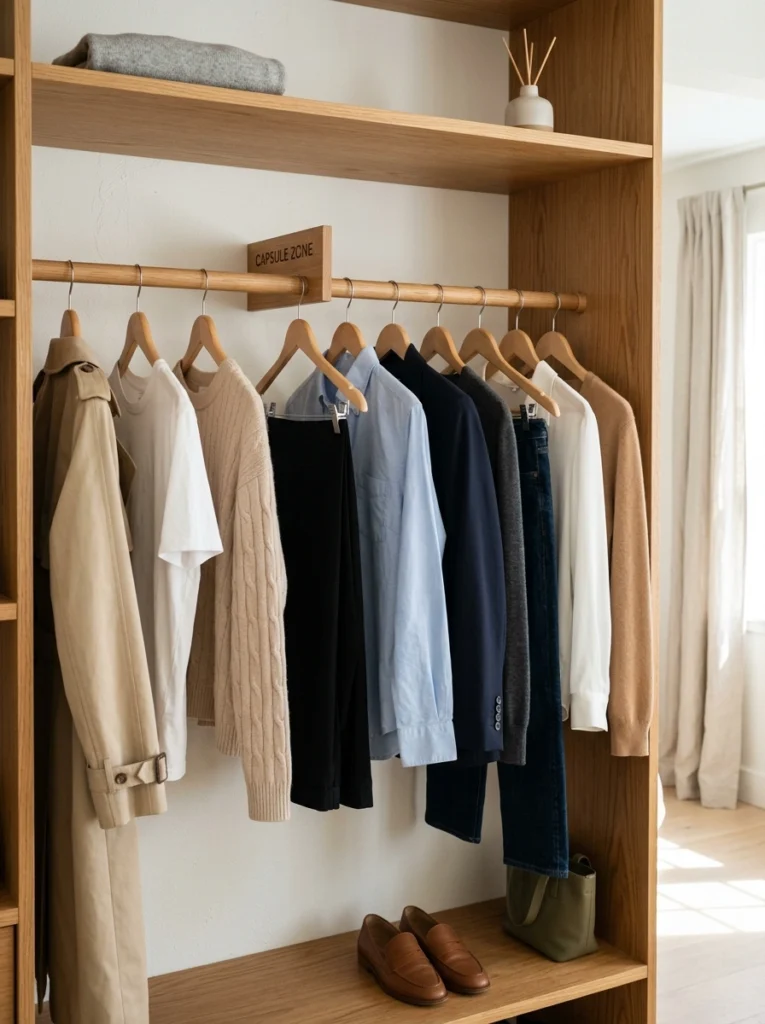
In my experience, the absolute best way to improve your daily closet use is to create a dedicated, front-and-center “Capsule Zone.” This is a small, designated section of your hanging rod—usually right in the middle—where you hang only 10 to 12 of your most worn, versatile pieces for the current season. The look is incredibly clean and airy, with plenty of breathing room between hangers. It completely eliminates morning decision fatigue because your go-to outfits are already selected and waiting for you.
To set this up, use visual dividers (like plastic rack size dividers) to carve out a small section of your main hanging rod. Every Sunday, select your outfits for the upcoming week and hang them in this zone, including your outer layers, tops, and pants. Avoid letting non-capsule items drift into this space, as it defeats the purpose of having a fast, curated morning setup. This layout idea is completely free to implement and will save you hours of stress every single week.
Conclusion
At the end of the day, having a functional closet is not about how much square footage you have; it is about how intentionally you use the space. True style and a stress-free morning do not require expensive custom build-outs or a massive wardrobe. By making just a few small, thoughtful adjustments to your closet layout, you can turn a chaotic mess into a peaceful, highly organized space that works for you every single day.
If you are feeling overwhelmed, I always recommend starting with just one or two simple ideas first—like switching to matching velvet hangers or setting up a dedicated capsule zone for the week. Once you experience how much easier it is to get dressed in the morning, you will feel inspired to keep organizing.
Which of these small closet layout ideas are you going to try out first in your home? I would genuinely love to know what your biggest closet struggle is, so leave a comment below and let us chat about it!
Frequently Asked Questions
How do I make a small basic closet look more stylish?
The quickest way to make a simple closet look stylish is to use matching velvet hangers, add cohesive storage bins on the top shelf, and install a wireless LED light bar. These small details instantly create a uniform, high-end look without costing a lot of money.
What is the best way to organize shoes in a very small closet?
Using vertical shoe grids or installing two parallel tension rods on the floor are the best ways to maximize shoe storage. This keeps your shoes off the floor, organized in neat pairs, and takes up very little floor space.
How can I double my closet space on a budget?
You can easily double your closet space by installing a second hanging rod below your short clothes and using ultra-slim velvet hangers. These two quick fixes can increase your hanging capacity by up to 50 percent immediately.
Should I fold or hang my sweaters in a small closet?
You should always fold sweaters rather than hang them, as hangers can stretch out the shoulders and ruin the fabric’s shape. Use clear acrylic shelf dividers on your top shelves to keep folded sweater stacks neat and upright.
How do I prevent my small closet from smelling musty?
To keep your closet smelling fresh, avoid putting worn clothes back inside, ensure everything is completely dry before storing, and place a small sachet of cedar chips, lavender, or baking soda on a shelf to absorb moisture and odors.