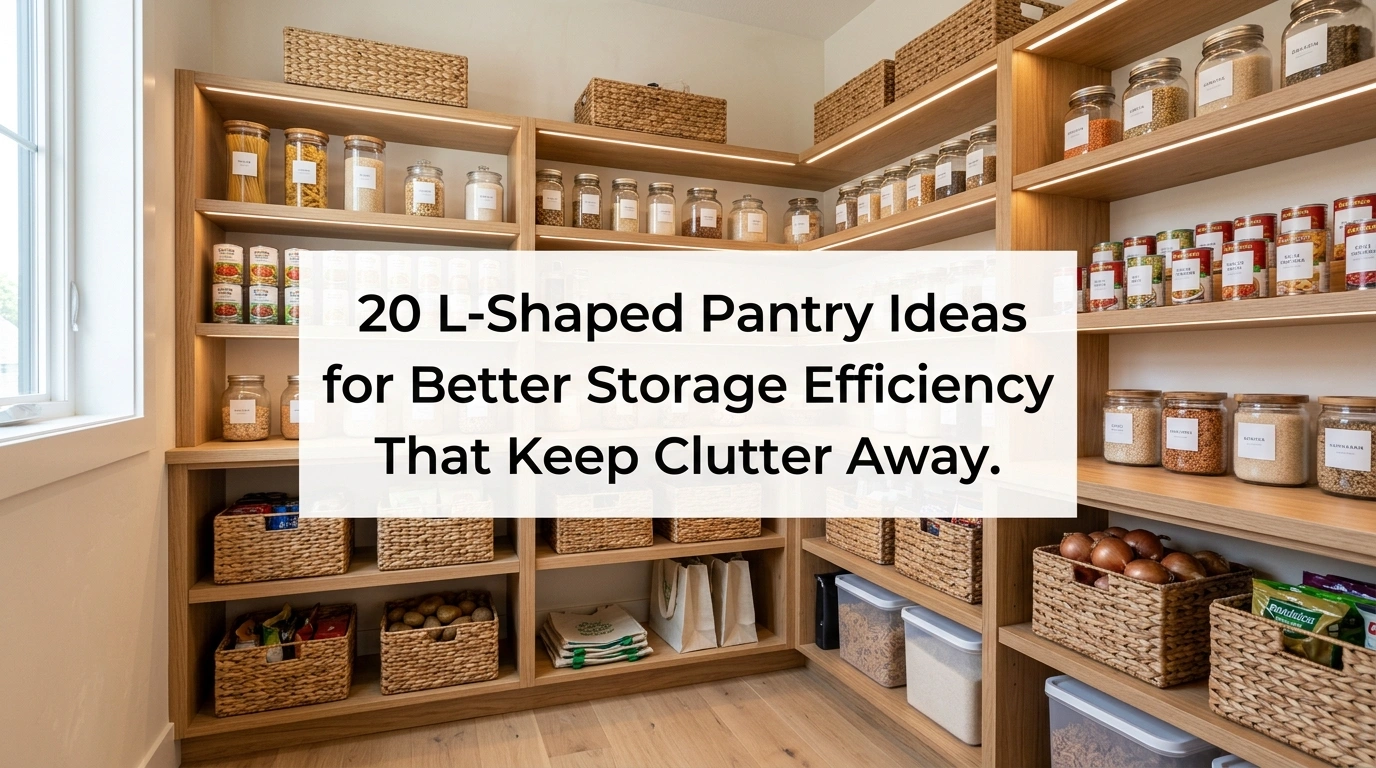
If you have ever opened your pantry doors only to find yourself staring into a dark, awkward corner where half-empty bags of chips and dusty canned goods go to die, you are definitely not alone. Kitchen corners are notoriously tricky to organize, and an L-shaped layout can quickly feel like a black hole if you do not have a solid plan. We have all been there—buying duplicates of spices we already own simply because the first jar was hidden away in the deep bend of a shelf.
The good news is that with a few intentional adjustments, an L-shaped setup can actually become your kitchen‘s hardest-working feature. By shifting how you view your corner space and organizing with accessibility in mind, you can turn those awkward angles into highly functional storage zones. In this guide, we are going to walk through 20 practical, real-life L-shaped pantry ideas for better storage efficiency that will help you maximize every single inch of shelving without spending a fortune.
1. The Oversized Lazy Susan Corner Turn
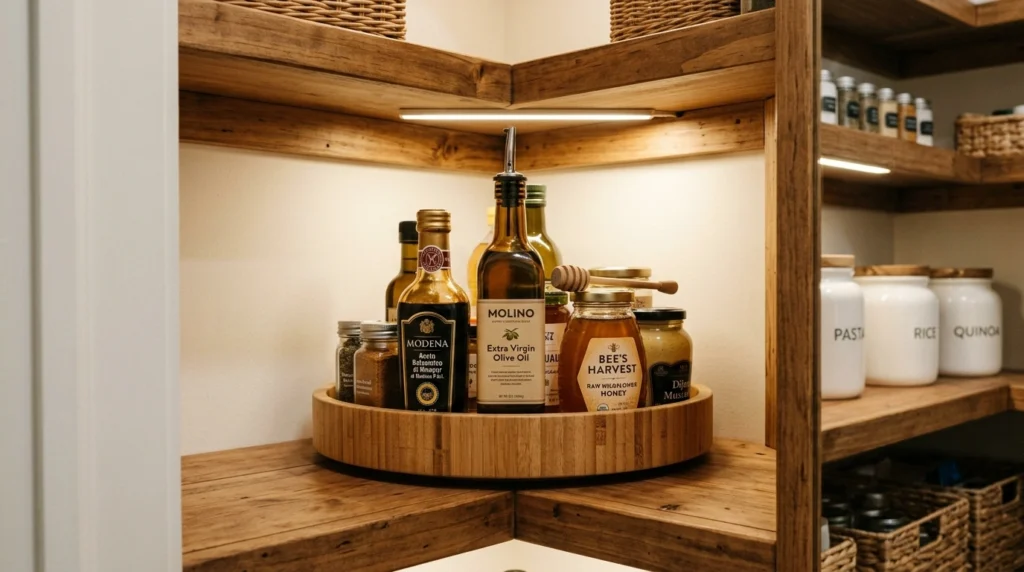
What I personally love about this look is how it instantly solves the “dead corner” dilemma. Instead of reaching blindly into the deep corner intersection of your L-shaped shelves, a large wooden or heavy-duty plastic Lazy Susan brings everything directly to you with a quick spin. It looks neat, feels satisfying to use, and keeps smaller items like oils, vinegars, or peanut butter jars from getting pushed into the dark background.
To recreate this setup, I always recommend starting with a turntable that is slightly smaller than the depth of your shelf so it has plenty of room to spin freely. Look for options with a small lip around the edge to prevent jars from flying off when turned. In my experience, the biggest mistake people make is buying cheap, flimsy plastic versions that buckle under the weight of heavy glass bottles. Spend a little extra—typically around $15 to $25—on a sturdy bamboo or thick acrylic turntable that can support your heavier pantry staples.
2. Color-Coded Basket Zones
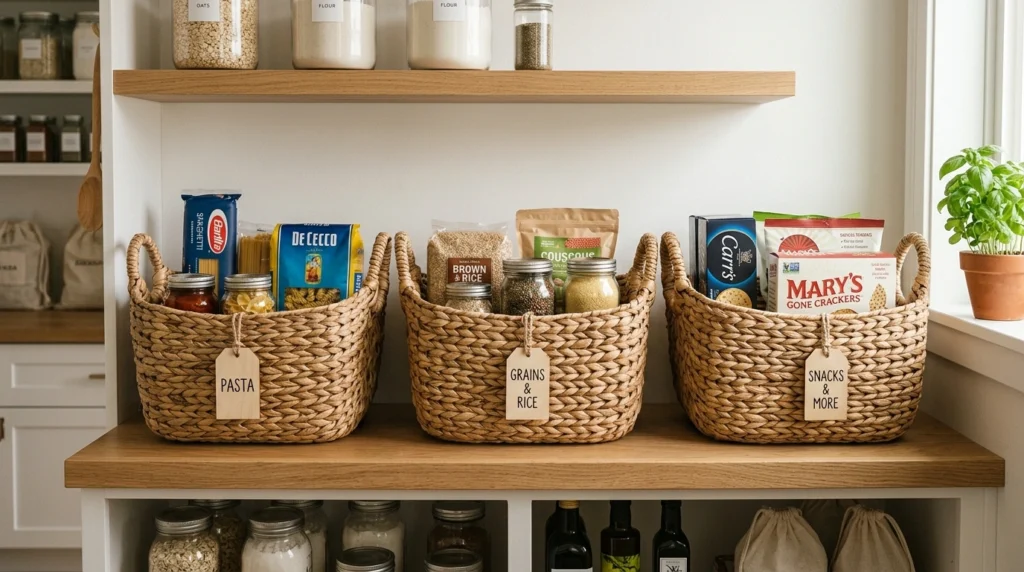
A lot of people overlook this detail, but organizing your food by category in matching baskets changes the entire feel of your pantry. By using woven water hyacinth or wire baskets to line the longer side of your L-shape, you create a beautiful, cohesive look that hides mismatched packaging. It instantly tones down visual clutter and makes the pantry feel like a calm, organized room rather than a messy storage closet.
When setting this up, group similar items together—like a “breakfast basket” for oatmeal and pancake mix, or a “dinner basket” for pastas and sauces. Make sure to choose baskets with sturdy handles so you can easily pull them off the shelf like drawers. This works especially well if you want to look more organized without trying too hard, as you can find great sets of three or four woven baskets at discount home stores for around $30 to $45.
3. Clear Acrylic Corner Risers
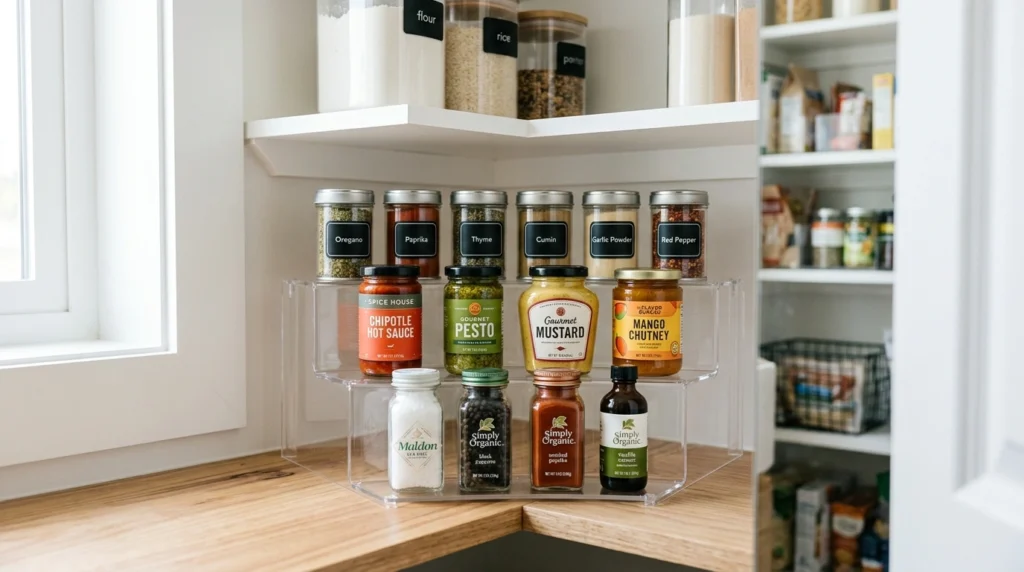
If you want your pantry to look incredibly clean and bright, clear acrylic step risers are a game-changer for the corner joints. They allow you to stack canned goods or small spice jars in a tiered, stadium-style arrangement right where the two shelves meet. Because the material is completely transparent, light passes right through them, keeping those notoriously dark L-shaped corners feeling airy and easy to navigate.
When styling these, place your tallest items on the back tier and the shortest items in the front so nothing is blocked from view. Avoid using them for heavy canisters; instead, keep them reserved for lightweight items like spices, tea boxes, or small jars. A good quality set of acrylic risers will run you about $12 to $20 and will completely prevent you from buying duplicate ingredients ever again.
4. Continuous Wrap-Around Wood Shelving
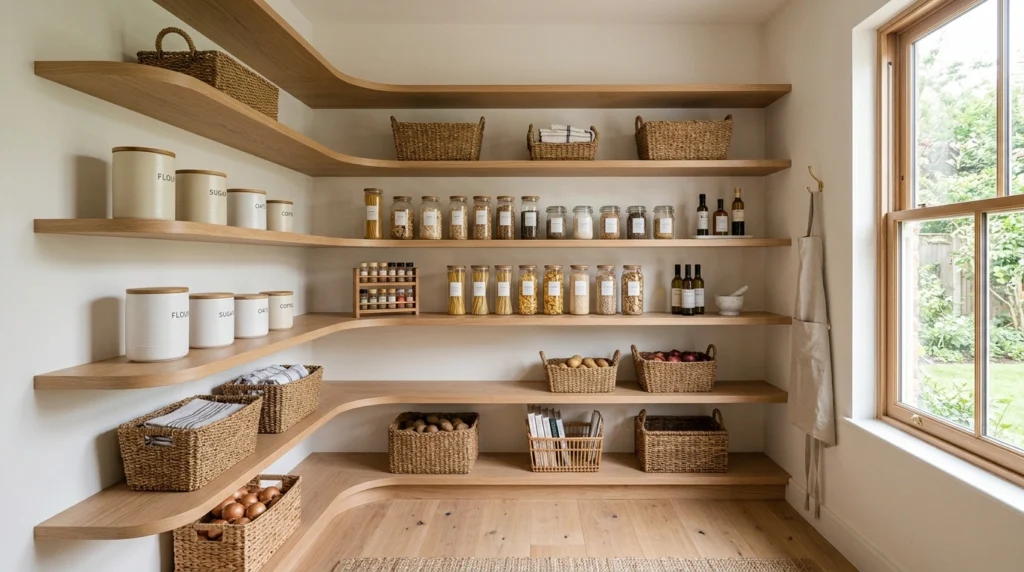
In my experience, the biggest mistake people make when building an L-shaped pantry is putting a thick wooden vertical support post right in the corner curve. It completely blocks your physical and visual access to the deepest part of the shelf. Opting for custom or semi-custom wrap-around wooden shelves with hidden bracket supports underneath gives you a clean, uninterrupted shelf surface that looks beautifully seamless.
To make this work on a budget, you can use heavy-duty steel L-brackets anchored directly into the wall studs beneath the shelves instead of building a bulky frame. Paint or stain the wood a warm, inviting tone like soft oak or classic white to make the space feel bright. While this DIY project might cost $100 to $200 in lumber and hardware, the massive increase in usable corner space is absolutely worth the effort.
5. Deep Bottom-Shelf Pull-Out Drawers
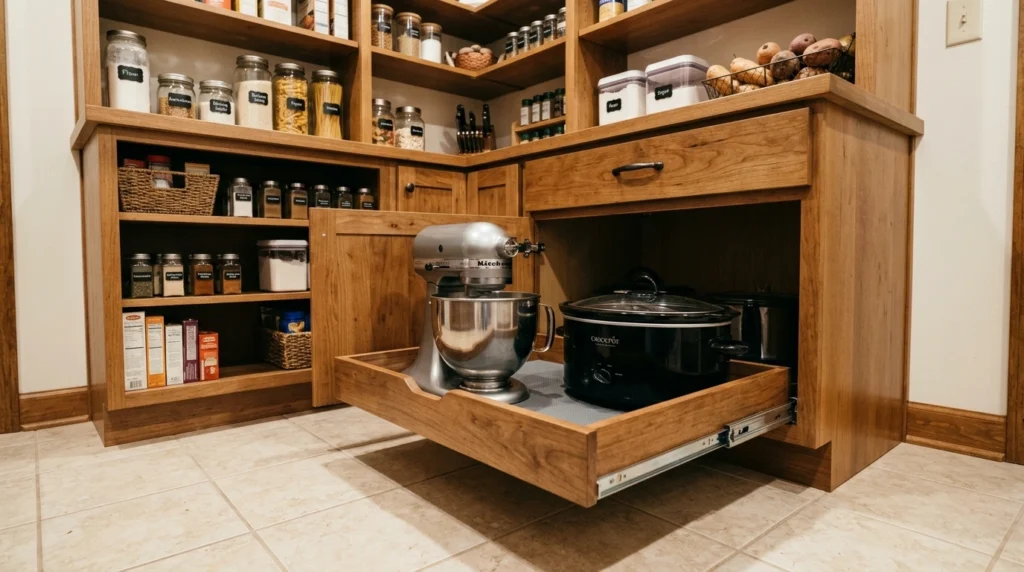
The bottom section of an L-shaped pantry is often a wasteland of heavy, awkward appliances and bulk paper products that are hard to reach. Installing deep wooden pull-out drawers on heavy-duty sliders along the lower half of your L-shape makes accessing heavy mixers, slow cookers, or bulk flour sacks incredibly easy. It saves your back from constant bending and reaching into dark floor corners.
I always recommend starting with professional drawer glides rated for at least $100 \text{ lbs}$ so they do not sag over time when loaded with heavy cast iron or kitchen electrics. If you are retrofitting existing shelves, you can buy pre-assembled slide-out wire or wooden baskets that screw directly into your cabinet base. These retrofits typically cost between $40 and $80 per drawer but completely transform how you use the lower third of your pantry.
6. Hanging Mesh Produce Bags
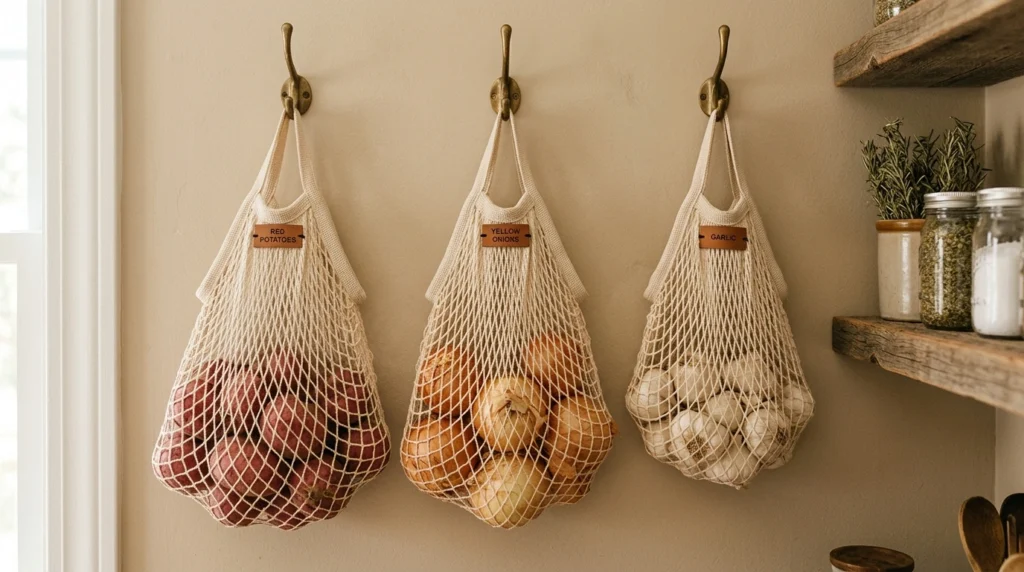
Utilizing the empty wall space at the very ends of your L-shaped shelves is a brilliant way to add storage without crowding the shelves themselves. Hanging lightweight, breathable cotton mesh bags from small brass hooks on the wall is perfect for storing onions, garlic, and potatoes. It keeps these items off your flat shelf space, allows proper air circulation so they last longer, and adds a charming, rustic touch to the space.
When installing the hooks, make sure they are anchored well or stuck firmly to the wall if using adhesive backings, as a bag of potatoes can get surprisingly heavy. Position them on the wall end of the shorter side of your L-shape, which is usually underutilized. You can purchase a pack of three organic cotton mesh bags for under $15, making this one of the most affordable and high-impact functional updates you can make.
7. The “Zone-Based” Glass Decanting System
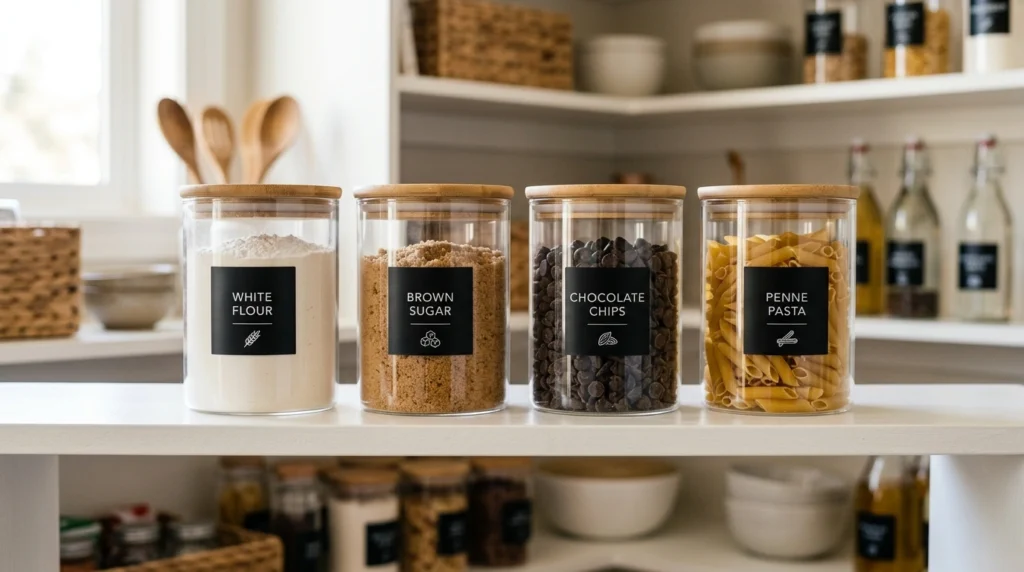
There is something deeply satisfying about looking into a pantry filled with matching glass jars of flour, sugar, pasta, and grains. By placing these decanted jars along the main eye-level shelves of your L-shape, you create an orderly focal point that feels incredibly calming. It also lets you see exactly when you are running low on baking essentials at a single glance.
The trick to keeping this practical is only decanting the items you use frequently, rather than trying to put absolutely everything into a jar. Use jars with wide openings and airtight bamboo or metal silicone-ring lids to keep your dry ingredients fresh. You can find beautiful glass jars in bulk online or at local department stores for about $5 to $10 each, depending on the size.
8. Vertical Cookie Sheet and Tray Dividers
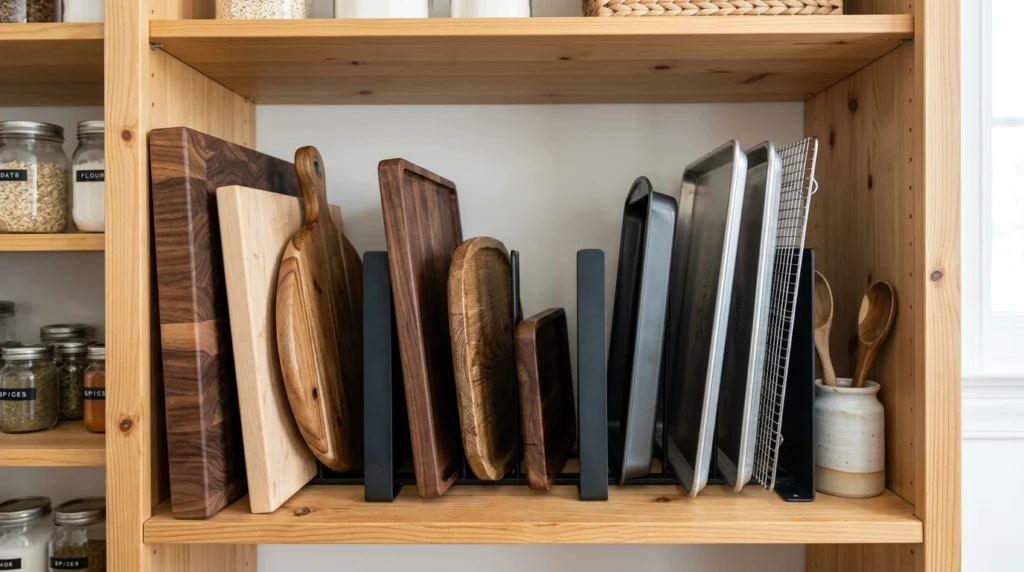
We often default to stacking flat items like cutting boards, baking sheets, and serving platters horizontally, which makes pulling one out a loud, frustrating chore. Dedicating a narrow section of your L-shaped shelving to vertical dividers keeps these flat items lined up like books on a shelf. It makes retrieving your daily cutting board completely silent and effortless.
You can easily recreate this look by purchasing inexpensive metal tension rods or pre-made wire organizer racks and placing them on an upper shelf. Arrange them spaced about $3 \text{ to } 4\text{ inches}$ apart so each tray has its own designated slot. This works especially well if you have a narrow vertical gap near the end of your L-shelves, and it costs less than $15 to set up.
9. Under-Shelf Wire Hanging Baskets
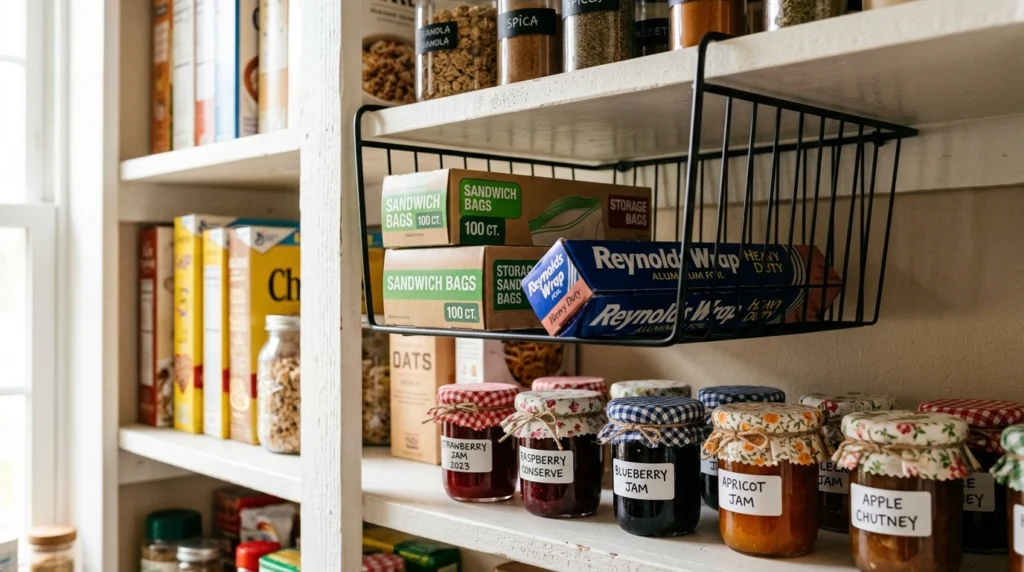
When you look closely at your pantry shelves, you will likely notice a massive amount of empty, wasted air space between the top of your items and the shelf above them. Under-shelf wire baskets simply slide onto your existing shelves to create a secondary, floating storage level underneath. They are the perfect spot for flat items like sandwich bag boxes, foil rolls, or lightweight bags of bread.
Make sure to measure the thickness of your shelves before buying to ensure the basket arms will slip over them comfortably. Look for sturdy black or white powder-coated metal designs that match the rest of your pantry hardware for a cohesive look. These handy little space-savers generally cost between $8 and $15 each and can instantly increase your storage capacity by twenty percent.
10. Cozy Rustic Chalkboard Labeling
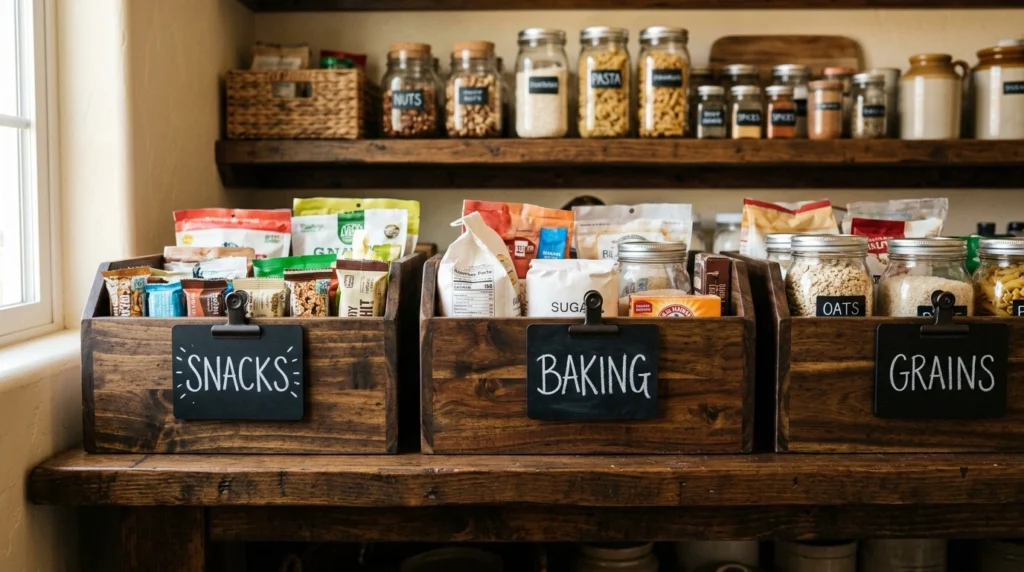
If you love a warm, cozy farmhouse aesthetic, using dark wooden bins or dark woven baskets with hanging chalkboard labels is a beautiful styling choice. The contrast of the white chalk lettering against dark wood or deep charcoal labels adds a gorgeous touch of personality while ensuring everyone in the house knows exactly where snacks, baking goods, and canned items belong.
My favorite tip is to use liquid chalk markers instead of traditional dusty chalk sticks; they write much cleaner, do not smudge when touched, and can still be easily wiped clean with a damp cloth if you decide to change the contents of the bin. You can buy a pack of clip-on wooden chalkboard tags and markers for around $10 to $12 to give your entire pantry a cohesive, stylized look.
11. End-Wall Pegboard Organizer
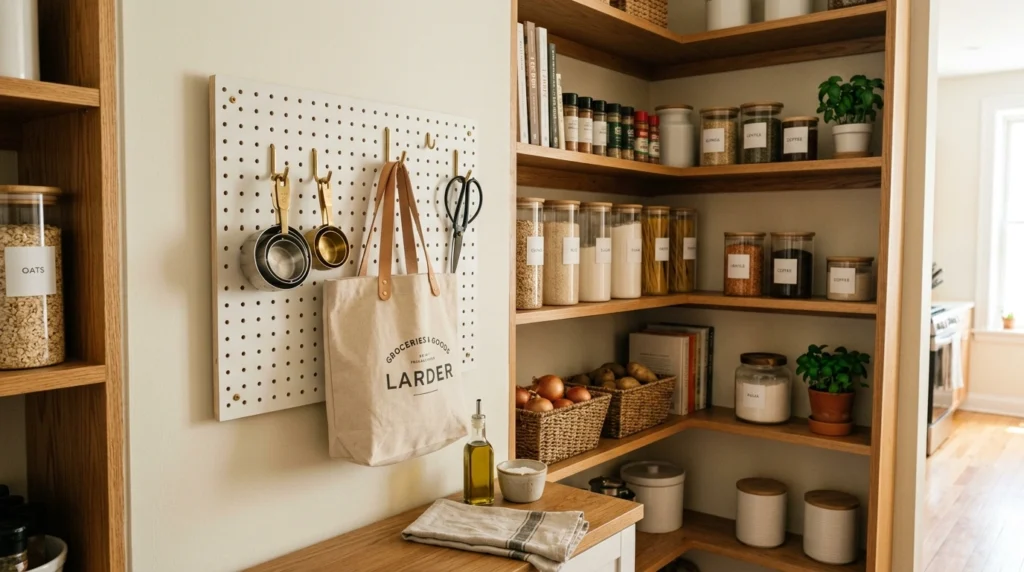
Don’t let the small blank wall space at the short return of your L-shape go to waste. Installing a painted wooden or metal pegboard on this wall gives you a highly customizable hanging zone for measuring cups, aprons, grocery bag dispensers, or small hand tools. It keeps these frequently used odd-and-end items out of draw bins and right within arm’s reach.
You can paint the pegboard the exact same color as your pantry walls so it blends in cleanly, or choose an accent color like soft sage green or charcoal for a pop of personality. Use brass or matte black peg hooks to match your kitchen’s hardware style. A basic pegboard kit with hooks is incredibly budget-friendly, usually costing around $20 to $35 at any local hardware store.
12. Over-the-Door Grid Organizer
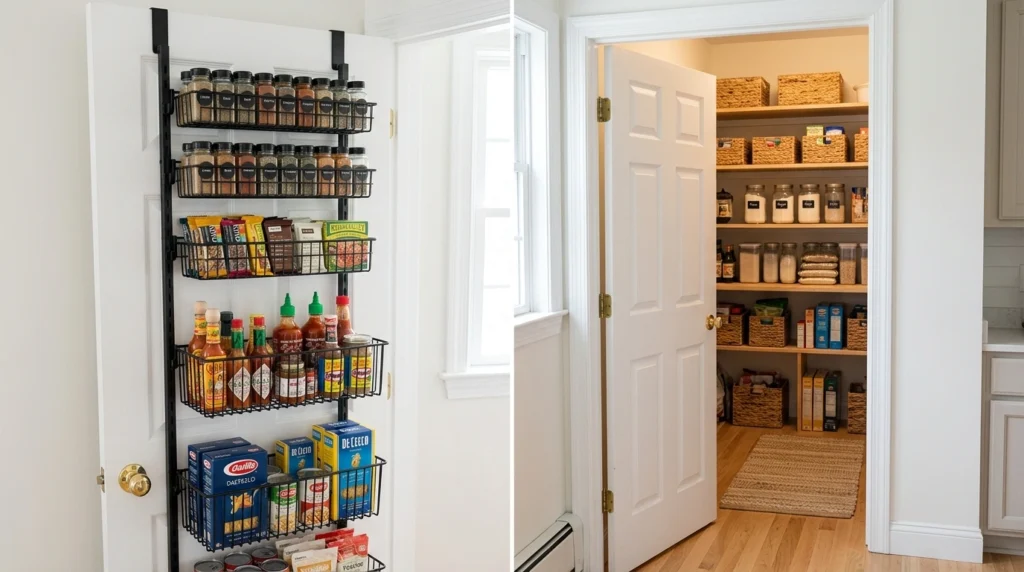
To truly maximize a small walk-in or reach-in L-shaped pantry, you have to utilize the inside of the pantry door. A heavy-duty, over-the-door metal rack with adjustable baskets acts as a natural extension of your L-shape. It is the absolute best place to store frequently grabbed items like spices, hot sauce bottles, snack bars, or kids’ juice boxes.
In my experience, the biggest mistake people make is buying cheap plastic hanging organizers that swing and clatter every time the door is opened. Spend a little extra on a metal grid system that screws securely into the door itself so it feels solid and premium. These high-capacity door systems generally cost between $35 and $60 and save an incredible amount of main shelf space.
13. Slim Rolling Cart Corner Tucker
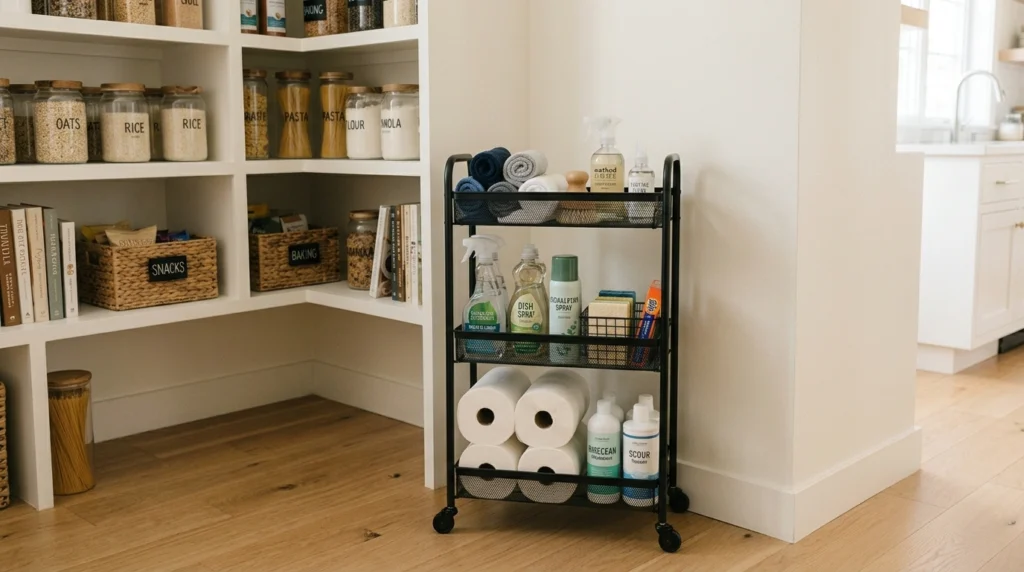
If your lower L-shaped shelves leave a awkward open gap near the floor corner, a slim, three-tiered rolling cart is the perfect filler. You can slide it directly into the empty space under the bottom shelf and roll it out smoothly whenever you need to grab something. It is an amazing spot for storing heavy cleaning supplies, extra paper towel rolls, or even root vegetables like onions and squashes.
Look for a metal cart with a narrow profile (around $6 \text{ to } 8\text{ inches}$ wide) that matches the height of your lower shelf gap. Ensure the wheels roll smoothly on your kitchen floor surface without scratching. A simple metal rolling utility cart is highly versatile, looks incredibly intentional, and can be found online or in home goods stores for about $25 to $40.
14. Double-Decker Lazy Susan for Spices
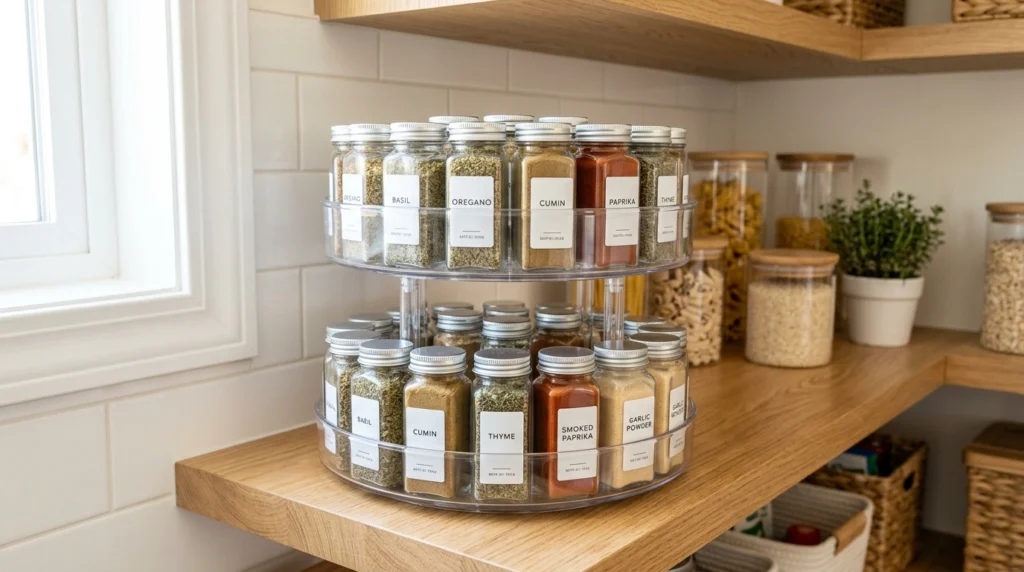
For those who have a massive collection of spices and baking extracts, a standard single-tier Lazy Susan might not offer enough storage. A double-decker (two-tiered) turntable placed right in the corner curve of an upper shelf doubles your vertical storage space while keeping every single spice easily accessible. It keeps your cooking essentials organized alphabetically or by frequency of use.
When organizing a double-decker turntable, place your tallest spice bottles and refills on the bottom tier and the smaller, daily-use spice tins on the very top. Opt for a model with a non-skid rubber lining on the surfaces to keep your lightweight spice jars from sliding around as you spin it. These multi-tier organizers are incredibly affordable, typically costing between $12 and $22.
15. Unified Color Palette Container Setup
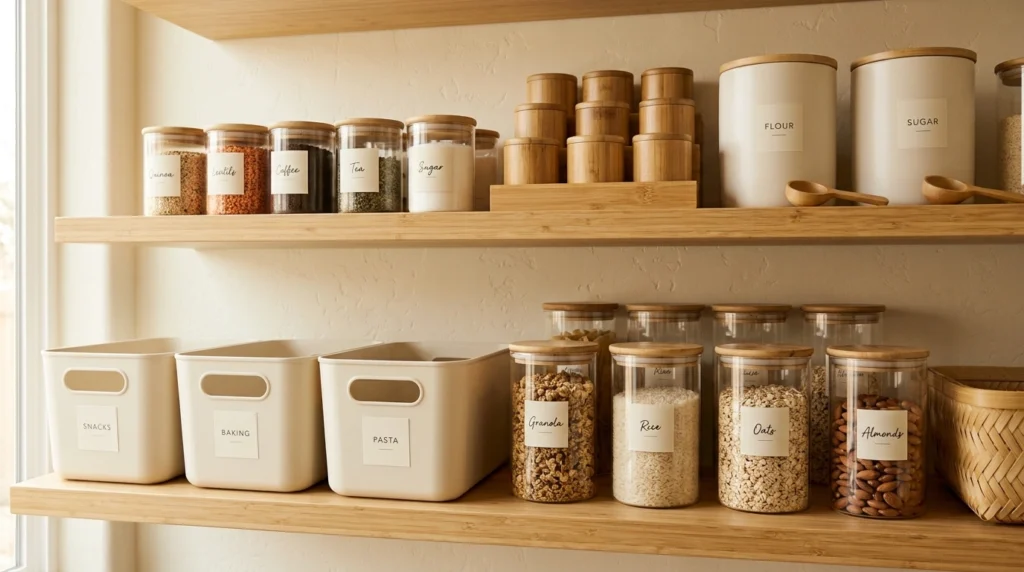
A simple trick that professional home organizers use to make any space feel incredibly high-end is adhering to a strict, unified color palette for all storage containers. By choosing canisters, bins, and baskets that only feature neutral colors—like warm sand, soft cream, light bamboo, and matte black—you create a visually peaceful environment. It prevents your eyes from getting overwhelmed by the chaotic colors of food packaging.
You do not need to buy all new expensive containers to achieve this look. You can paint mismatched plastic bins with plastic-safe matte spray paint or buy inexpensive matching container sets over time. Focus on replacing your loudest cardboard packaging first. Starting with a set of five or six matching cream-colored plastic organizing bins will cost around $20 and make an immediate visual difference.
16. Backlit Warm LED Strip Lighting
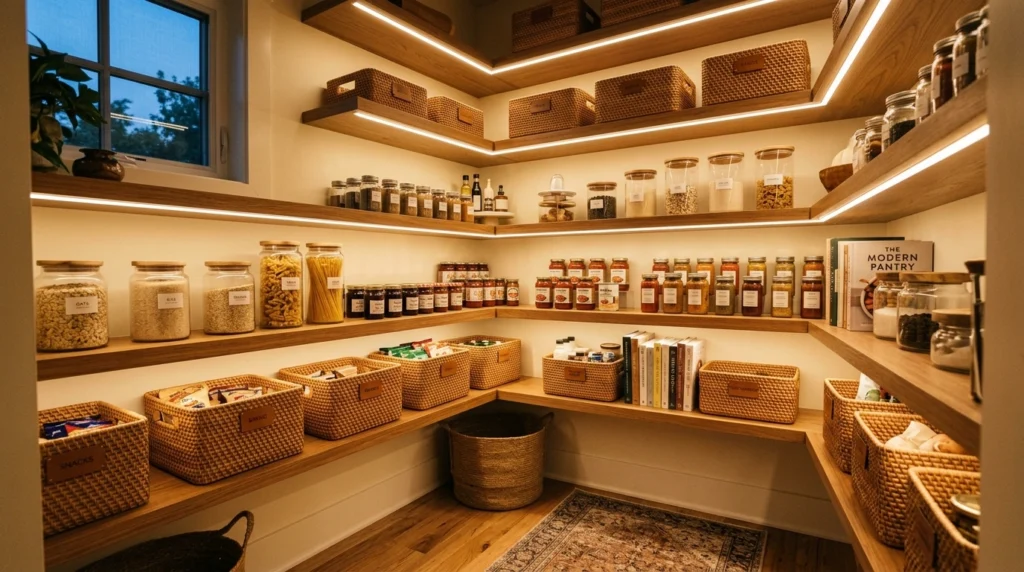
One of the biggest issues with deep L-shaped pantries is that the shelves cast shadows on one another, leaving the lower and corner areas incredibly dark. Running a continuous line of warm, battery-powered or plug-in motion-sensor LED strip lights along the underside of each shelf changes everything. It illuminates every nook and cranny, making your pantry feel incredibly luxurious and easy to clean.
I highly recommend choosing motion-activated LED strips so they turn on automatically the second you open the pantry door and turn off shortly after you close it, saving battery life. Stick-on LED strips are incredibly easy to install without any wiring or tools. A complete set of rechargeable, magnetic LED strip lights for a medium-sized pantry will cost about $30 to $50 and completely change how you view your space.
17. The Kid-Friendly Lower-Level Baskets
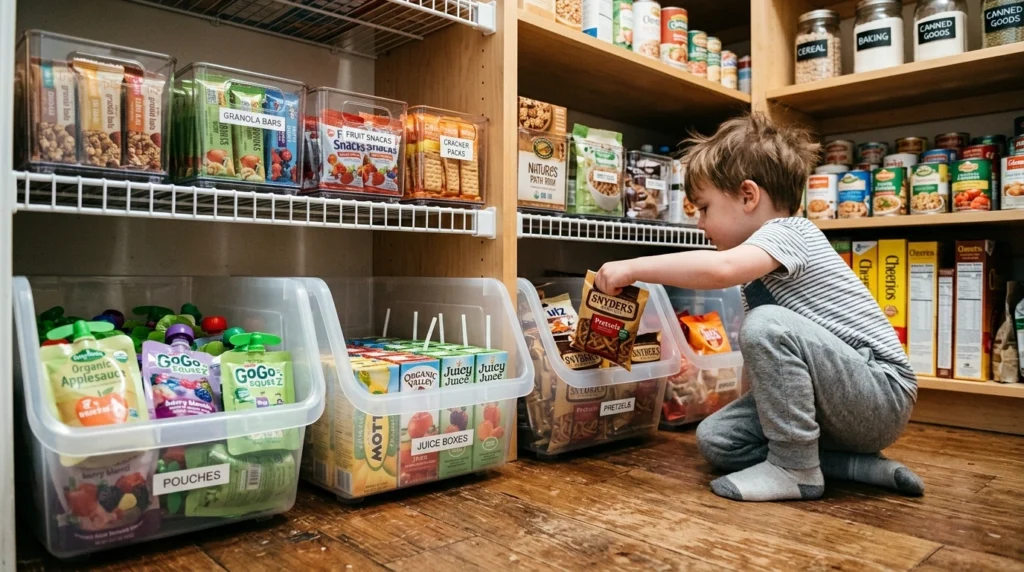
If you have young children, you know how often they ask for snacks or help themselves, leaving box tops ripped and half-empty bags lying around. Dedicating the lowest, easiest-to-reach shelves of your L-shape to kid-friendly snack baskets is a sanity-saver. Filling open, durable plastic bins with pre-portioned bags of pretzels, fruit snacks, and applesauce pouches empowers kids to choose their own snacks safely.
Choose heavy-duty, BPA-free plastic bins that can be easily washed out with soap and water if a juice box leaks or a snack bag breaks. Avoid using glass or heavy ceramic containers on these lower levels for safety reasons. A set of three open-front plastic “grab bins” is incredibly practical, durable, and will cost you around $15 to $25.
18. Staggered Shelf Depths
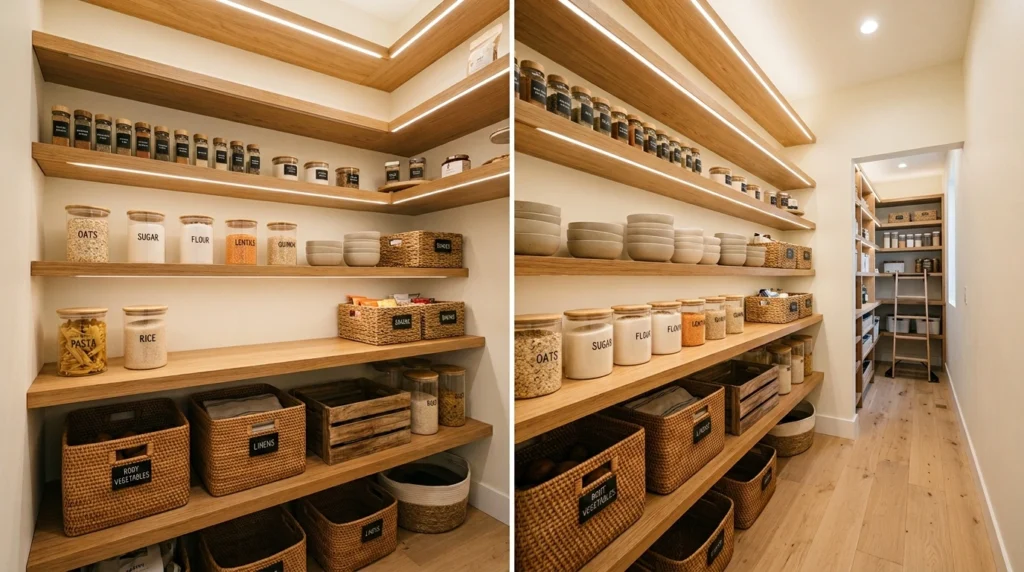
A brilliant design choice for custom or DIY L-shaped shelves is using staggered shelf depths. This means having deep shelves (around $16 \text{ to } 18\text{ inches}$) at the very bottom for heavy appliances and large bins, standard shelves (about $12\text{ inches}$) at eye level for plates and jars, and shallow shelves (around $8\text{ inches}$) at the very top for small spices and lightweight boxes.
This staggered layout ensures that light from the ceiling can reach all the way down to the bottom shelves instead of being blocked by deep upper shelving. It also prevents you from losing track of items on high, deep shelves where you can’t easily see. While this requires a bit of planning during installation, using varying wood board widths is a highly efficient way to build an incredibly ergonomic pantry.
19. Tension Rod Partition Setup
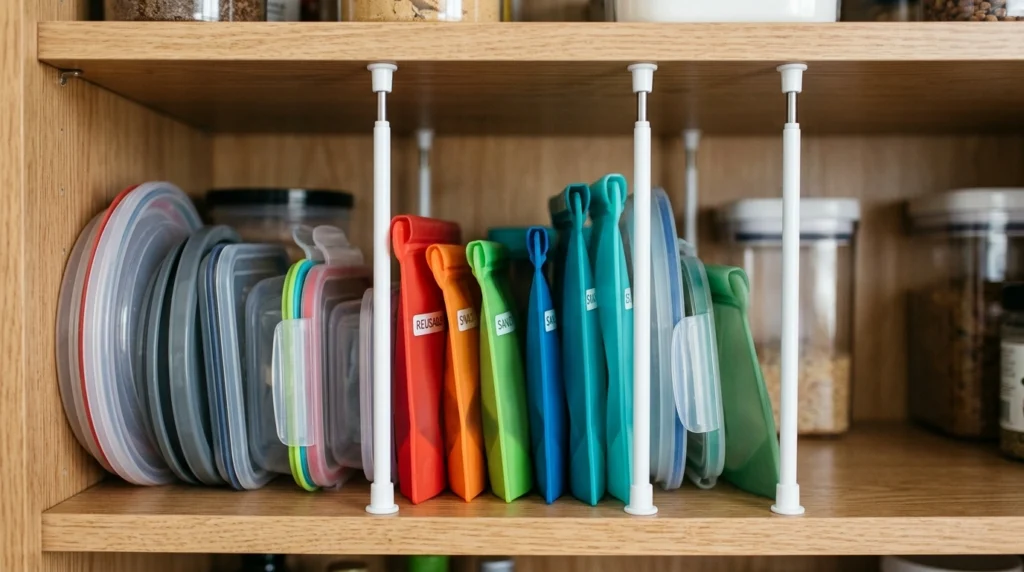
If you have a collection of lightweight, awkward items like plastic food container lids, reusable silicone bags, or fabric dish towels, they can easily become a chaotic mess in a drawer. Setting up mini tension rods vertically between two shelves creates small, customizable compartments to keep these items filed upright and separated. It is an incredibly clever, customizable way to utilize a tight corner gap.
To set this up, buy a pack of short, spring-loaded tension rods (often sold as cupboard or window rods) and tension them vertically between your shelf boards. Space them out as needed to fit your specific items. It takes less than five minutes to install, requires absolutely no drilling or screws, and costs less than $10 for a pack of four rods.
20. Gravity-Fed Can Racks
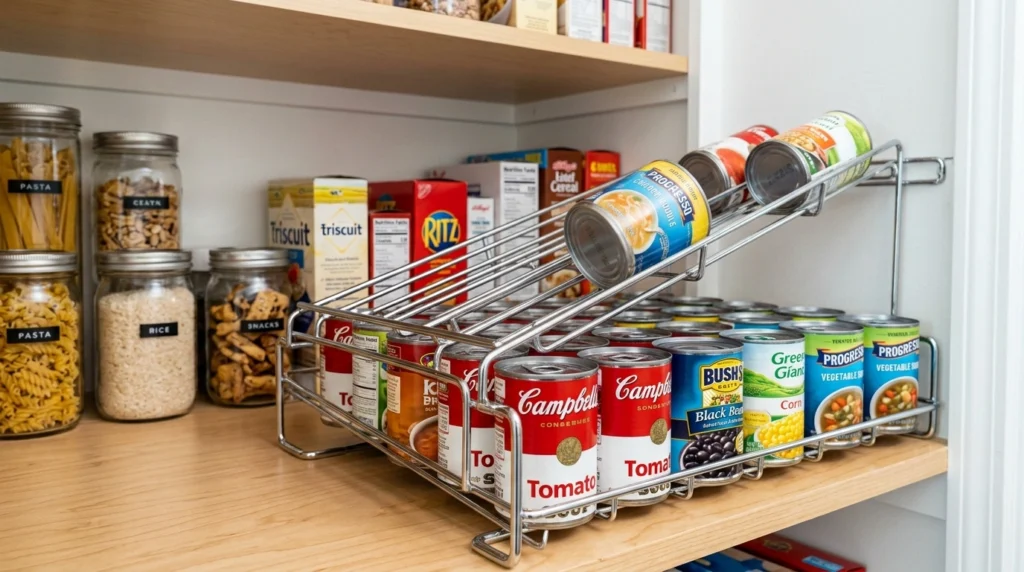
Canned goods are notoriously heavy and take up a massive amount of flat shelf space when lined up side-by-side. Placing a metal gravity-fed can dispenser rack on one of the longer sides of your L-shape is a brilliant way to store up to 36 cans vertically. When you pull a can out from the front row, the next can automatically rolls forward, keeping your stock rotated and visible.
Make sure to measure your shelf depth before purchasing a can rack to ensure your pantry door can still close comfortably when it is in place. Look for double-tier or triple-tier wire racks that allow you to adjust the row widths for different sized cans, like soup cans vs. larger bean cans. These durable metal organizing racks are incredibly satisfying to use and cost between $18 and $30.
Moving Toward a More Functional Pantry
At the end of the day, an organized pantry is not about having a flawless, picture-perfect space that looks like a home decor catalog. It is about creating a functional, stress-free environment that makes your daily life easier, saves you money on groceries, and helps you get dinner on the table without frustration. You do not need to buy twenty matching glass jars or spend hundreds of dollars on custom cabinetry to make a difference in your kitchen.
Instead of trying to tackle your entire pantry in a single weekend, I always recommend starting with just one or two small, manageable ideas first. Maybe you buy a single Lazy Susan for your most awkward corner, or set up one basket for your daily breakfast items. As you see how much easier it is to find what you need, you will naturally feel inspired to keep organizing.
Which of these L-shaped pantry storage ideas are you excited to try out in your own kitchen first? I would genuinely love to know!
Frequently Asked Questions
How do I make basic pantry shelves look more organized on a budget?
The absolute cheapest way to make your pantry look instantly more organized is to remove as much mismatched cardboard packaging as possible. You can find incredibly inexpensive plastic bins at dollar stores to group similar items together, or save glass pasta sauce jars, wash them out, and use them to store grains and nuts.
What is the best way to utilize the very deep corner of L-shaped shelves?
The deep corner of an L-shaped shelf is best utilized by placing a large-diameter Lazy Susan (turntable) in the space. This completely eliminates the need to reach blindly into the dark corner, as you can simply spin the turntable to bring bottles of oil, vinegar, or honey directly to you.
Should I store my heavy kitchen appliances in the pantry?
Yes, the deep bottom shelves of an L-shaped pantry are the perfect place to store heavy, infrequently used appliances like stand mixers, slow cookers, and food processors. Placing them on deep pull-out drawers or rolling floor carts keeps them off your valuable kitchen countertops while keeping them easy to access.
How do I keep my food fresh inside clear glass decanted jars?
To ensure your dry goods stay fresh, always choose glass jars that feature airtight lids with silicone rubber rings around the inner rim. Additionally, try to place your decanted jars on shelves that do not receive direct sunlight, as heat and light can cause dry ingredients like flour, spices, and nuts to spoil faster.
What is the ideal shelf depth for a walk-in L-shaped pantry?
For most standard items, a shelf depth of 12 inches is absolutely perfect because it fits large boxes, canisters, and plates without allowing items to get lost in the back. For lower shelves holding large appliances or bulk bins, a depth of 16 to 18 inches is ideal, while upper spice shelves work best at 8 inches deep.